Home
Account setting
Staff
Lists
Forms
Templates (HTML emails/SMS messages)
Sending messages by SMS and email
Classes, events, attendance and Zoom
Automation
Create a birthday invitation and automation
Communication
Microsite
E-Commerce
Networks, Federations and Franchises
How to guides
Personal information and electronic message laws in Canada and the USA
Get support
Terms and conditions
https://activitymessenger.com/
10410 Waverly, Montréal, H3L 2W4
Terms and conditions
Step 3. Invitation template and automation
Finally, you'll set up the invitation email that will be sent to the guests. This template contains a direct link to the Guest RSVP Confirmation form. Once you've made your edits to this template, you'll automate the sending of this invitation. This means that, as soon as a host parent organizes a party, they will receive this second email with e-invite and the waiver form which can be sent to the invitees.
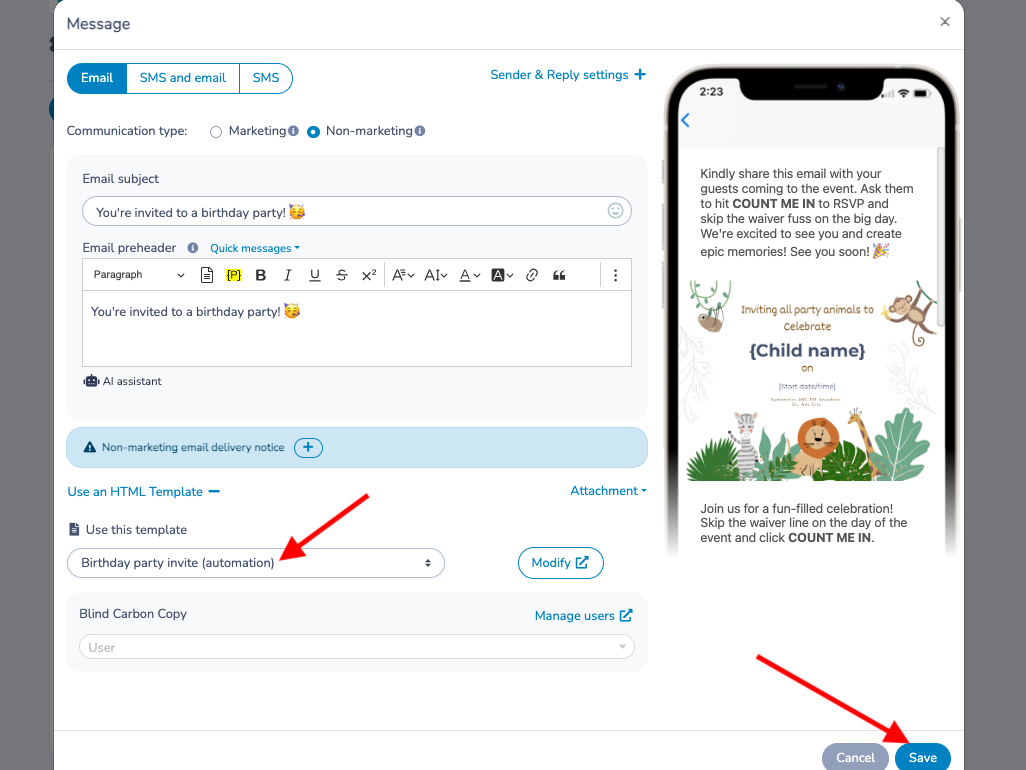
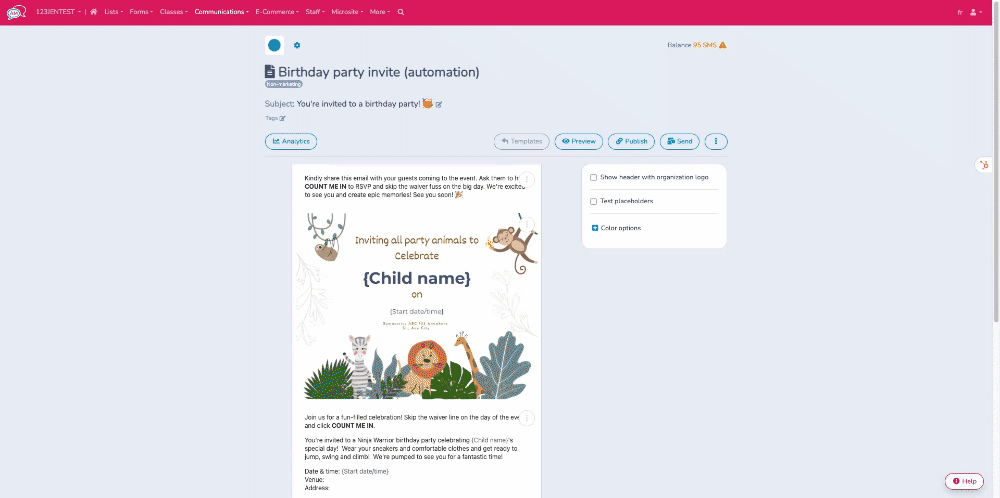
# Customize Invitation Templates
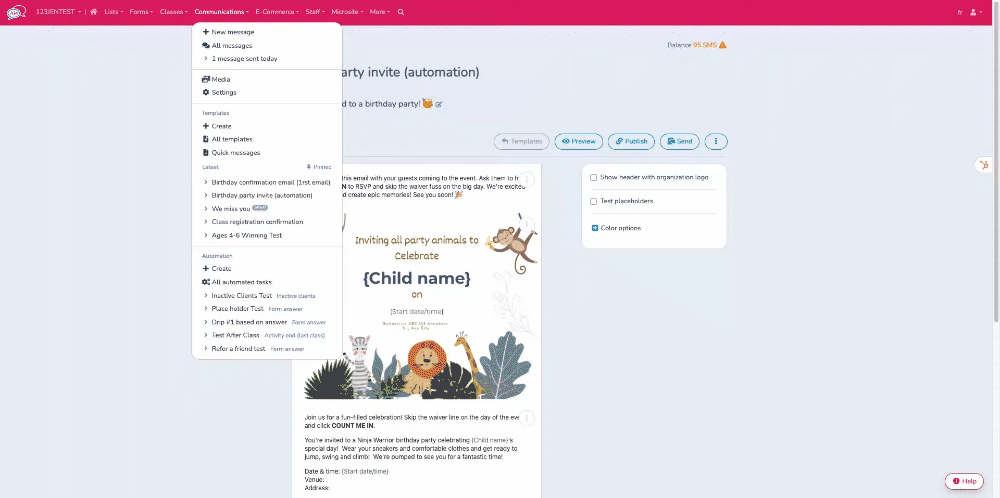
Go to the Communication section, then All Templates, and find the Birthday Invitation Email template (automation). If it isn't already created, click the "+" to find the sample and add it to your templates.
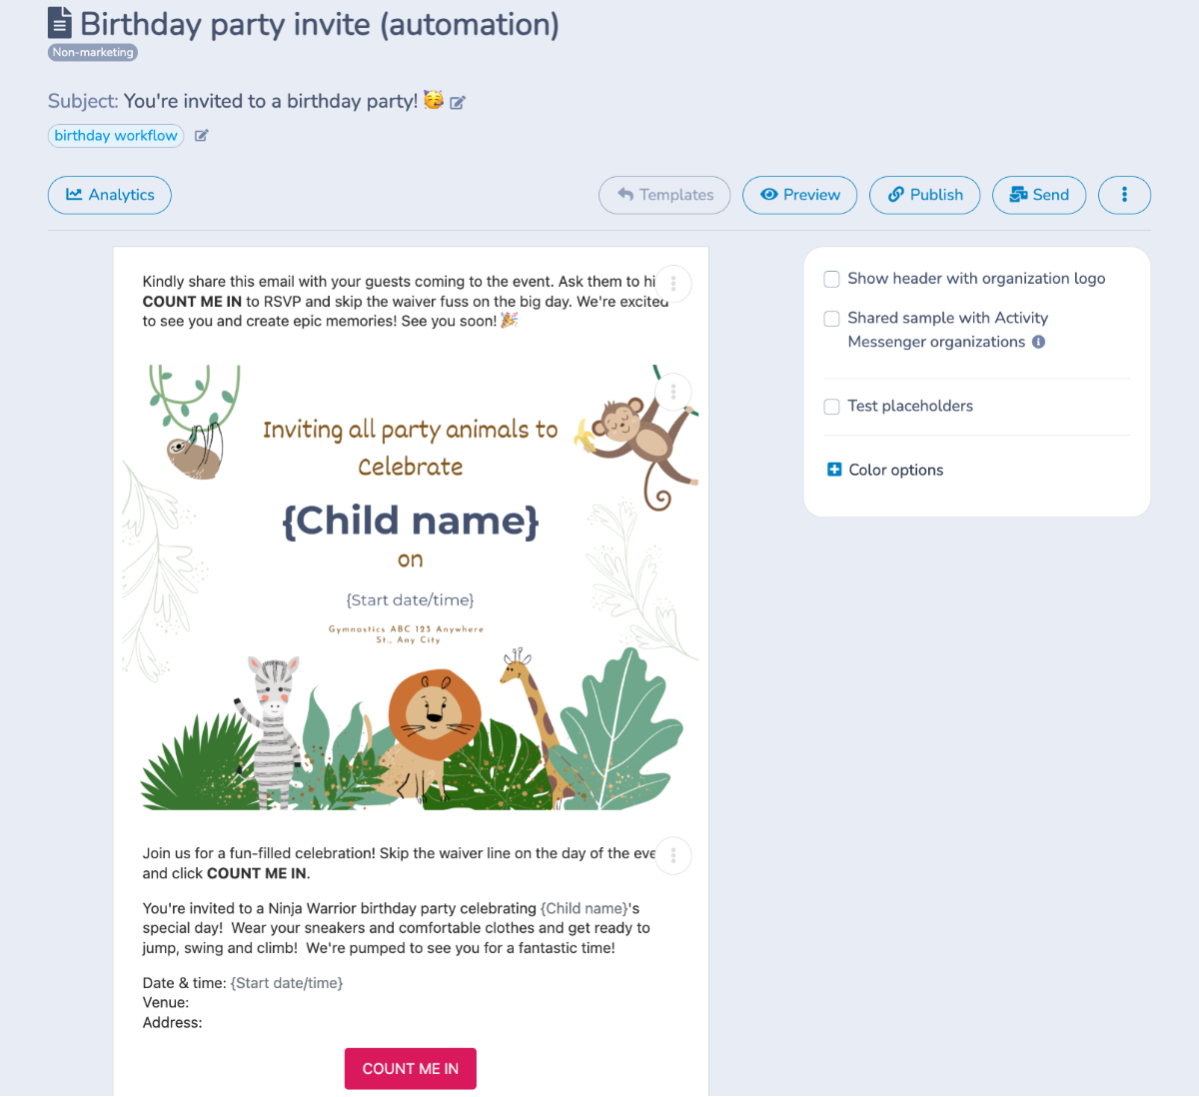
Modify the Certificate that is the e-vite to be sent as an invitation:
Personalize the text. Use the merge fields to enter the date, time, location, name of the person being celebrated, and other details.
This is where the placeholder that you created on the Confirmation RSVP form will link to the e-invite.
- In the button tab, make sure to select "Start Date/Time" as the pre-filled field. This will allow the system to recognize the birthday and add the guest to the correct attendance list.
- Save
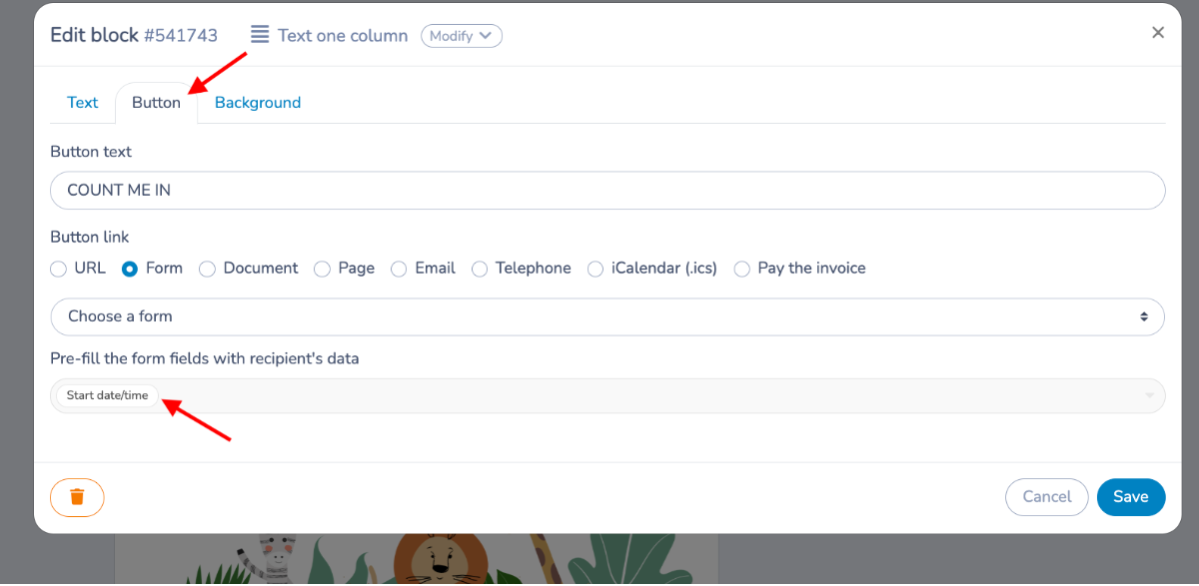
In the Count Me In button make sure the add the Birthday Party Guest RSVP & Waiver form that you created in Step 2.
# Automating the email to the host parent
Set up the Automation. Go to the Communications tab, scroll down to Automations and click Create.

Create a new automation, select Form answer and enter a title.
Choose the birthday party booking form, Choose the date field, toggle on Right after response and Configure the message.
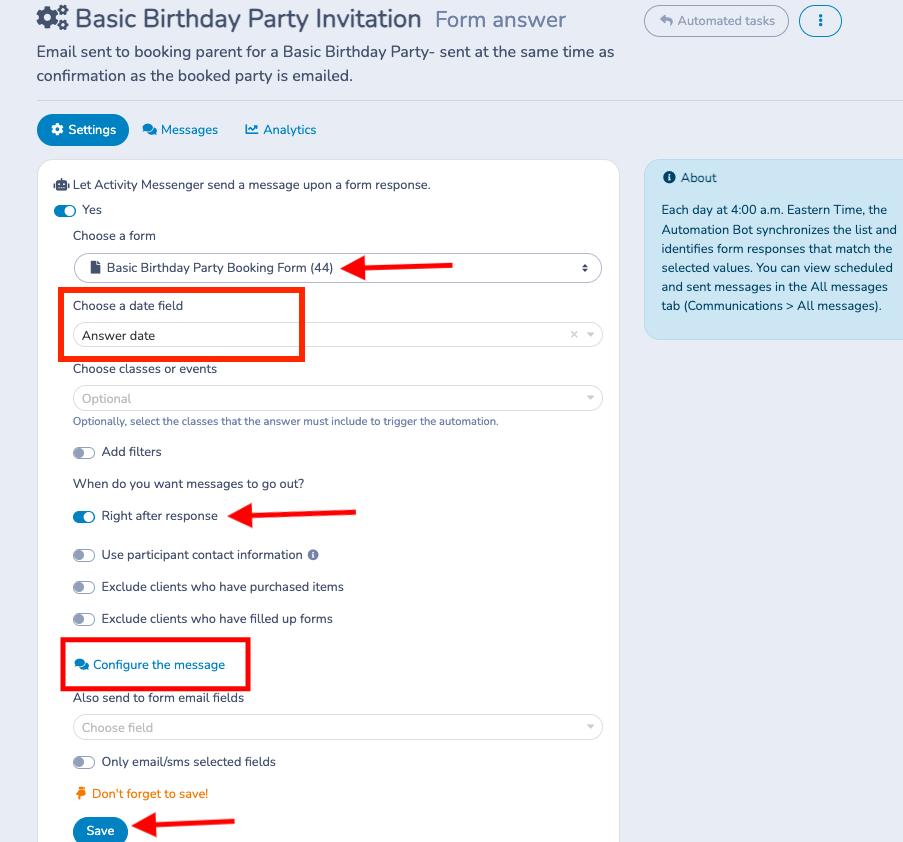
When configuring the message, be sure to add the Birthday party invite (automation) template to your email message and save.
This is the email that the host parent will forward to the invitees.