Home
Account setting
Staff
Lists
Forms
Templates (HTML emails/SMS messages)
Sending messages by SMS and email
Classes, events, attendance and Zoom
Automation
Create a birthday invitation and automation
Communication
Microsite
E-Commerce
Networks, Federations and Franchises
How to guides
Personal information and electronic message laws in Canada and the USA
Get support
Terms and conditions
https://activitymessenger.com/
10410 Waverly, Montréal, H3L 2W4
Terms and conditions
Step 1. Creating the birthday form
# Create the form ie. Birthday Party Event
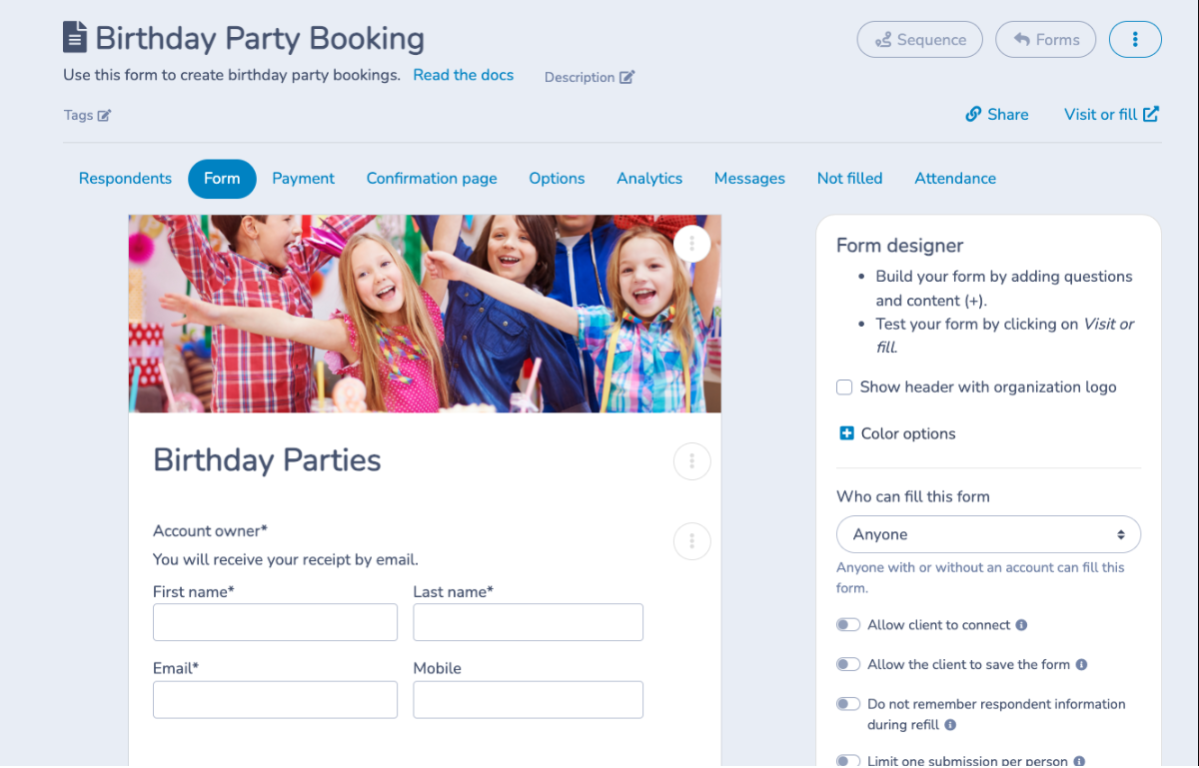
This form allows the organizing parent to provide essential information such as the first name of the birthday child and the date of the event.
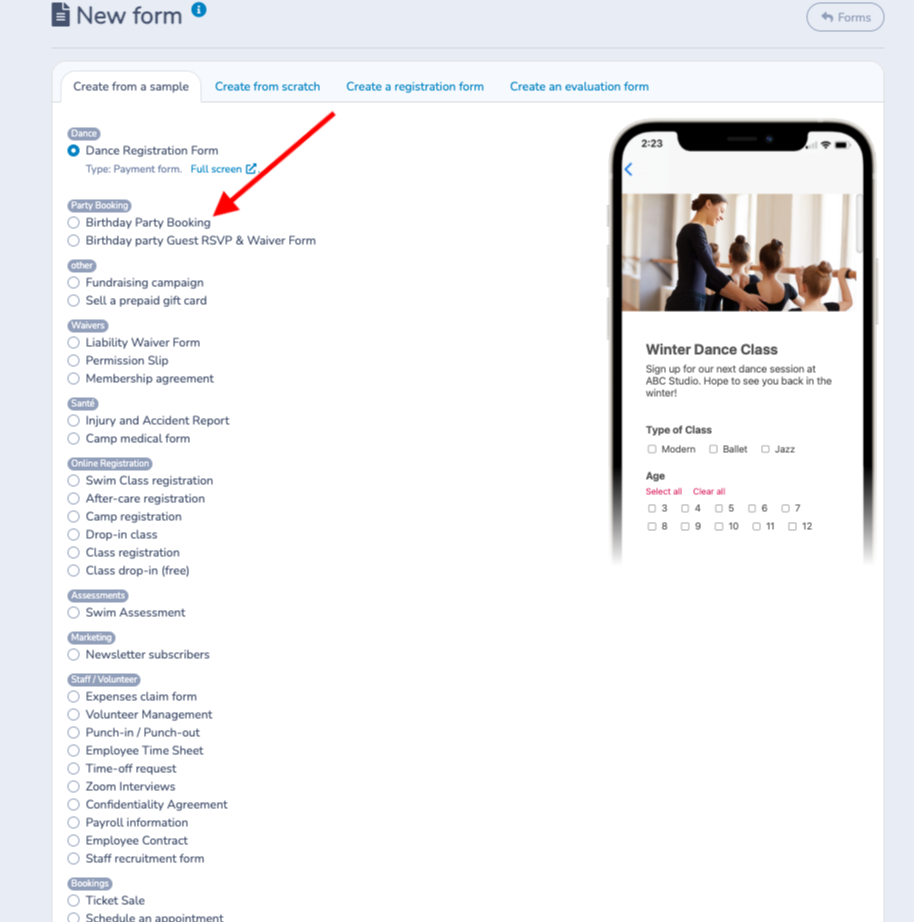
Navigate to the forms tab and create a new form by selecting the Create from a sample tab at the top, then scroll down to Other and select Birthday Party Booking template. Then click on the Create button, on the bottom of the page.
Customize the form:
- Customize the question for the Account Owner to collect information from the parent organizing the party.
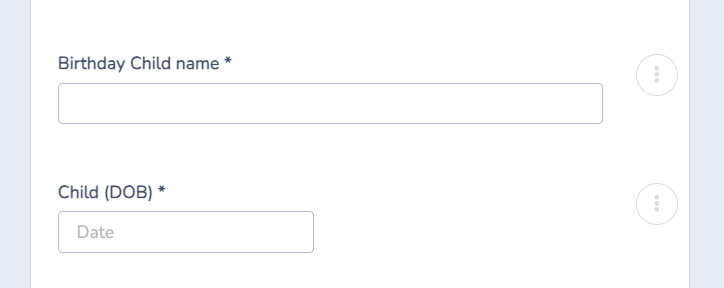
- Adjust the field for the child's first name according to your needs (first name of the birthday person). This field will be used in the e-invitation using a merge functionality.
- Add the child's actual date of birth if this seems relevant to you.
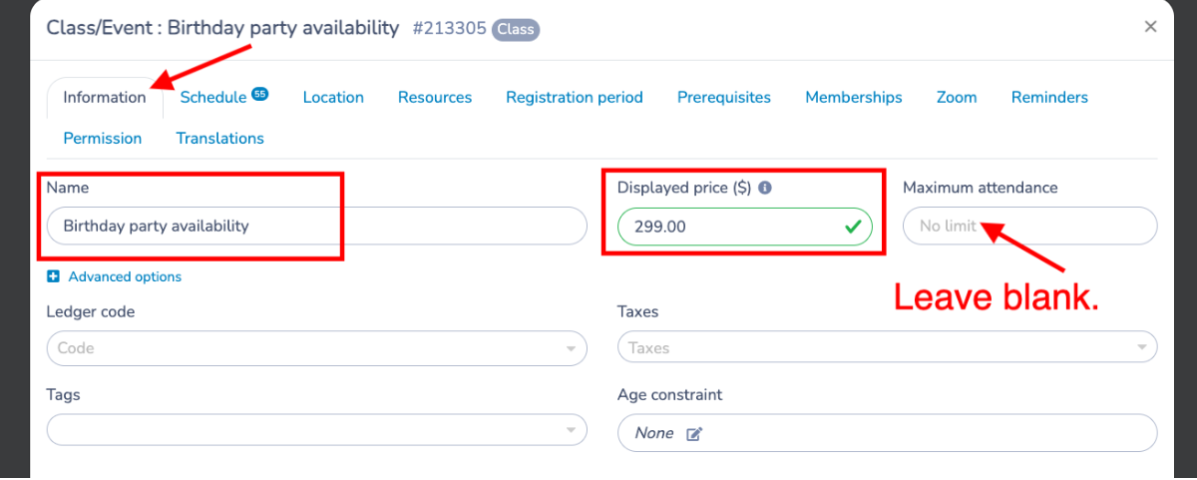
# Configure the class associated with the birthday
When the form is created (step 1), a new class (Birthday party) is automatically generated - you can edit the name, schedule, price and any other necessary parameters.
Edit the class:
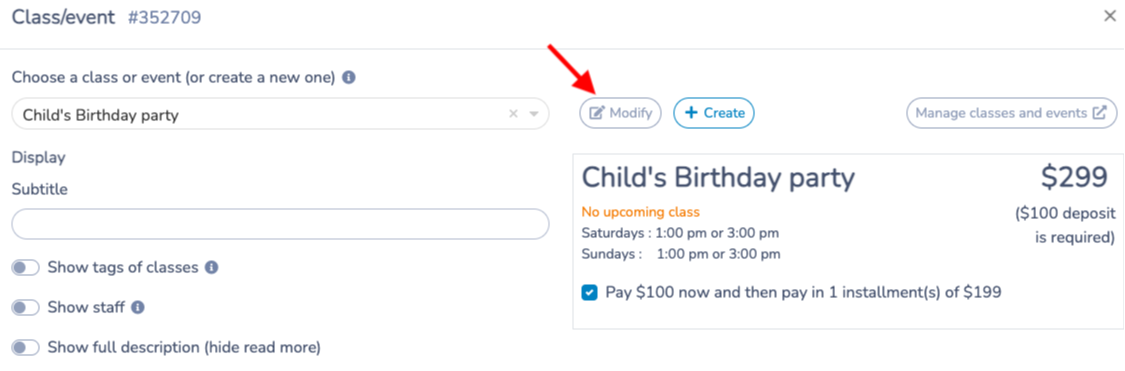
Set the price. Leave the maximum attendance at No Limit (you will restrict this to 1 on the registration form as an override setting).
# Form registration rules:
- Configure registration so that only one event can be selected per form.
- Set the rule ''the price is for an event''.
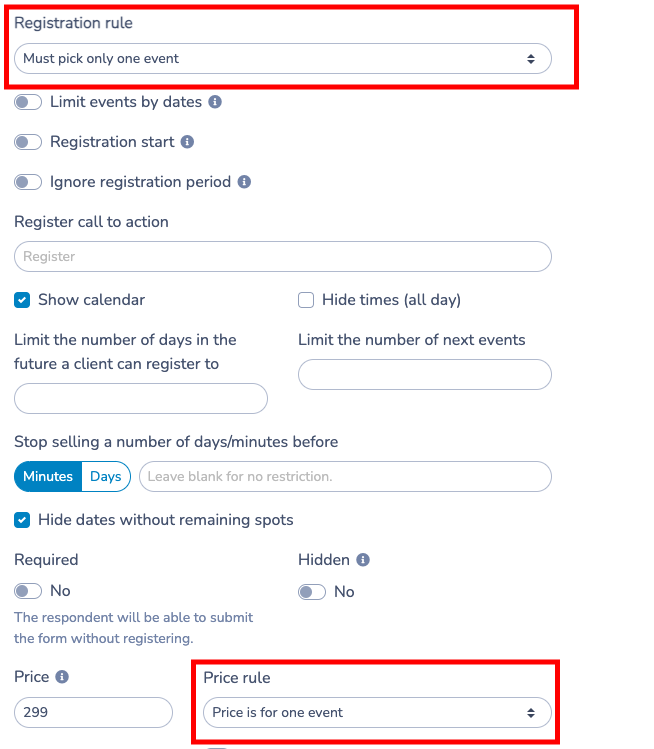
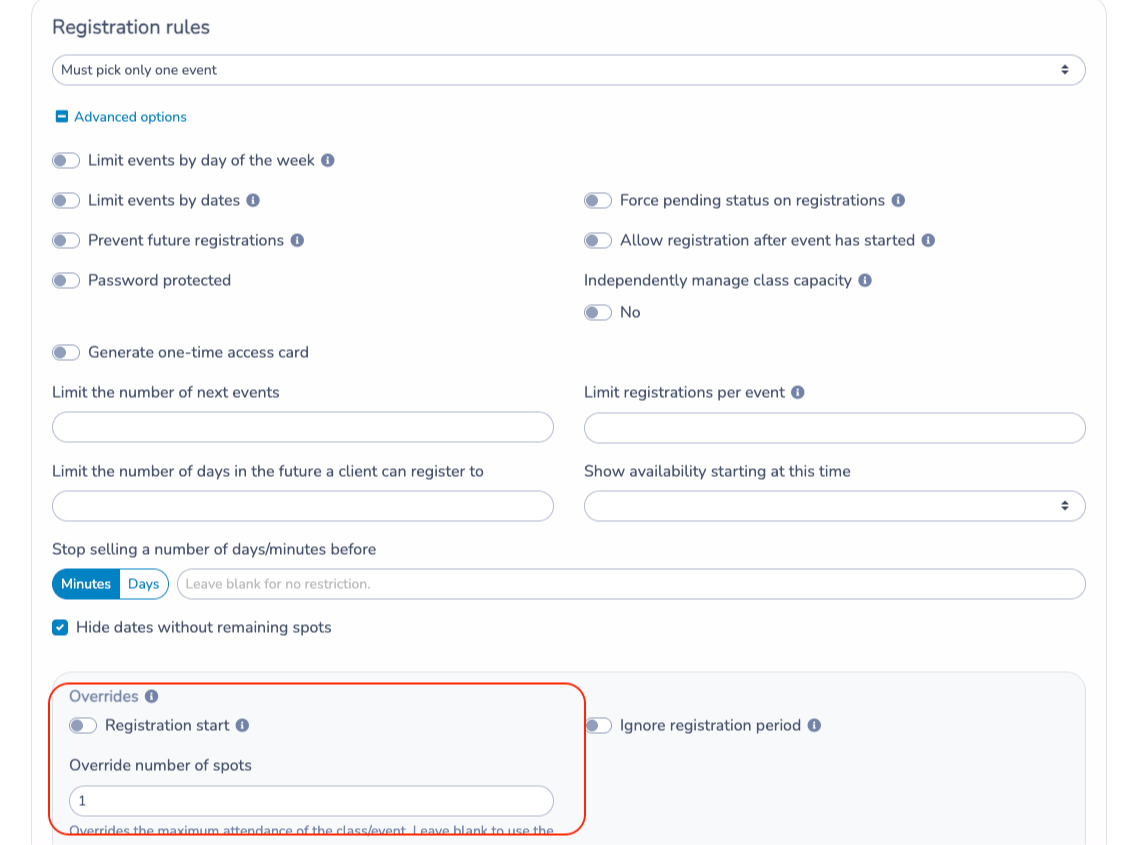
NOTE: In the Registration Rule of the class on the form, set the override to 1 so that only 1 party can be booked at a time.
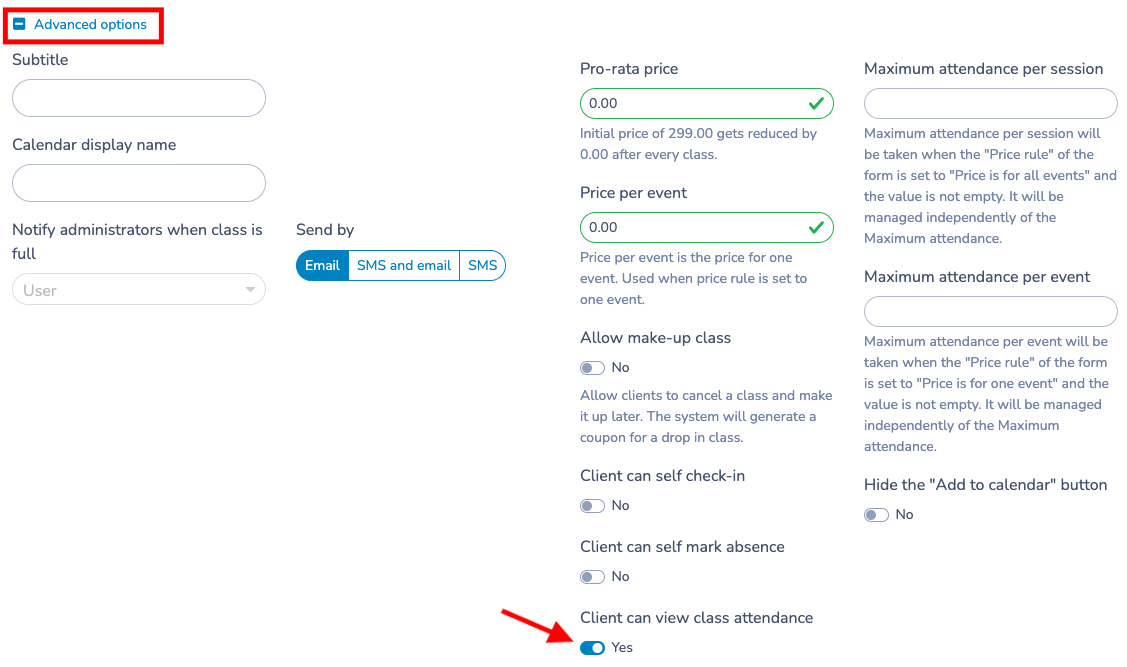
# Advanced checks and options:
Click on "Advanced options" to display the available settings, then activate the option allowing the client (the organizing parent) to view the attendance list.
Add available dates to book a party:
Enter all the dates and times in the schedule

Next step: 2. Creation of the release form