Activity Messenger Help Center
Sell tickets online for your events
Activity Messenger offers an online ticket sales tool for your events. You can take advantage of all the e-commerce tools available for selling your tickets (discounts, billing, etc.).
Whether it’s for a tennis tournament or any other event, you’ll learn to set up the event, sell tickets, and manage participants smoothly and automatically.
To get started, you need to create an event form. Then, you can use our QR code scanner to validate tickets on-site.
Creating the event
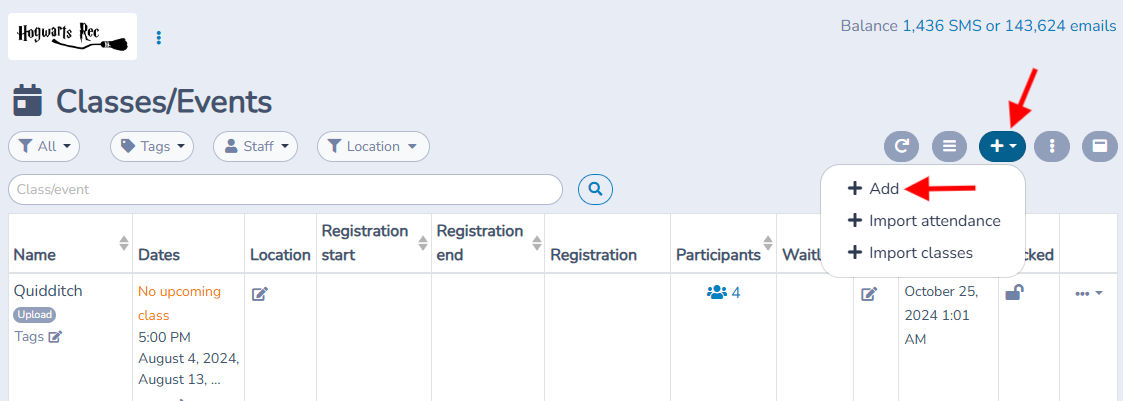
To begin, create your event by going to the Classes section and selecting All Classes and Events.

Click on the Add button, name your event, set the ticket price, and configure the location and schedule.
Refer to the Creating a Class or Event page for more information.
Sell tickets with a QR code
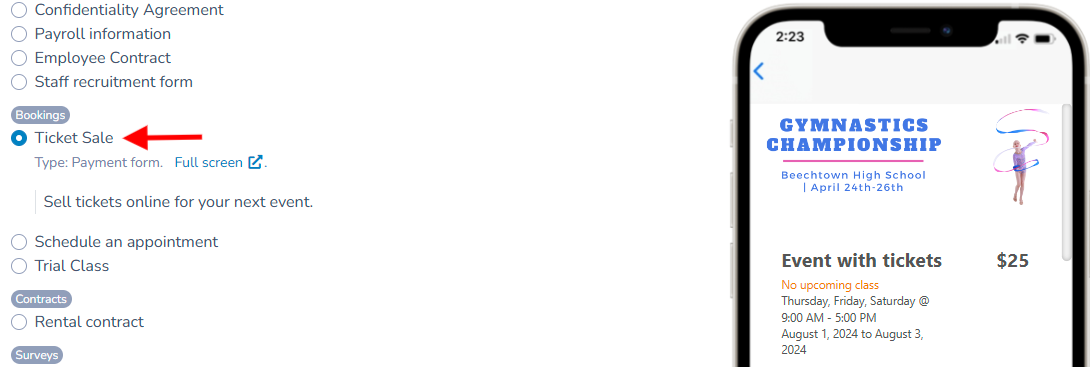
Go to Forms and select Create. Use a ticket sales template or create a form from scratch by choosing the Event Registration Form with Tickets option.
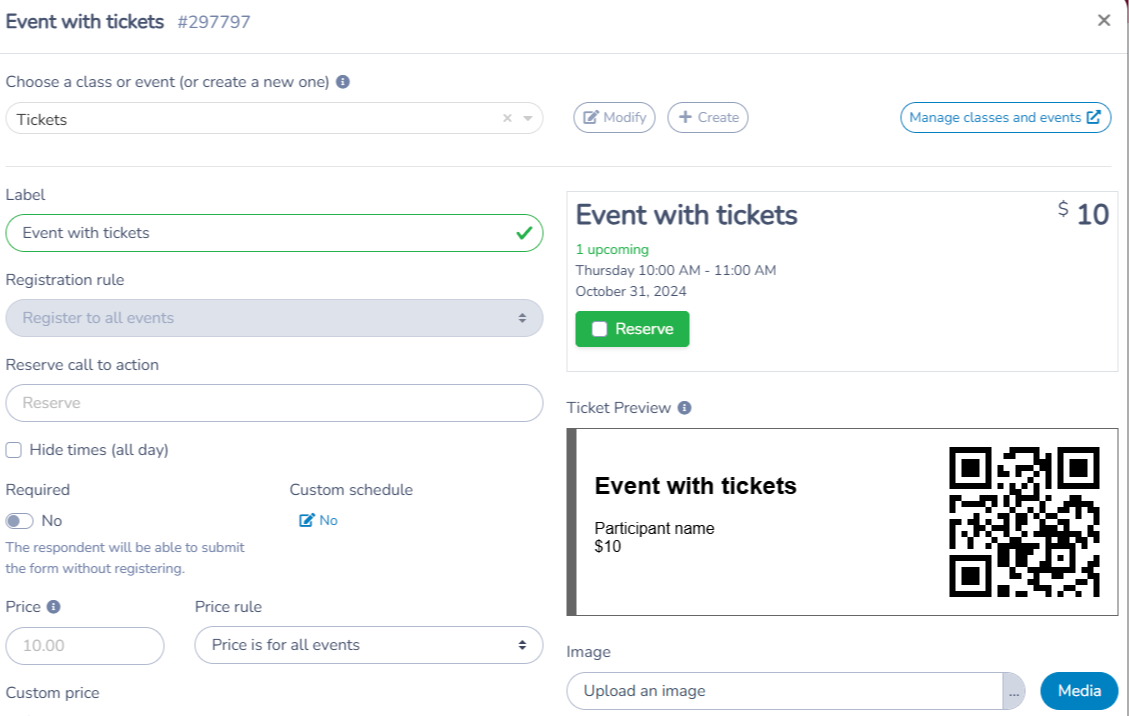
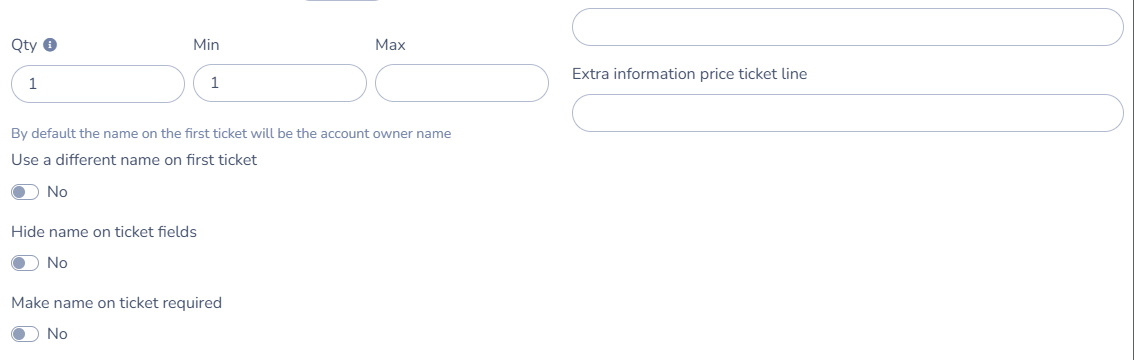
Associate your form with the event you created earlier. Configure the ticket details, the maximum number of tickets per person, etc.
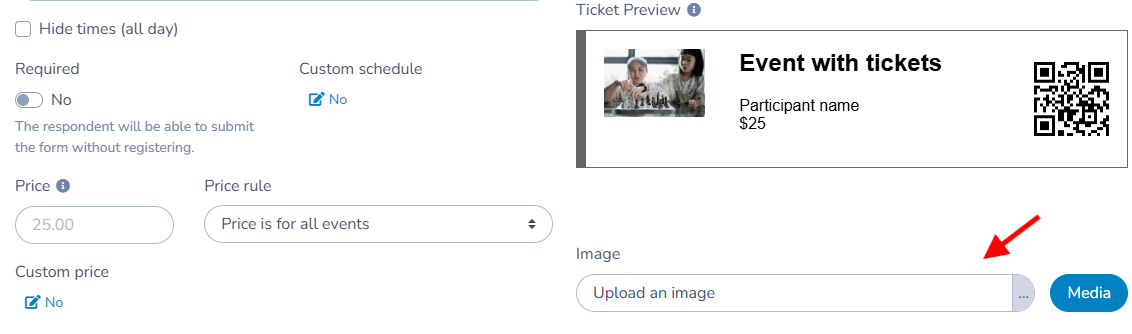
Upload an image to customize the appearance of your ticket.
Set up options for additional participants.
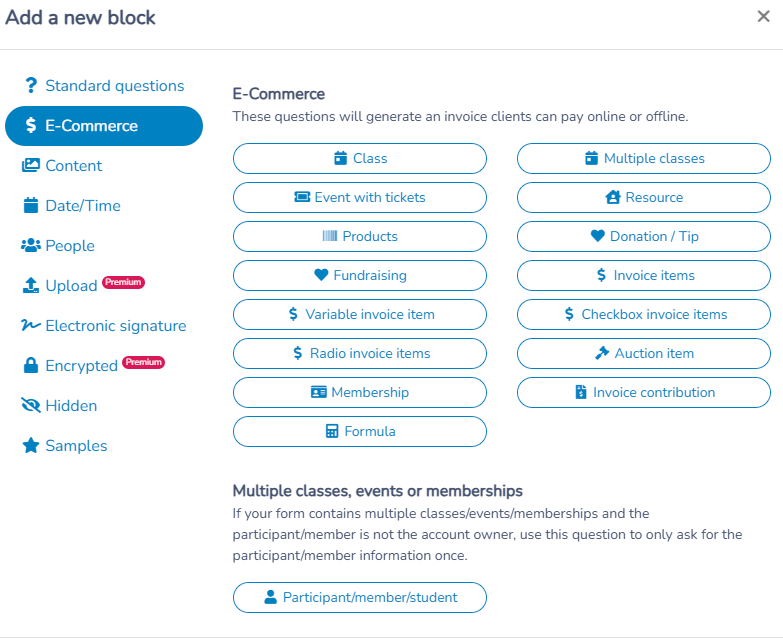
You can add options for selling items, subscriptions, or other add-ons to your form in the e-commerce section to increase your sales.
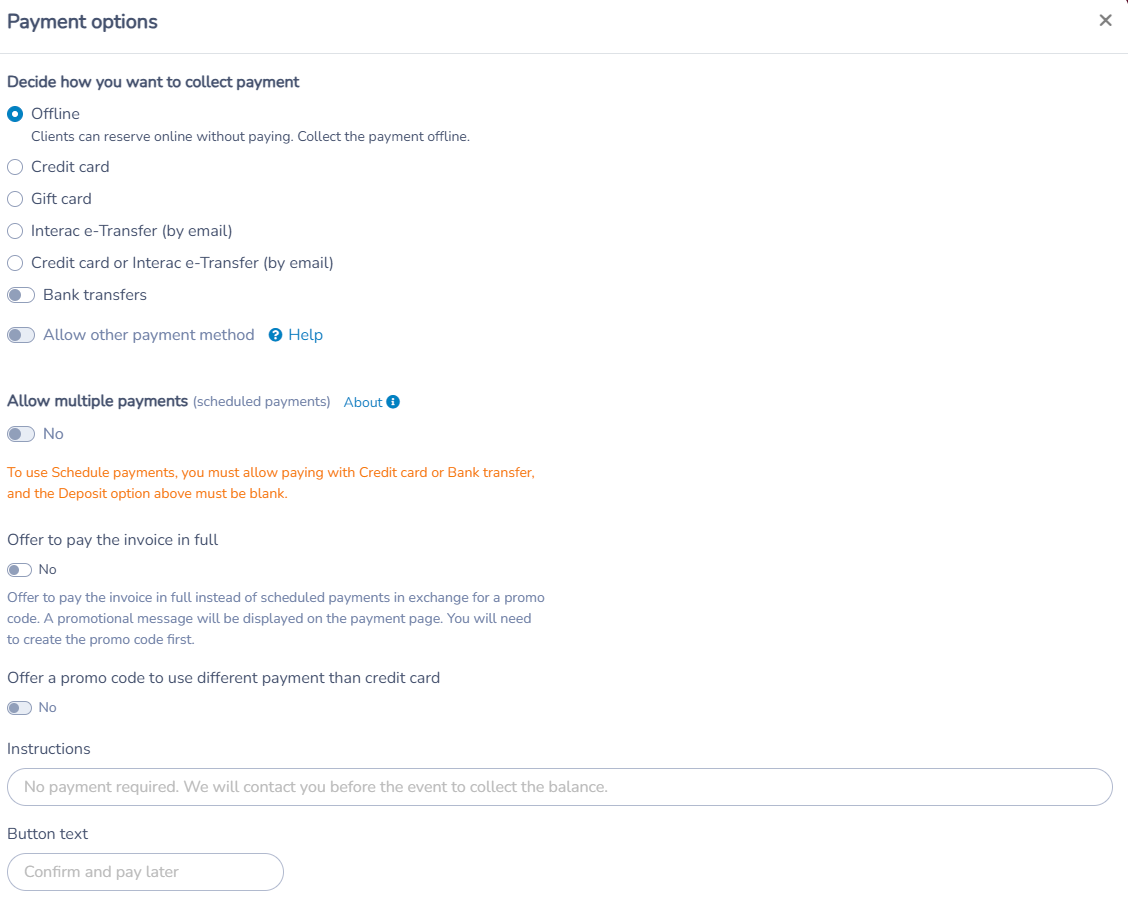
Payment options
Set up payment options for your tickets by connecting your Stripe account to accept credit card payments.
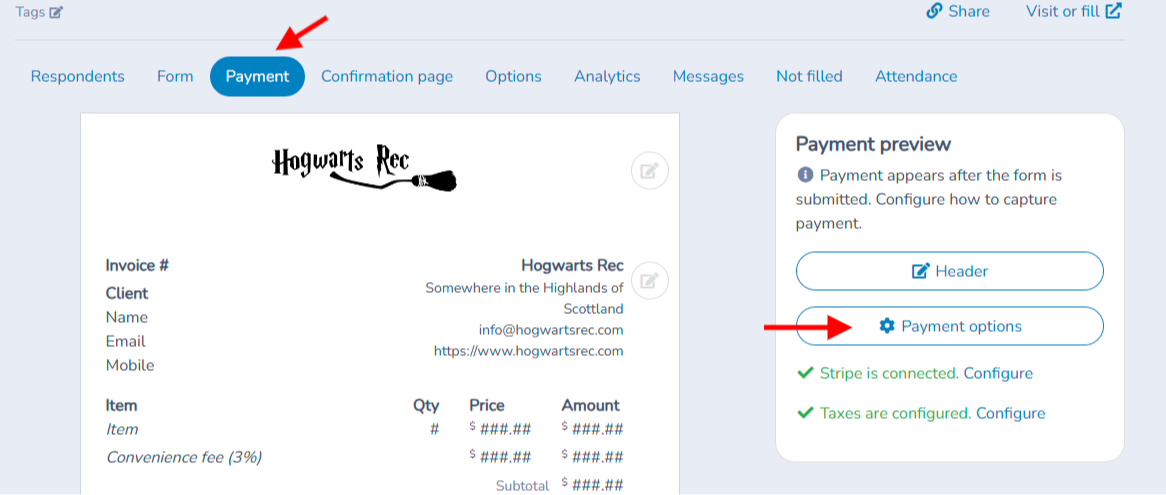
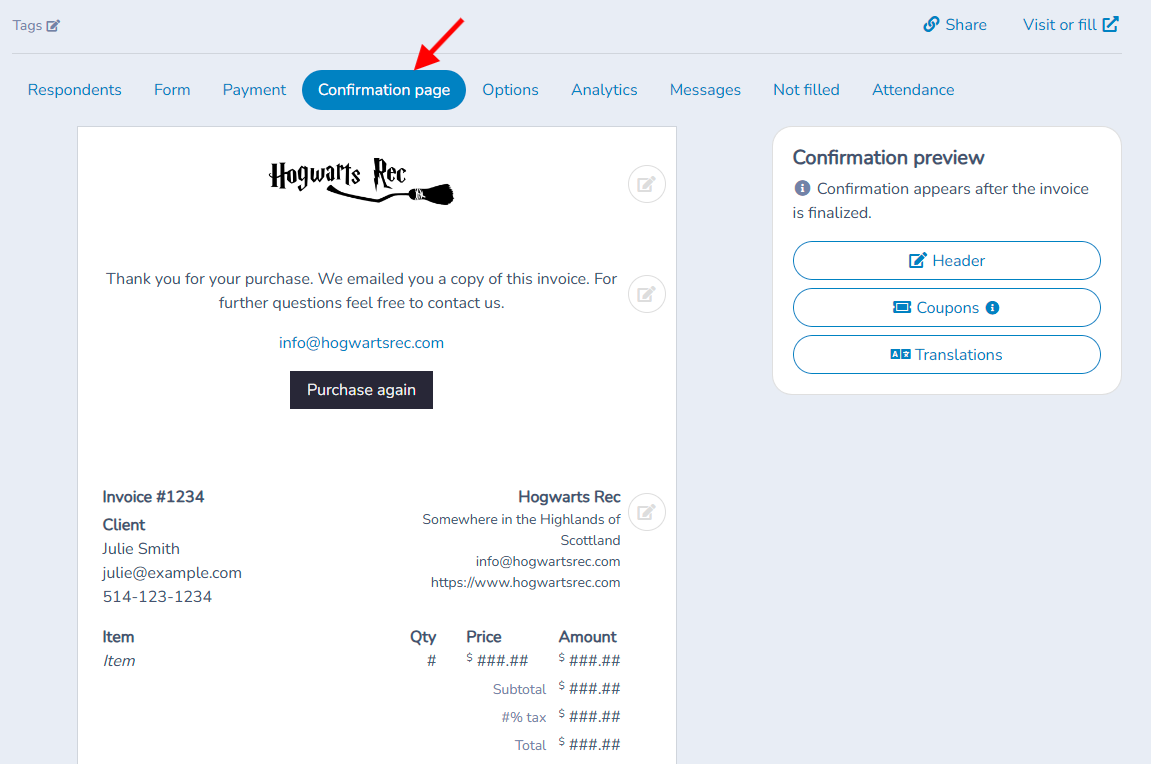
You can customize the confirmation page and the confirmation emails that participants will receive with their tickets.
Ticket sharing and management
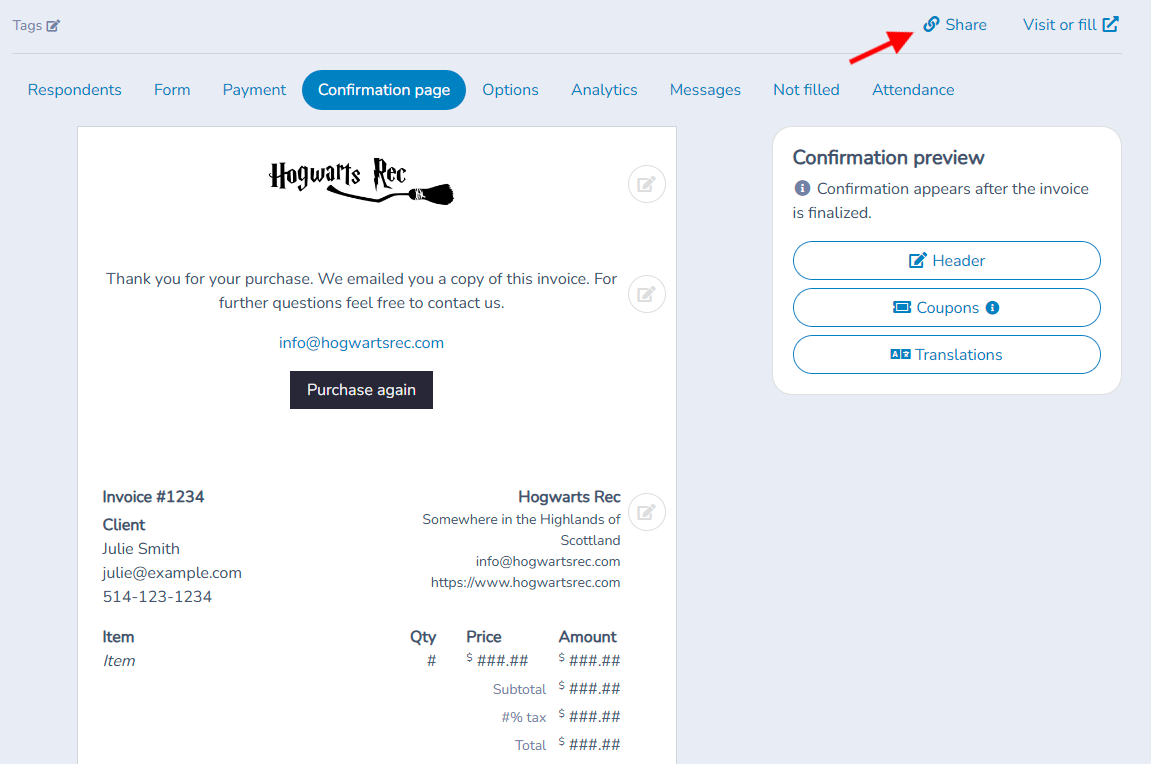
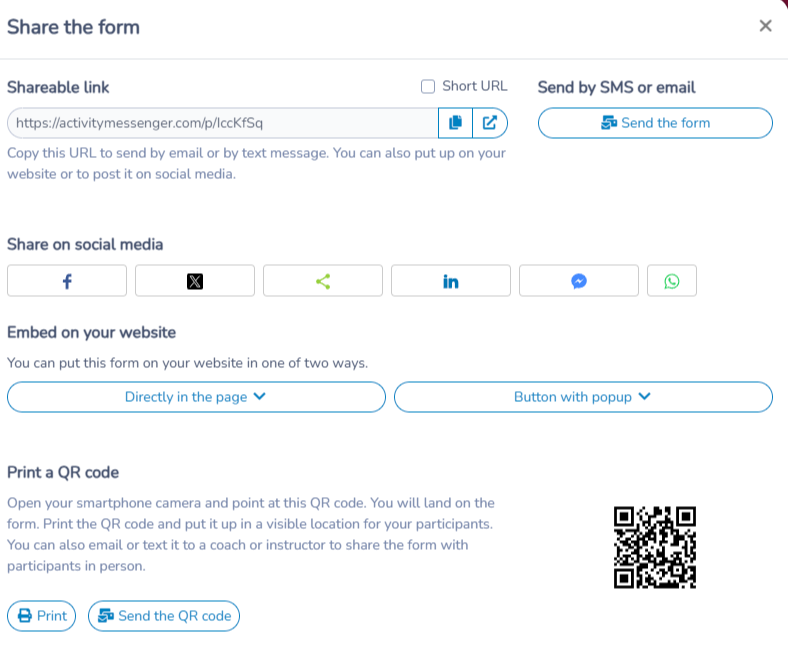
Use the unique link generated to share your ticketed forms via email, SMS, or social media. You can also embed the sales form on your website.
For door sales, a QR code is available to enable quick ticket purchases on-site.
Ticket transfers
Yes. By default, the person who bought a ticket can transfer it to someone else. You decide, for each Event with tickets question, whether purchasers are allowed to do it.
How a purchaser transfers a ticket
- Sign in to My account and open the Tickets tab. It lists the tickets for events that have not ended.
- Click Transfer ticket next to the ticket.
- Enter the new holder's First name, Last name, Email and Mobile. The email address is required.
- Click Transfer.
What happens next depends on whether you chose a form for ticket actions (see below):
- No form chosen: the ticket moves right away. The new holder replaces the previous holder on the event's attendance list, keeps the seat if one was assigned, and receives an email with the ticket.
- A form chosen: the new holder receives an email with a link to the form. The ticket stays with the purchaser, marked as a pending transfer, until the new holder completes the form. The ticket then moves to the new holder, who receives the ticket by email.
How you allow or prevent transfers
Go to Forms, open your form, edit the Event with tickets question and, in the Tickets card, click Advanced options.
- Allow purchasers to transfer tickets: Yes by default. Set it to No to prevent purchasers from transferring their tickets. The Transfer ticket button then no longer appears in the Tickets tab of My account.
- Form used for ticket actions: optional. Choose a form to collect information from the person who receives the ticket (or from a guest). Leave it empty to allow transfers without a form.
- Available ticket actions: appears when a form is chosen and transfers are allowed. Choose Transfer the ticket only (default), Collect guest information only or Allow both actions.
If transfers are turned off and a form is chosen, purchasers see Guest information instead of Transfer ticket. They can fill in the form themselves or send it to a guest, and the ticket always stays in the purchaser's account.
The setting is read from the form question each time a ticket is displayed or transferred, so changing it also applies to tickets that were already sold.
Transferring a ticket yourself
Turning off purchaser transfers does not stop you. Account owners, administrators and attendants can transfer a ticket from the ticket list: click the ... menu next to the ticket and choose Transfer. Enter the new holder's details (or click Choose a client) and leave Send an email along with the ticket on to email the ticket to the new holder. The ticket list is shown in the invoice window and in the form response window.
A transferred ticket shows a Transferred badge, and the transfer (original holder, previous holder and new holder) is recorded in the ticket's log.
Validate tickets using the QR code scanner
On the day of the event, use the QR code scanning tool to validate tickets at the entrance. Validated participants will be marked as present on your list.
You can also resend the tickets via email, for example, the day before the event, to remind participants of their purchase and the event details. To access the QR scan, go to the attendance list of your event.
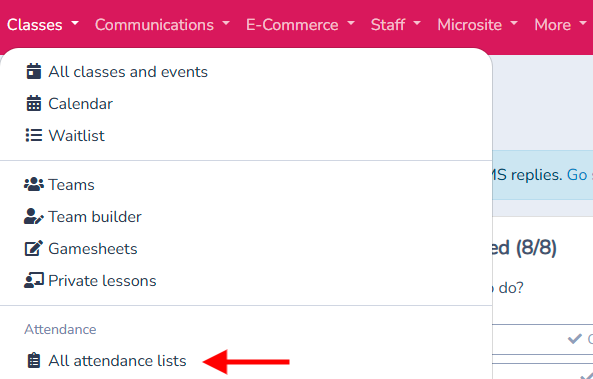
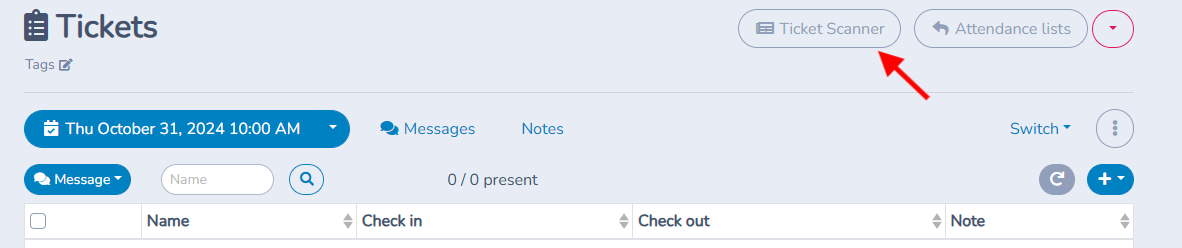
Select the attendance list for your event and click on Ticket Scanner.

The ticket scanner supports a barcode reader or can use the camera of your smartphone.
Barcode scanner
We also support barcode scanners. These offer faster throughput than the camera of a smartphone.
Activity Messenger recommends one of these 2 models that can read barcodes and QR codes. These are 2D scanners (necessary for QR codes) that scan images on smartphones. Unlike other models, they are not affected by glare.
Handheld
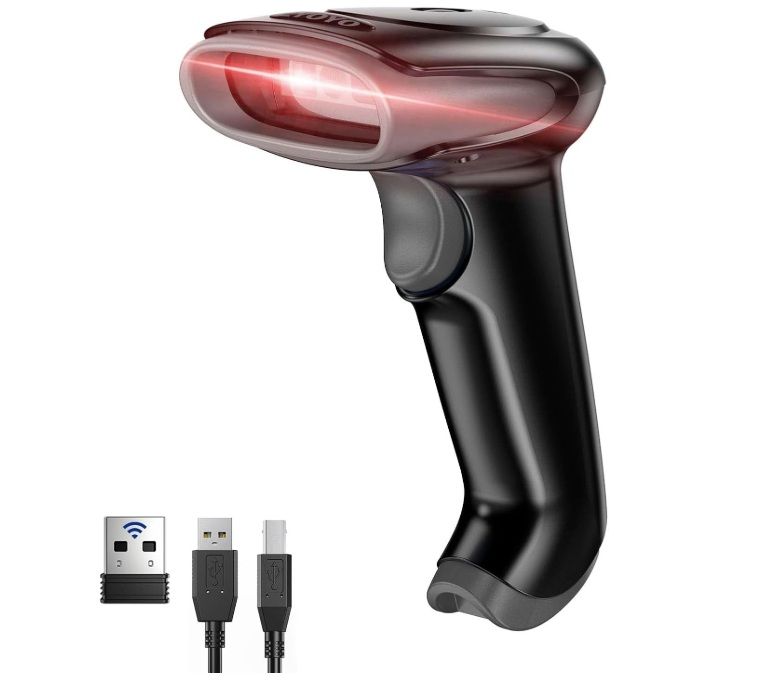
Eyoyo Bluetooth Wireless Barcode Scanner, 1D 2D QR Code Scanner.
Available on Amazon: https://www.amazon.ca/dp/B0BLRTFK5N
This scanner is wireless and handheld. You can connect 2 to the same computer.
Wired
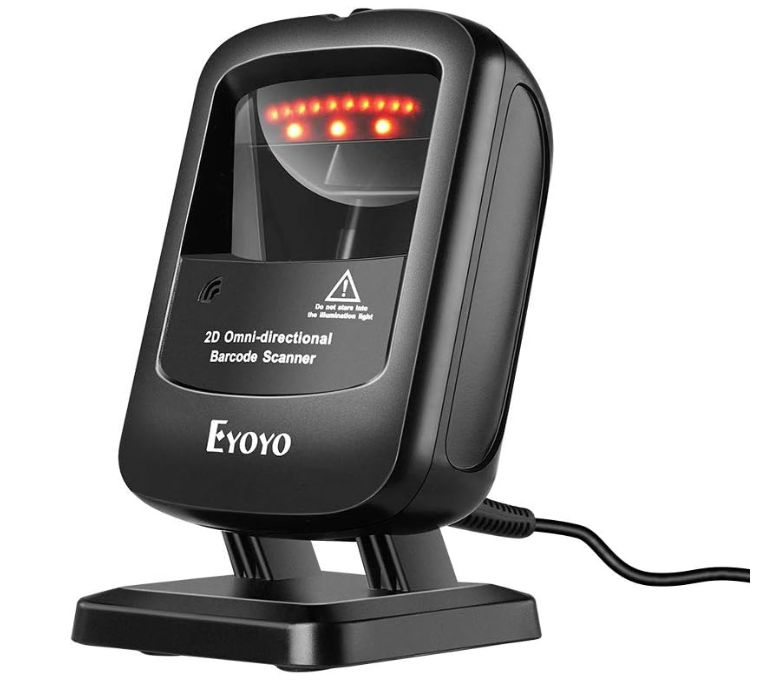
Eyoyo 1D 2D Desktop Barcode Scanner, Omnidirectional Hands-Free USB Wired Barcode Reader.
Available on Amazon: https://www.amazon.ca/dp/B07SVZ5DK3
This scanner is wired and sites on a table or counter. It automatically scans when a barcode or QR code is placed in front of it.
Settings reference
| Setting | Where | Default | Effect |
|---|---|---|---|
| Event name, ticket price, location and schedule | Classes › All Classes and Events › Add | None | Creates the event that your ticket form sells. See Creating a Class or Event. |
| Form type | Forms › Create | None | Choose a ticket sales template or Event Registration Form with Tickets. |
| Registration rule | Form › Event with tickets question › Registration rules | Must pick only one event | Also Register to all events or Can pick multiple events. The choice is available only when the event has more than one date. |
| Limit (Min and Max) | Form › Event with tickets question › Tickets | Min 1, no Max | Number of tickets a customer can reserve in one purchase. |
| Image | Form › Event with tickets question › Tickets | None | Custom image on the ticket. |
| Hide price on ticket | Form › Event with tickets question › Tickets › Advanced options | No | Does not show the price on the ticket. |
| Hide name on ticket fields | Same | No | Ticket holder names are not required and not shown on the ticket. |
| Show ticket number | Same | No | Shows the ticket number, which is unique per class. |
| Extra information ticket line, Extra information price ticket line | Same | Empty | Adds a line of your own text to the ticket and to its price line. |
| Form used for ticket actions | Same | None | Form completed by the person who receives a transferred ticket, or by a guest. Leave empty to allow transfers without a form. |
| Allow purchasers to transfer tickets | Same | Yes | When No, purchasers cannot transfer their tickets from My account. Owners, administrators and attendants can still transfer them. See Ticket transfers. |
| Available ticket actions | Same (visible when a form is chosen and transfers are allowed) | Transfer the ticket only | Or Collect guest information only, or Allow both actions. |
| Payment method | Form › Payment tab › Payment options | Offline | Credit card takes payment online with Stripe. See Build and share your first form. |
| Confirmation page and emails | Form › Confirmation and Options tabs | Message shown after submission | Edit what participants see and receive with their tickets. |
| Share link, QR code, embed | Form › Share | None | Link for email, SMS or social media, QR code for door sales, and embed code for your website. |
| Ticket scanner | Attendance list of the event | None | Validates tickets with a barcode reader or the camera of a smartphone. Validated participants are marked present. |
| Send | ... menu of a ticket in the ticket list | None | Emails the ticket again. |
| Transfer | ... menu of a ticket in the ticket list | None | Moves the ticket to someone else. Account owners, administrators and attendants only. |
Common questions
Can a ticket be transferred to another person? Yes, unless you turned it off. A purchaser opens My account › Tickets and clicks Transfer ticket. See Ticket transfers.
How do I stop ticket transfers? Edit the Event with tickets question, open Advanced options in the Tickets card and set Allow purchasers to transfer tickets to No. Staff with the right permission can still transfer a ticket.
Can I transfer a ticket for a customer? Yes. Account owners, administrators and attendants can use ... › Transfer on the ticket, even when purchaser transfers are turned off.
Can a buyer send a ticket to a guest without giving up ownership? Yes, if you choose a form under Form used for ticket actions and set Available ticket actions to Collect guest information only or Allow both actions. The ticket stays in the purchaser's account.
Does turning transfers off affect tickets already sold? Yes. The setting is read from the question each time, so it applies to existing tickets as well.
Who receives an email when a ticket is transferred? The new holder. Without a form, they receive the ticket right away. With a form, they first receive a link to complete it, then the ticket.
How do I see that a ticket was transferred? The ticket shows a Transferred badge, and the transfer is recorded in the ticket's log.
Can a buyer transfer a ticket after the event? No. The Tickets tab in My account lists only events that have not ended.