One of the biggest issues we hear from customers is that their current registration process can be overwhelming.
Customers have to navigate through a long list of classes, which makes the process cumbersome, especially on mobile.
With Activity Messenger, you can now create a customer journey that replicates the personal touch of a phone call.
In this article, we’ll cover
Click here if you want to know why we set out to build the best online registration platform
Discover our party booking workflow
Replace Mailchimp, SurveyMonkey, Jot Form & Eventbrite in a single tool
How to create a registration form for camps, dance, swim or gymnastics
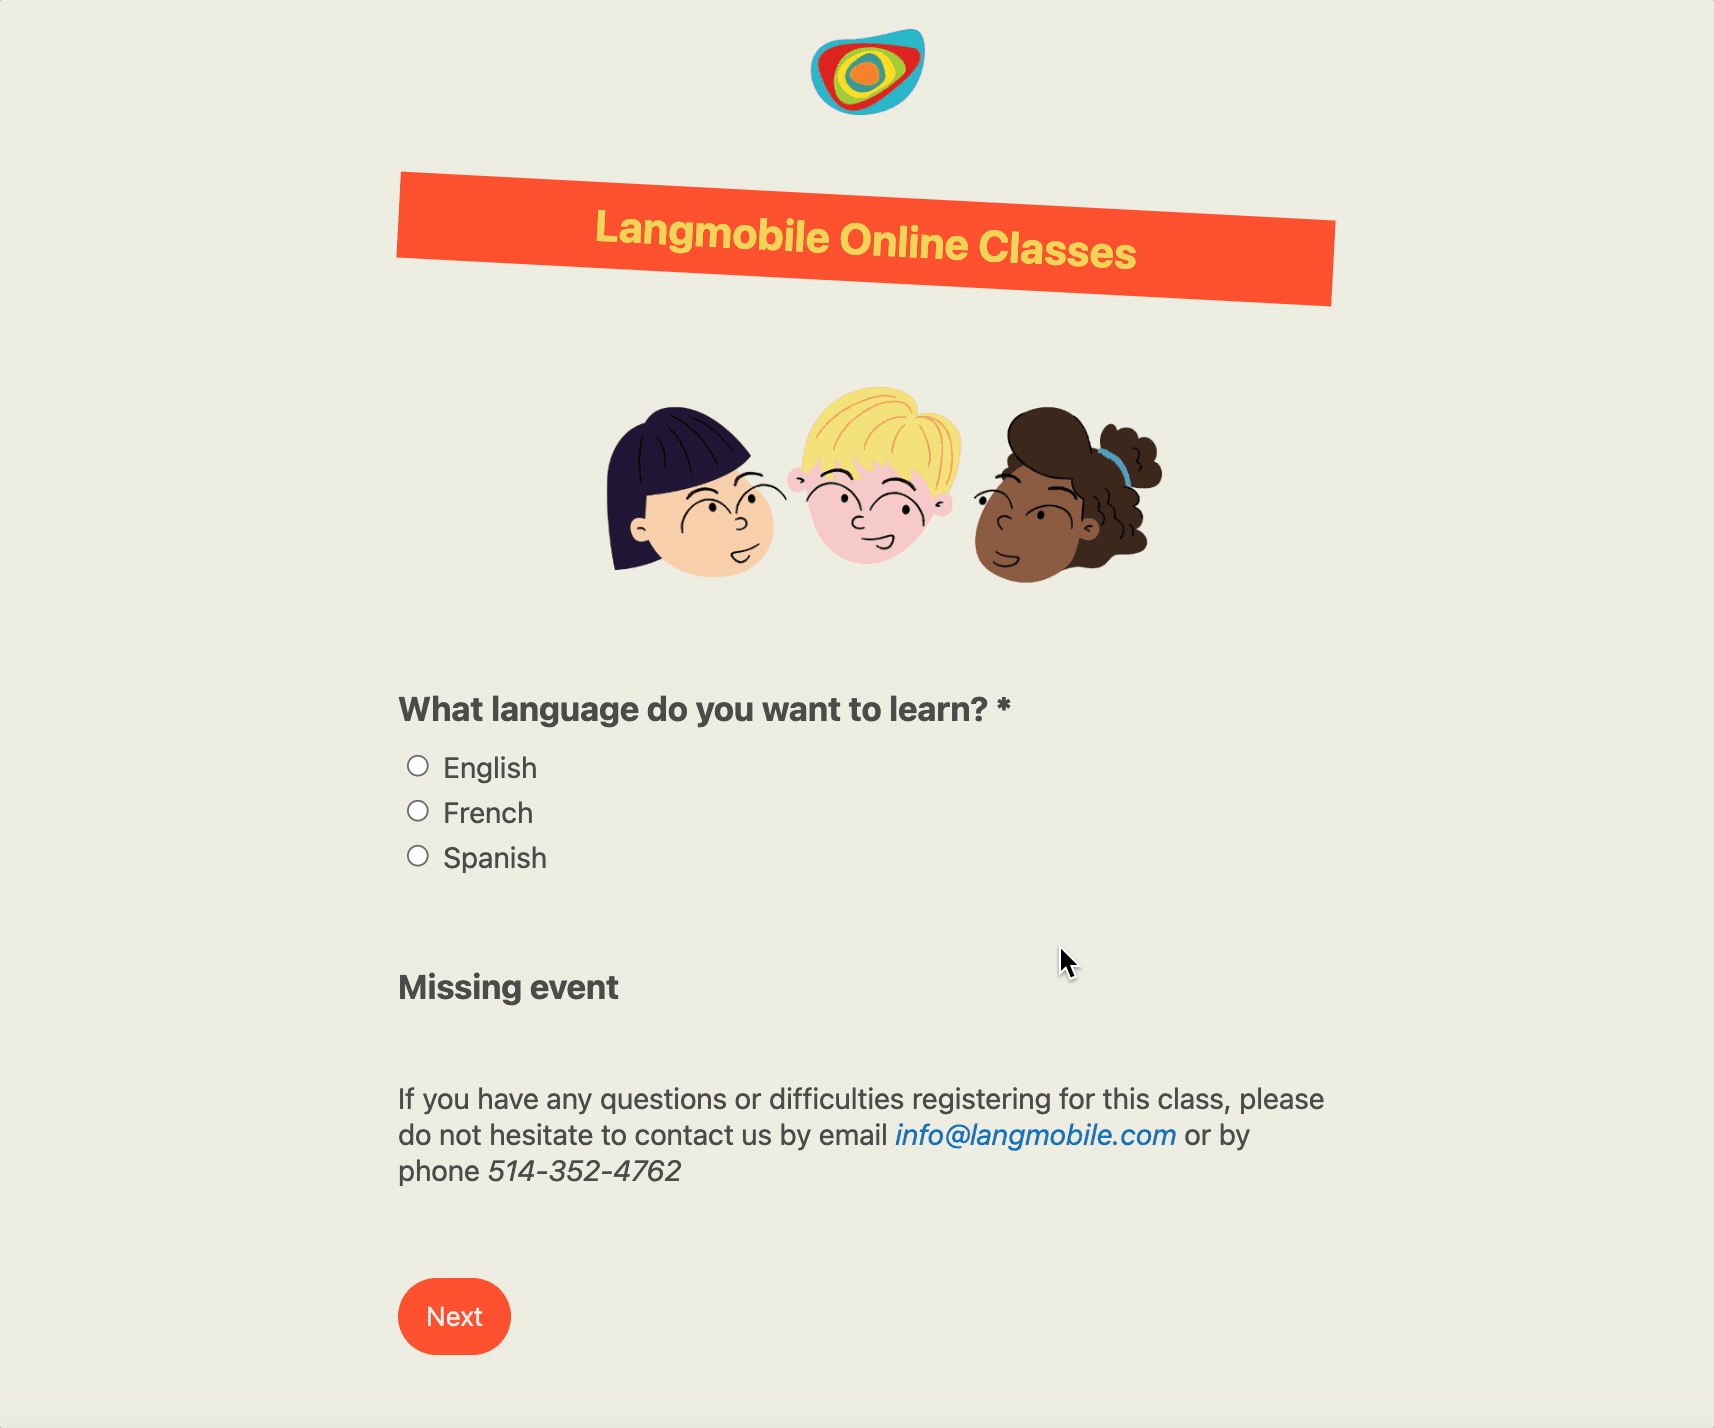
Think about a recent phone call when you guided a potential client to find a class? You knew exactly the questions to ask.
Questions like:
These questions quickly lead you to the right class option for that client.
Here’s an example of what it can look like.
Read more: How to retarget abandonned forms and improve conversion rates.
By using a tag for each question.
Think of tags as the answers to each question you would ask if you were on the phone with a client.
They are the basis for the system to filter through many options and quickly find the perfect class after a few answers.

Activity Messenger can also replace any class management software for Dance Studios, Gymnastics Clubs, Swim Schools and Camps.
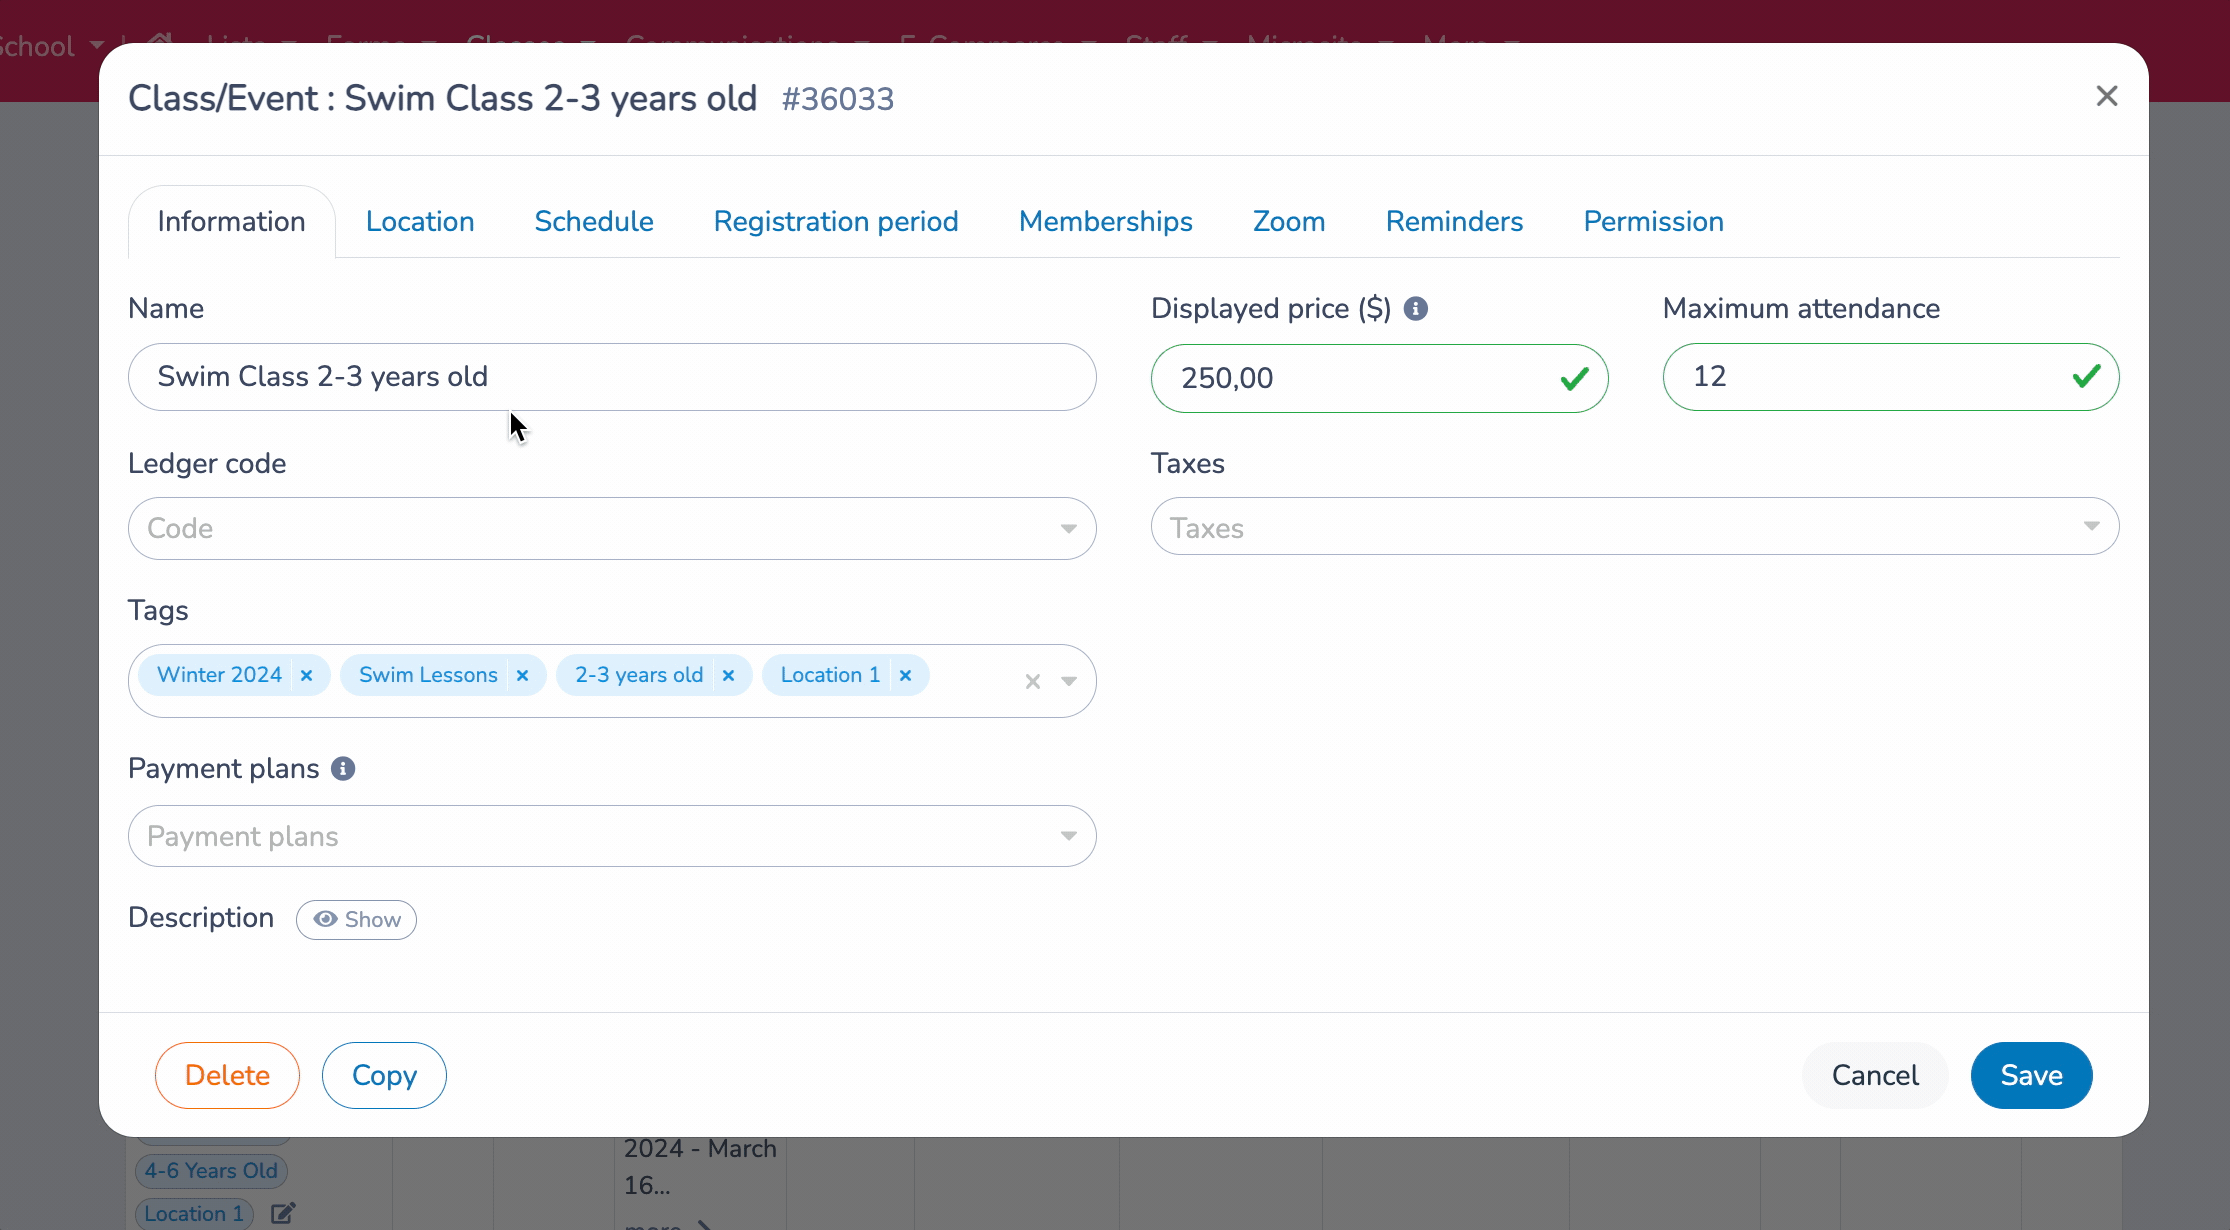
First, you’ll need to create and tag multiple classes. Go to All Classes in the top menu and then select All Classes and Events.
Create classes and make sure you add the correct tags to each class. Tags can also be applied in bulk.
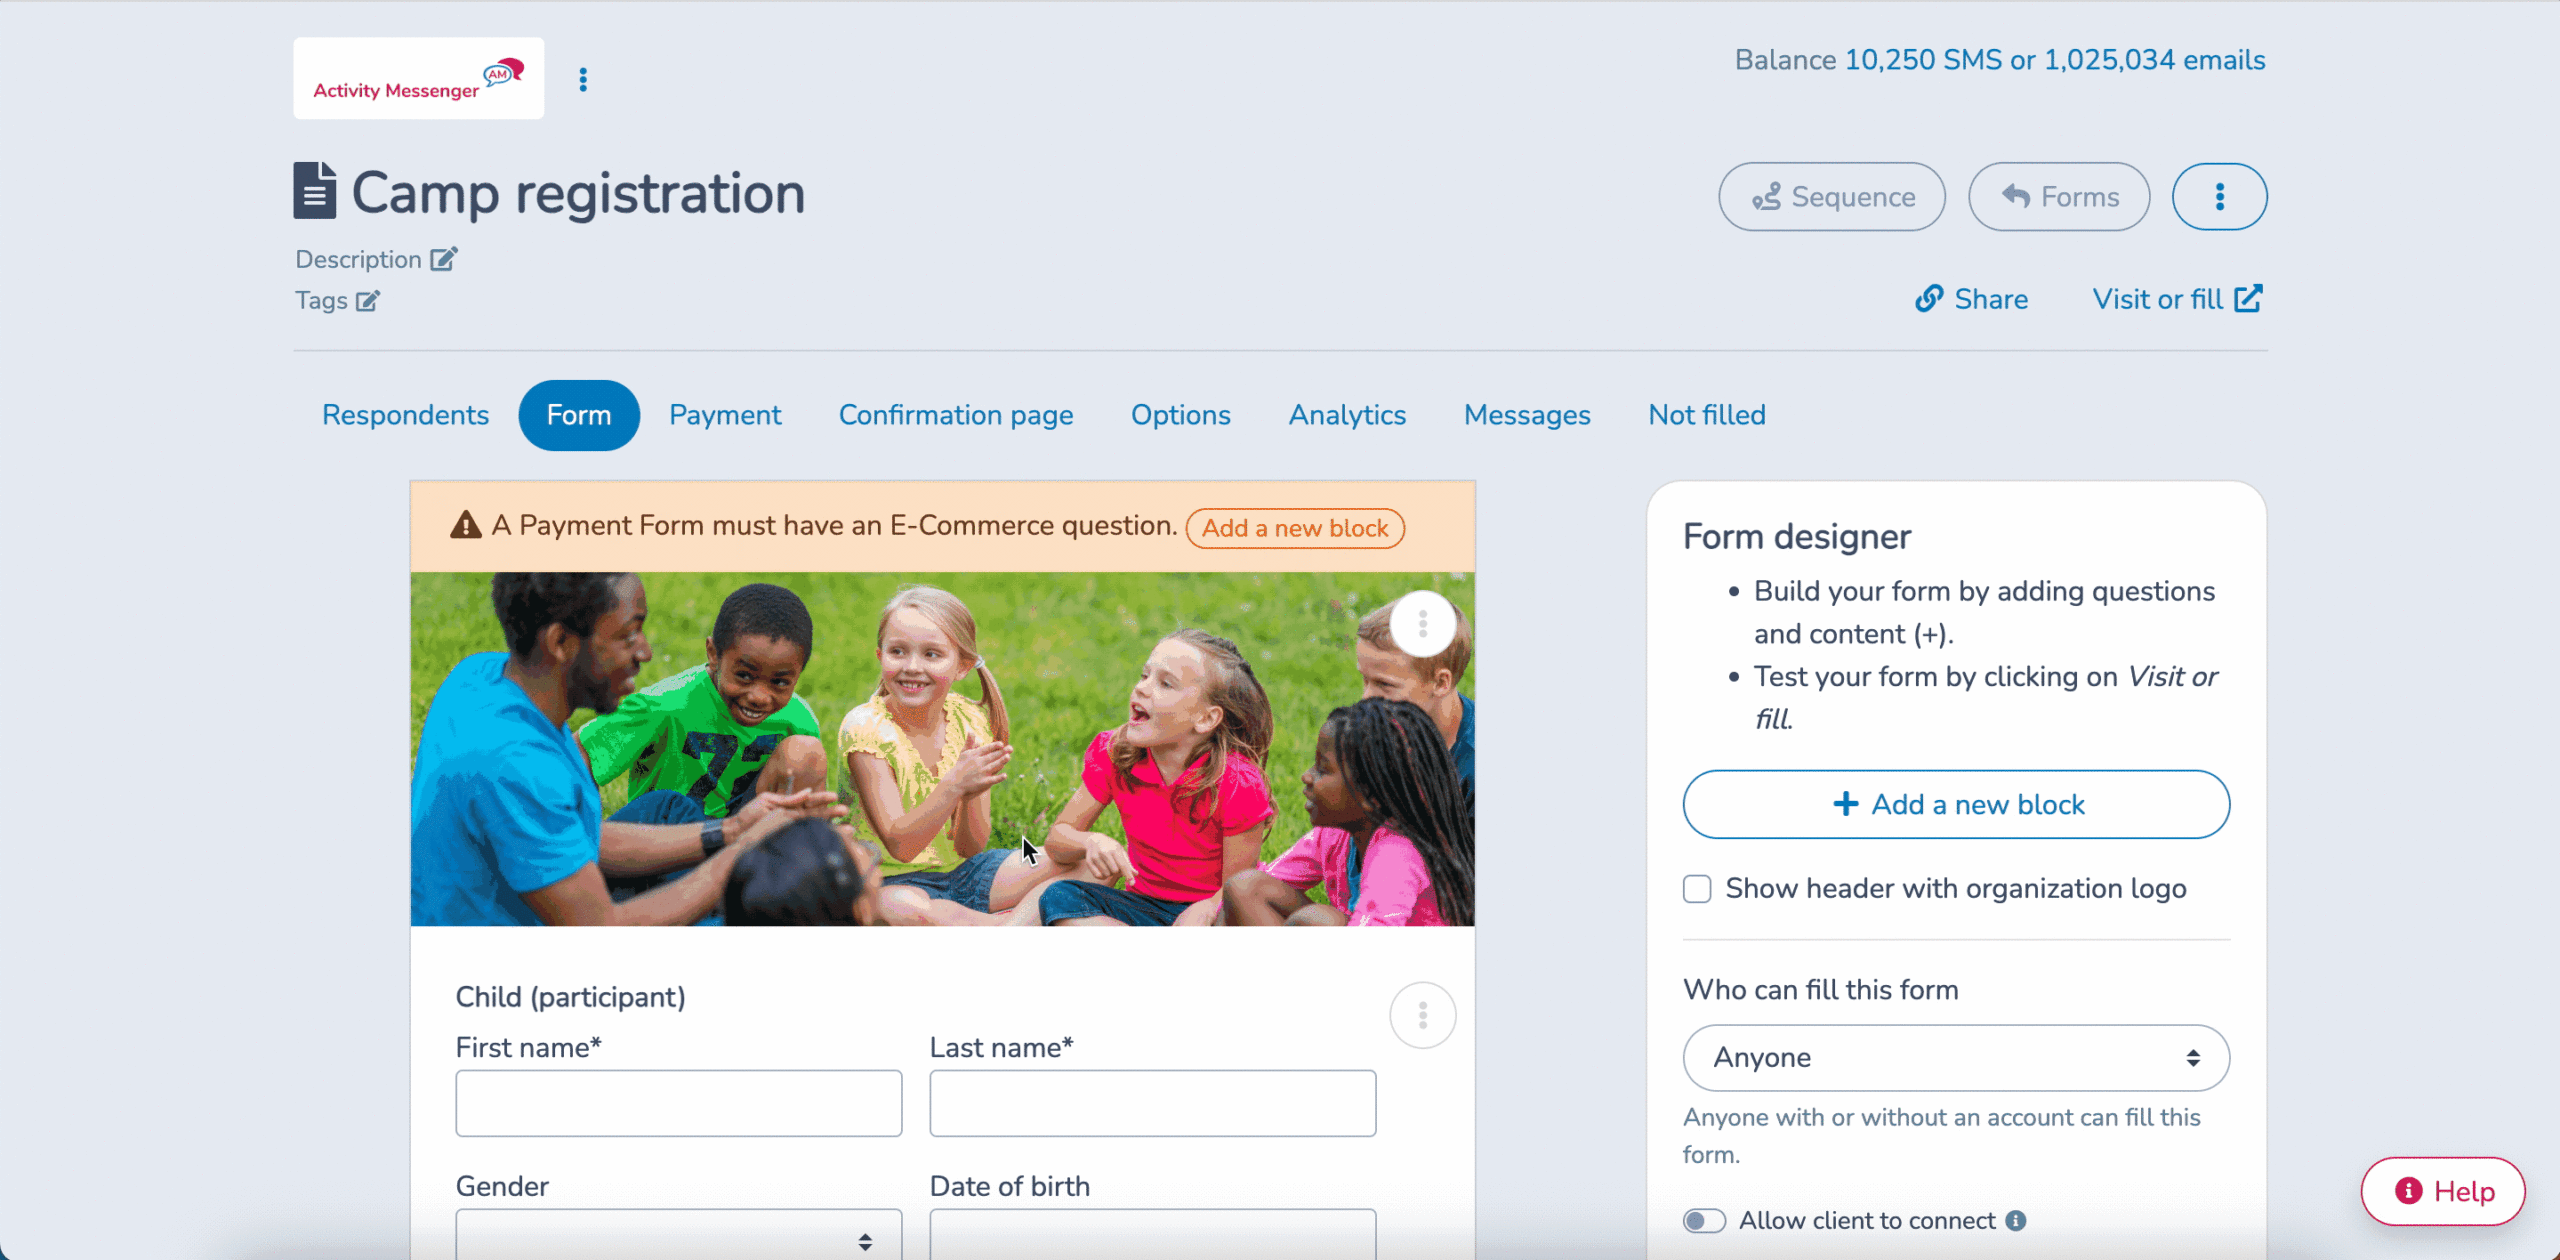
Now that you have created all your classes and added all the tags needed to customize the registration path, you’ll need to create your registration form.
Go to Forms and select Create New Registration Form. Once the form is created, click the + sign and select the Multiple Class option under E-commerce.
You can connect your forms to Stripe to collect payments by credit card. For Canadian organizations, you can integrate Interact E-transfer payments to your registration form using a form builder like Activity Messenger.
There are 3 important settings that you’ll need to set up once all your classes are created.
This is where you select all the classes you want to appear on this form.

Example: I have a tag called Winter 2024, so all the classes that have this tag will be populated on this form.
Next you need to create registration rules. You can create rules for all your tags or change the rules for different tags.

Example: I created rules for Multiple kids, Waitlist, Memberships, Promo codes and other required information.
This is where you personalize the registration process. Add as many or as few filters as you need to personalize you registration process.

Example: Adding an age filter allows your client to quickly filter to their kids age range. Other examples would be level, location, day of the week, session etc.
If you are interested in learning more book a demo or read how Activity Messenger can replace your current class management software


