Payment plans are especially useful for courses that run over an extended period of time, such as a year or several months, where the total amount can be significant.
With payment plans, participants no longer have to pay the full amount up front. Instead, they can choose to make a deposit and pay the balance in monthly installments.
But rest assured, there’s no extra work for you (or your customers) because Activity Messenger fully automates the process. You’ll never have to manually invoice or charge clients every month.
To make the enrollment process even smoother, you can add conditional logic to guide participants to their desired class with ease.
Why you should offer payment plans
Payment plans can not only help your clients and families, but also benefit your business. Here are some reasons to offer payment plans at your dance studio, camp, gymnastics club or swim school.
- Financial accessibility: Allows families of all financial means to afford your programs
- Increased conversion rate: Attract a larger pool of students because they don’t have to pay the entire fee up front
- Predictable monthly payments: Makes it easier to manage cash flow and cover operating expenses
- Increased retention: Returning participants who have difficulty paying the full amount at once may re-enroll instead of opting out.
- Improved Customer Satisfaction: Demonstrates your commitment to accommodating families with varying circumstances
How to setup a payment plan for your classes
First, you’ll need to determine how you’d like to split the payments. Activity Messenger offers fully customizable options (monthly or weekly, percentage or amount) so you can modify and adjust payment plans to fit your needs.
- Once you have selected a class, go to the payment plan option.
- Click on the + sign to set up your payment plan.
- Select an installment type (Amount or percentage).
- Add an initial installment amount (deposit).
- Select number of payments, interval type, and other custom variables.

Create a Class, Activity or Event
Before setting up a payment plan, you’ll need to create a class for your registration form following these steps:
- Navigate to Classes
- Click on all classes and events
- Create or select the class for which you want to add a payment plan
You can also add multiple to classes to a single form.

Some things to consider when creating a class or activity
Here are some of the most commonly used fields when creating a class, activity or event:
- Class Name and description
- Price, location & maximum enrollment
- Schedule (Weekly, monthly, bi-weekly, exceptions)
- Start & end of the registration period
- Registration rule (registration for all dates, select one date, multiple dates)
- Prorate options, coupon codes and payment plans
Read more: Best online registration platform for classes & Activities

Adding the class to a form
Once the class and payment plan are set up, you will need to add the class to a registration form.
- Select or create a registration form
- Add a new block and select the class (under e-commerce)
- Complete the form by adding additional blocks with the information you need for enrollment
- When people visit the form they will now be able to
Activity Messenger allows you to customize the registration form to include digital waivers, sell gift cards, collect donations and many other options.
Start automating payment plans today
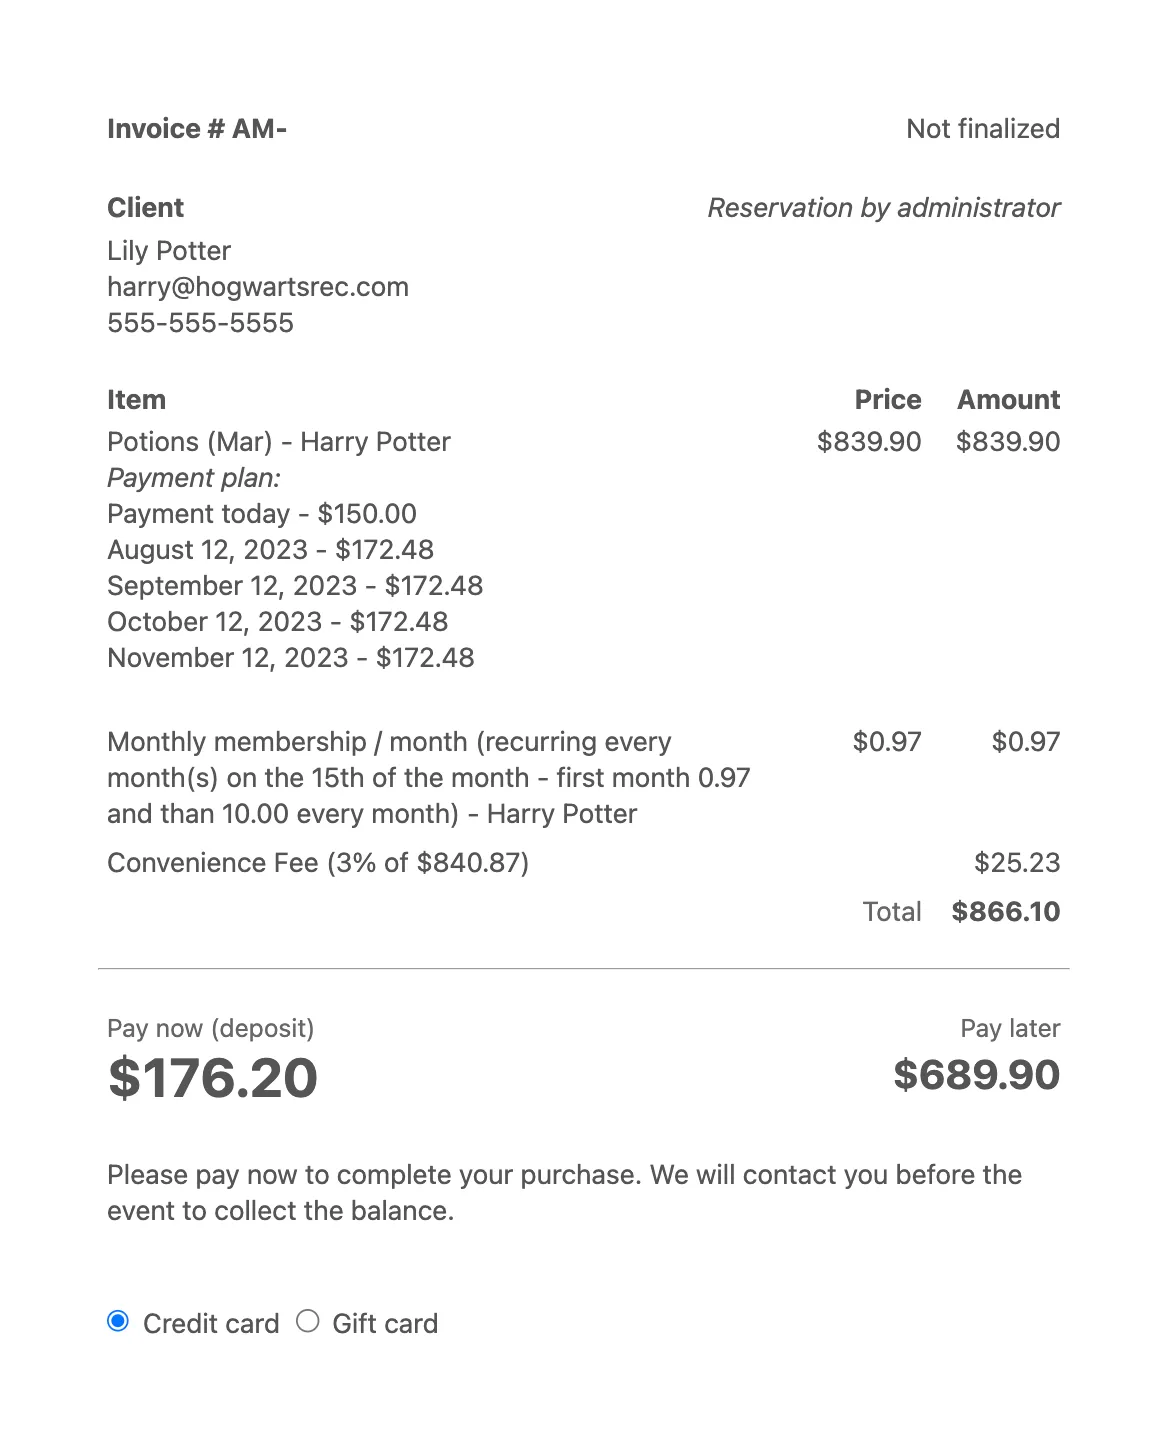
When people sign up, Activity Messenger creates an invoice that details the deposit and any upcoming payments so your customers know what to expect. Payments are then taken at the appropriate time using the credit card on file without any manual intervention on your part. Clients are notified by email and/or SMS when each payment is processed.
Conclusion
Integrating payment plans into your dance studio, camp, gymnastics club, or swim school can benefit everyone. You’ll increase conversion rates, make revenue more predictable, and improve customer satisfaction.
With Activity Messenger, you can customize payment plans to fit your needs and fully automate the process.