
Home
Account setting
Staff
Lists
Forms
Templates (HTML emails/SMS messages)
Sending messages by SMS and email
Classes, events, attendance and Zoom
Automation
Create a birthday invitation and automation
Communication
Microsite
E-Commerce
Networks, Federations and Franchises
How to guides
Personal information and electronic message laws in Canada and the USA
Get support
Terms and conditions
RL-24
https://activitymessenger.com/
10410 Waverly, Montréal, H3L 2W4
Terms and conditions

Rental contract creation guide
With a Payment Form, Activity Messenger makes it easy to create and manage electronic contracts. This guide will show you how to:
-
Create a rental contract with an invoice, terms and conditions and electronic signatures
-
Pre-fill the contract with the client information
-
Send the contract to the client by email to complete missing form fields, sign and pay a deposit
-
Access the contract PDF and invoice
You can use Activity Messenger Payment Forms for rentals, birthday parties, service offers, etc...
# Create a payment form
Click on the Forms menu and choose the Create option. Select the existing template for rental contracts and give it a name.
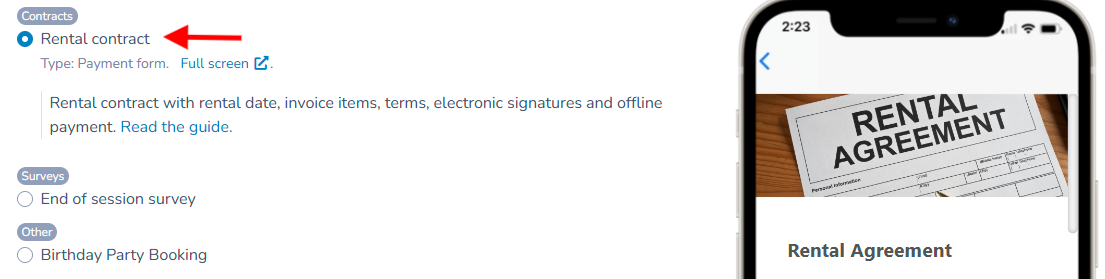
# Design the form
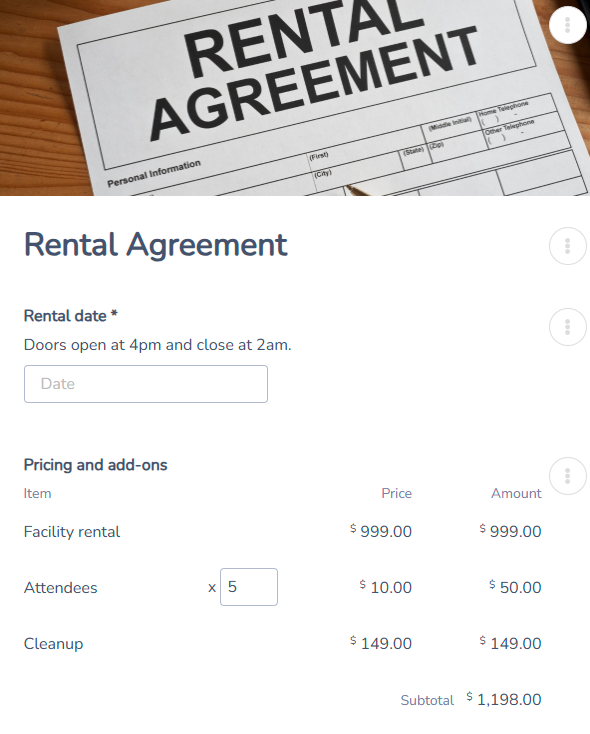
Once the template is created, you can customize the contract to meet your needs. Here are some key points:
Rental Date: Add a field to select the rental date. This field can be pre-filled by the administrator or left for the client to fill out.
Pricing: Include items with specific pricing. For example, for a venue rental, you can set a minimum and maximum number of guests, with corresponding costs.
Cleaning: If cleaning is required or optional, add a field to include or exclude it from the contract.
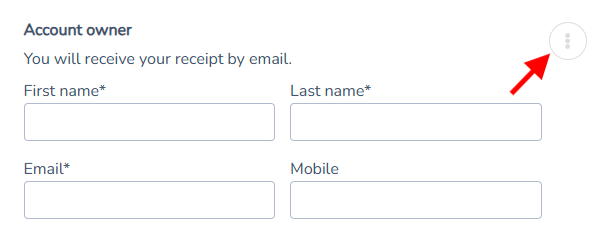
Customize the client's information. Add fields to collect necessary details from the signer, such as name, email address, and phone number. You can also include fields for additional details, like the name of the company renting the space.
# Add terms and signatures
Insert the contract conditions, then add dedicated sections for electronic signatures. You will have the option to include a signature from the administrator as well as from the client. Feel free to integrate multiple conditions that require the client's explicit approval before validating their signature.
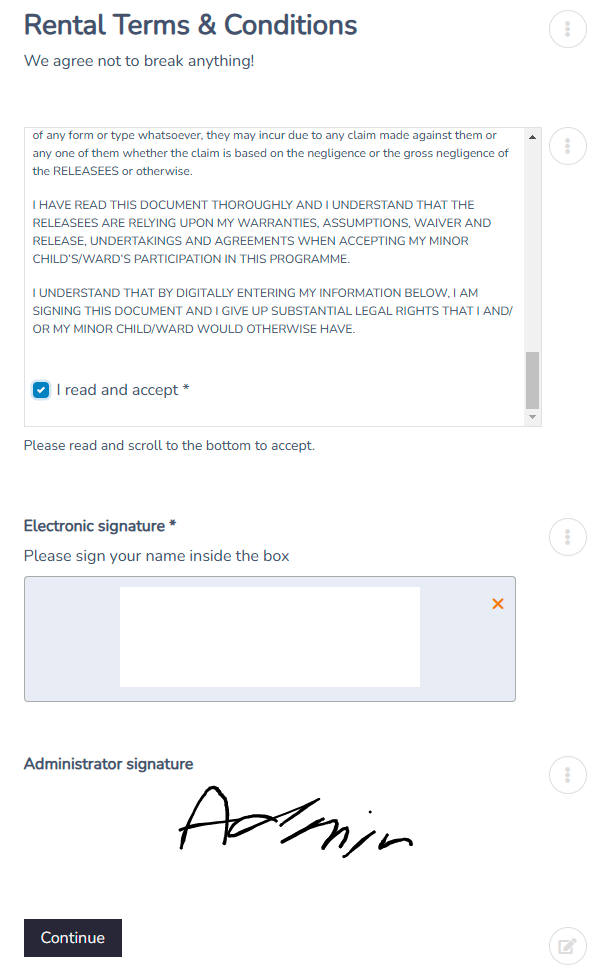
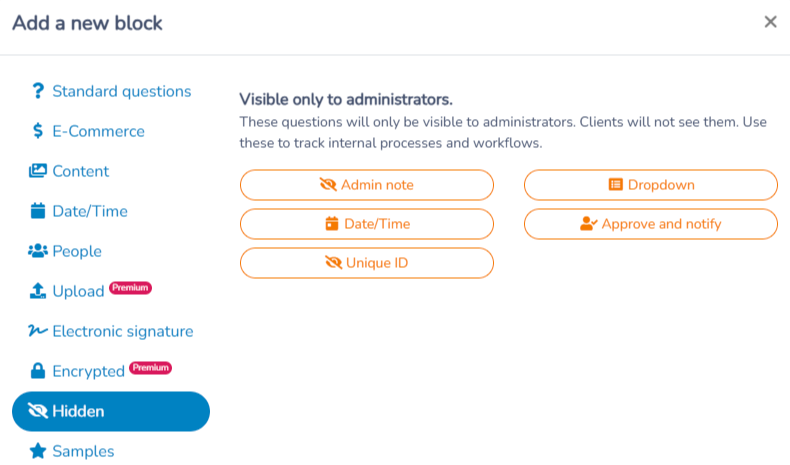
Click the (+) button to add an administrative note. The client will not see this question, but it will allow you to communicate notes to the manager.
# Set up payment and deposit
If the contract includes a payment, you can configure payment options through Stripe or other methods (Interac transfer, check, etc.). Set the amounts to be paid, such as deposits or percentages of the total.
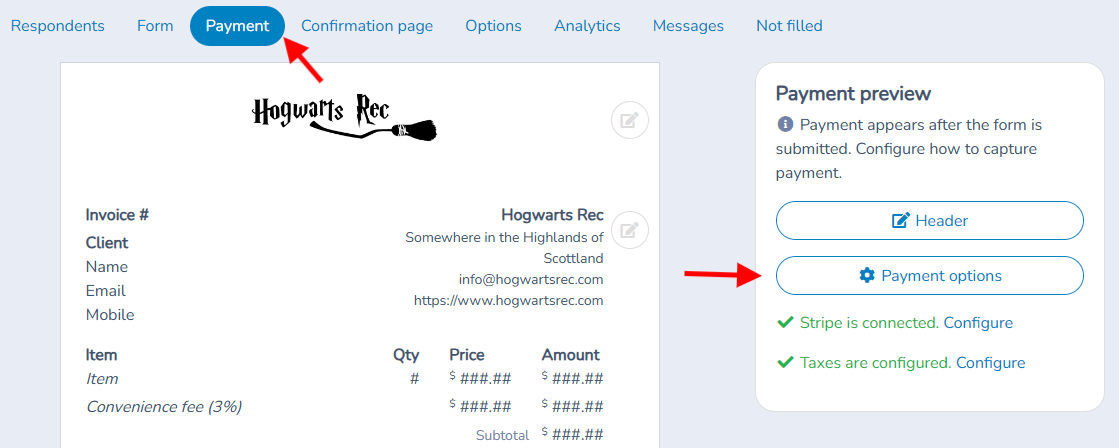
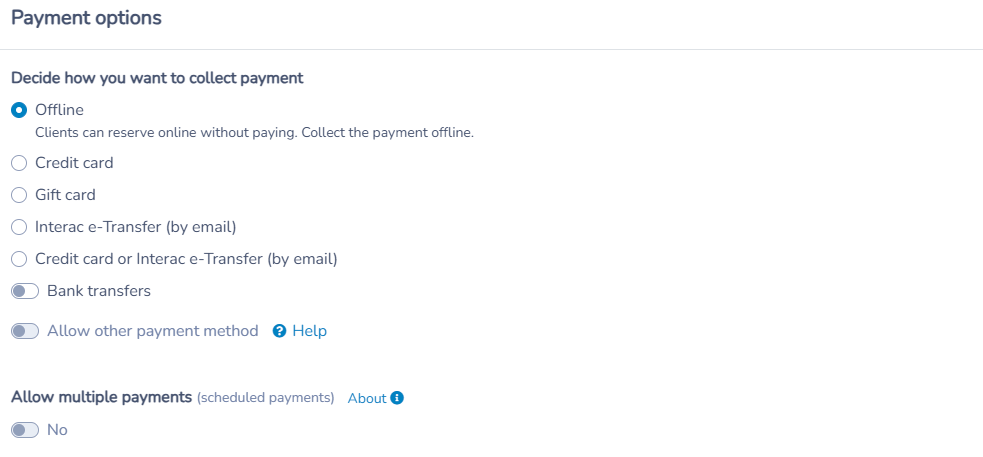
Example: 50% at signing and the balance seven days before the rental
For a rental contract prepared by an administrator, the associated invoice already exists before the client signs. You can arrange the payments on that invoice; the client does not need to create another invoice or configure the schedule.
- Prepare the contract and its invoice, and set the first payment to 50% of the total.
- Open the associated invoice and use Schedule payments to schedule the remaining 50%. Calculate the date seven days before this rental and enter that specific date. If the first payment is already collected or separately scheduled, do not schedule it again.
- Choose how the balance will be collected. A scheduled credit-card payment uses the card on file. Email client sends a payment request and requires the client to pay; it is not an automatic charge.
- Send the prepared contract to the client. The client reviews and accepts the terms, signs, and proceeds to the first payment.
For example, on a $1,000 invoice for a rental on October 20, arrange a $500 first payment at signing and schedule the remaining $500 for October 13.
If no credit card is on file, the scheduled credit-card option sends an email so the client can enter their card for the first payment. That card can then be used for subsequent scheduled payments. Confirm the payment method and the invoice schedule rather than assuming that signing alone authorizes or collects a payment.
The administrator sets the balance date manually. A standard form schedule uses fixed dates or a fixed interval from a configured start date. It does not calculate “rental date minus seven days” from a date answer in the form. If the rental date changes, review and adjust the scheduled payment yourself. A fixed calendar date for the first scheduled payment is also different from “when the client signs.”
Booking packages have a separate option for payment relative to a booking date. That option has its own conditions and should not be treated as the same setup as a 50% deposit with a manually scheduled balance.
# Confirmation page, PDF options and notification
A template is already provided for the confirmation page; adjust the text as needed.
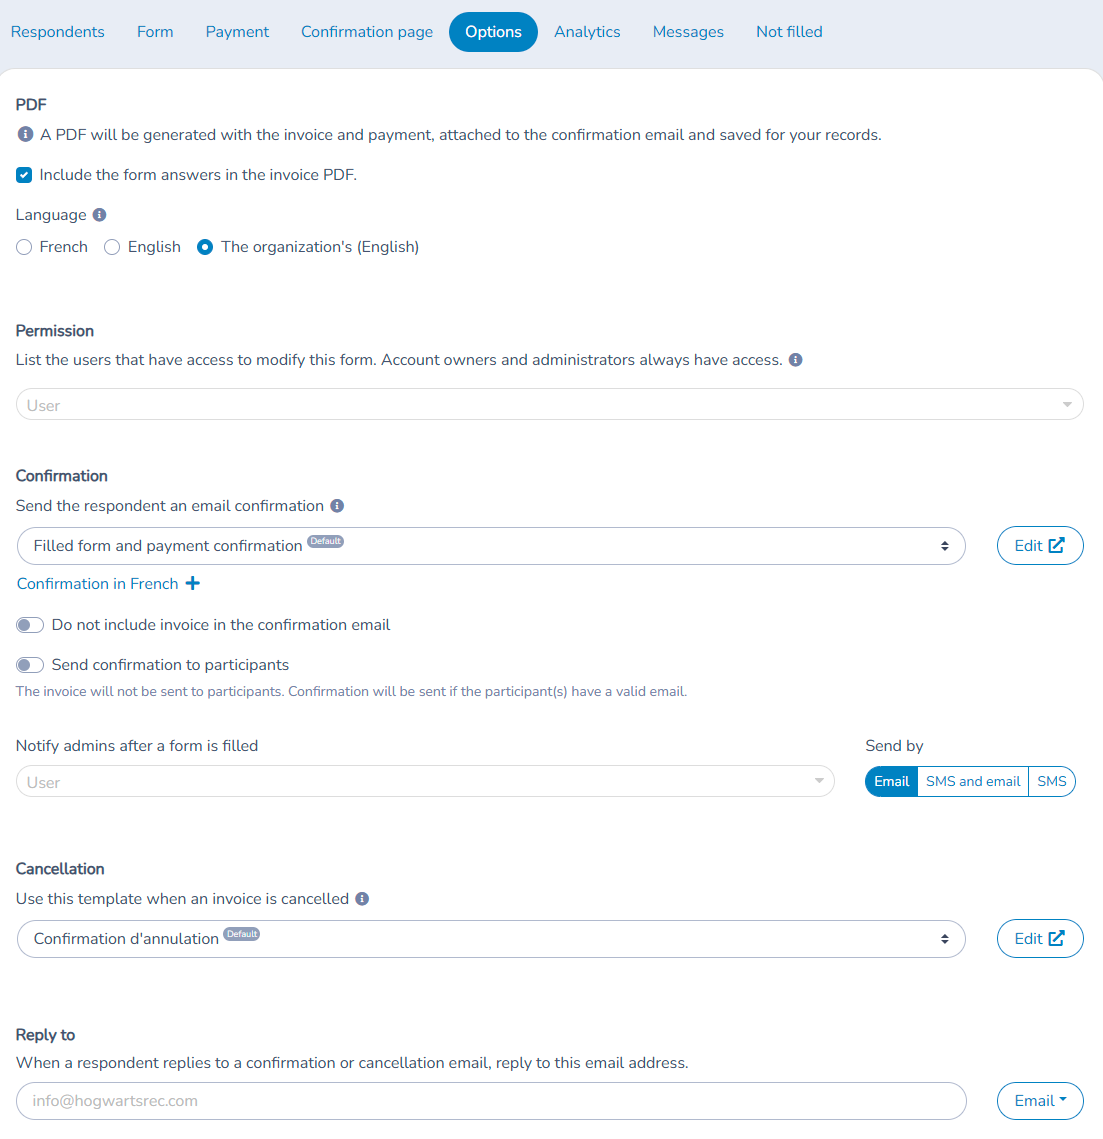
Go to the Options tab. Check the PDF option so that the form is saved with the invoice in a PDF file.
You can also request Activity Messenger to send a notification email (or text) to one or more administrators.
# Pre-fill the form
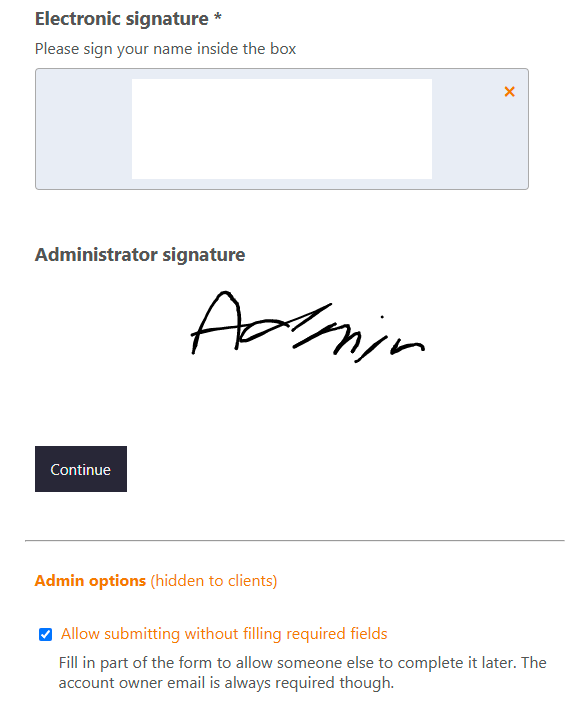
Now that your contract is ready, you can use it. Click on "Visit the Form." It will open in another tab of your browser. Enter the name and email fields. You can leave the other required fields empty; your client will fill them in. Scroll to the bottom of the page and check the option "Allow Partial Save." Click Continue.
# Send the contract via email to your client
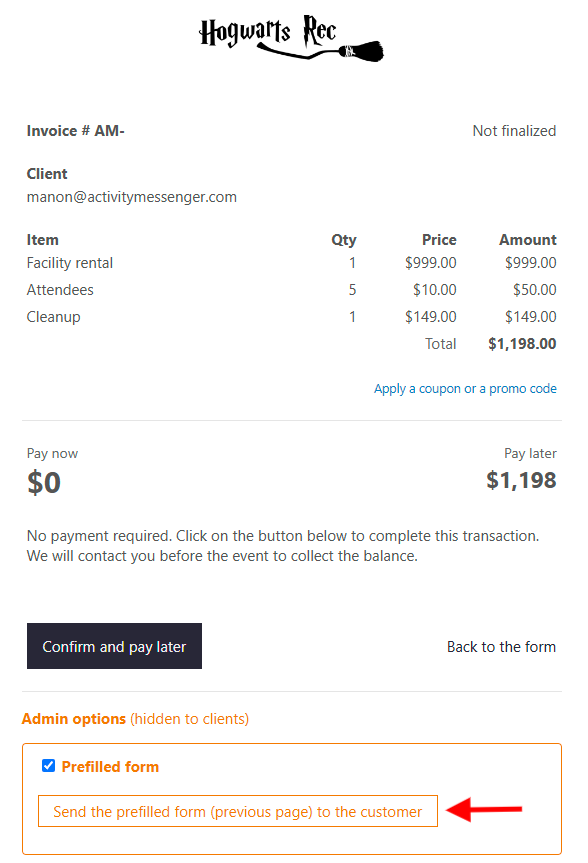
After pre-filling the form, you will land on the payment page. The client's information, the invoice, and the payment form will be displayed. Scroll to the bottom of the page to the administrator options. Click on the option "Send Pre-filled Form to Client.
A new tab will open in your browser displaying the New Message page. Customize the message and click Send. The client will receive an email containing a button that provides access to the pre-filled form. They will be able to complete the information, sign the contract, and pay the deposit by credit card.
Repeat the two previous steps for your other clients. If you allow your clients to book the rental themselves, you can publish the form on your website.
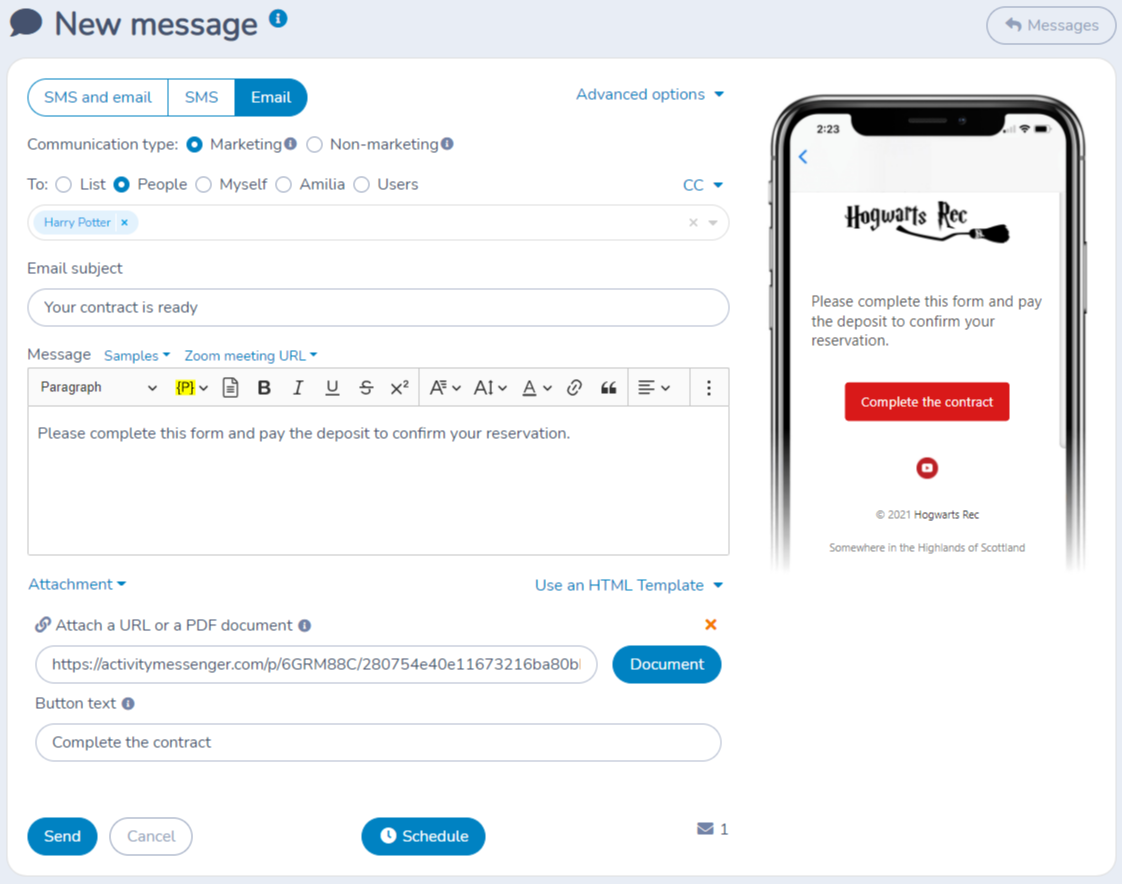
Another browser tab will open with the New message screen. Adapt the message and click on Send. The client will receive an email with a button to access the contract. They will be able to complete the form, sign electronically and pay their deposit.
# Accessing the contract and invoice
Click on the Respondents tab and refresh the table. Once filled, the client and their invoice will appear in the table. Click to open the Client billing.
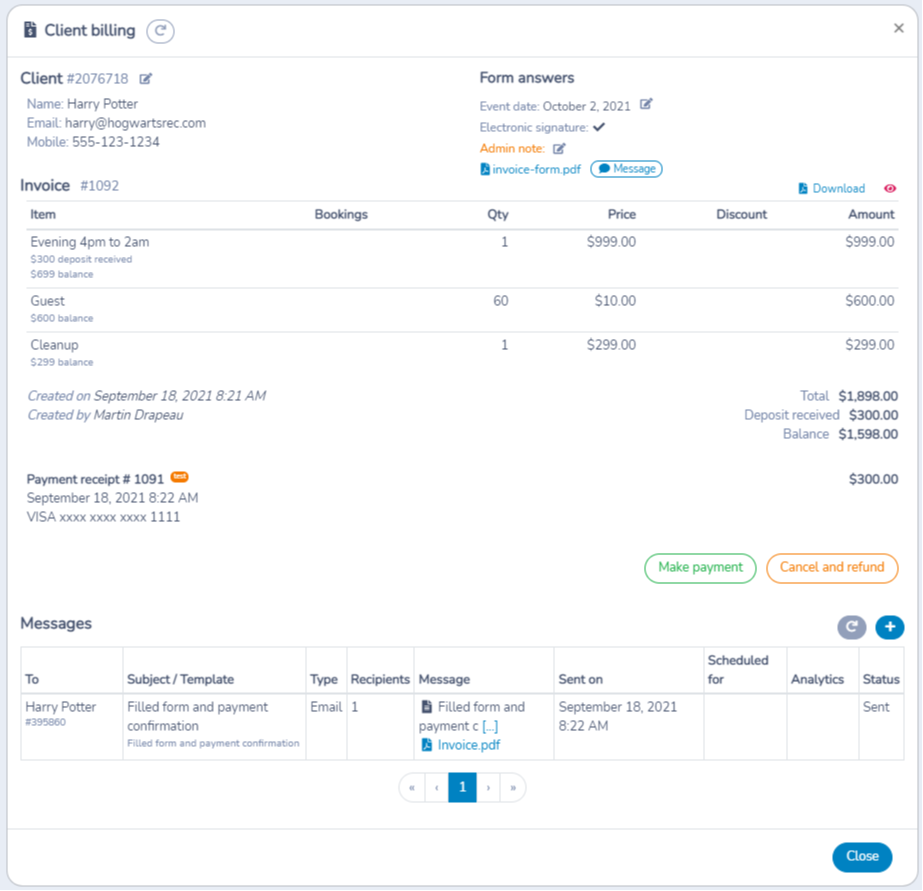
The invoice and payment are shown. You can modify the account information and question answers (date of event and admin note). Click on Make a payment to collect the balance immediately, or use Schedule payments to collect it on a specific future date. Check existing scheduled payments before adding another one. The contract PDF is available for download. The PDF will contain the invoice and the captured form. In addition, we provide a summary log with the client information, a timestamp and their signature.
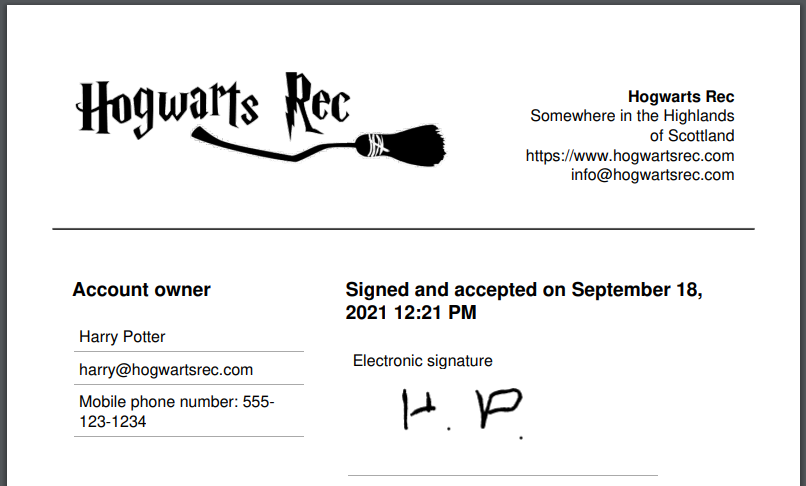
Access a sample contract PDF here: Contract.pdf.
# Client account
The client receives the contract PDF by email as well. They also have access to their contract in their Client account under Invoices.