
Personalization is critical in today’s marketing. Whether you’re sending newsletters, promotional materials, or certificates, creating content tailored to each recipient can make all the difference. Luckily, Canva’s Bulk Create Free App allows you to perform a mail merge with ease.
In this article, we’ll walk you through the steps of setting up a mail merge in Canva and explore how you can streamline the process even further using Activity Messenger.
Step 1: Prepare Your Data
Step 2: Create Your Canva Template
Step 3: Use the Bulk Create App
Step 4: Review and Download Your Designs
When to use MailMerge in your Canva Design
How to Automate the Process Using Activity Messenger
Mail merge is a process that automates the generation of personalized documents or graphics by combining a template with a data source. It’s ideal for sending individualized messages at scale, like certificates, event invitations, or customized newsletters. Canva, known for its intuitive design capabilities, allows users to leverage this functionality through its Bulk Create feature.
Before working on your design in Canva, it’s important to set up your data properly. Here’s how to do it:
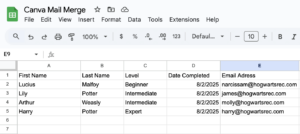
If you’re using a platform like Activity Messenger to send bulk invitations or certificates, you’ll also need to import the attendee’s email address.
Once your data is ready, it’s time to design the template (certificate, name tag, invitation etc) that will be customized for each recipient:
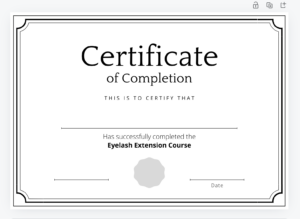
Read more: How to send bulk certificates with Canva
This is where Canva’s magic comes in. Follow these steps closely:
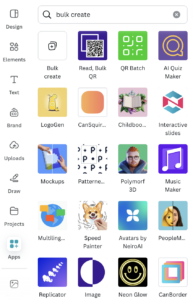
Open your Canva design and click on apps on the left-hand menu. Select Bulk Create from the menu.
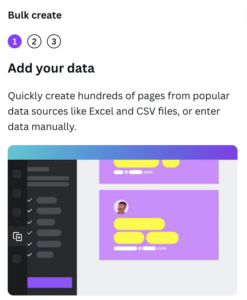
Upload the CSV file you created earlier. Canva will automatically recognize the columns in your file as fields that can be used in your design.
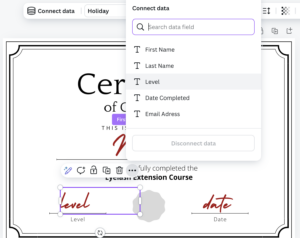
Match the columns in your CSV file to the corresponding text boxes in your design. For example, if your CSV has a column labeled “Name,” map this to the text box that says “{Name}.”
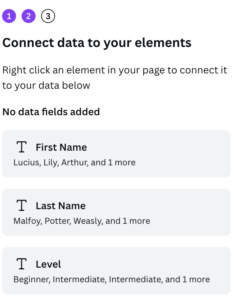
Click Continue to generate your personalized designs. Canva will create individual copies of your template, each one filled in with the data from your CSV file
After Canva completes the bulk creation process, it’s crucial to review the output to ensure accuracy:
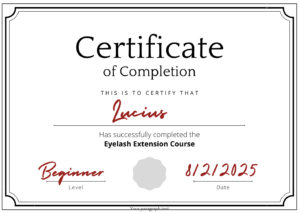
Automatically generate personalized certificates for course, workshop or sports program participants with unique names, completion dates and event details.
Customize event invitations for activities such as dance recitals, sports tournaments, or corporate events, personalizing each invitation with the recipient’s name and event details.
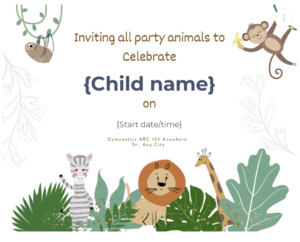
Design marketing materials that include personalized information such as names, unique discount codes, or location-specific offers to increase engagement.
Quickly create custom name tags for conferences, events, or classes by merging attendee information with a professional-looking name tag template to save time and ensure consistency.
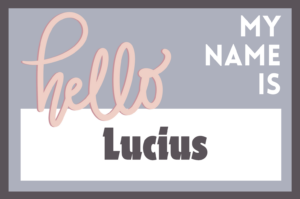
Automatically generate personalized thank you notes for customers, donors, or event attendees to add a personal touch to your communications.
Quickly create personalized event tickets for concerts, sporting events, or performances, including attendee name, seat number, and ticket code for easy tracking and access control.

Now that you know how to create a mail merge with Canva, let’s see how Activity Messenger can streamline the process of distributing your personalized invitations, certificates or name tags to your recipients.
Now that you’ve created your personalized designs in Canva, it’s time to get the data ready to send:
Next, use Activity Messenger to create an email template that integrates with your personalized designs:

The real power of Activity Messenger lies in its ability to automate the entire distribution process:
Note: What is not available in Canva, but very important if you want to share and send mass certificates or invitations, is the ability to create and send email/SMS based on uploaded contact lists.
Using Canva’s Bulk Create feature, you can easily create beautifully personalized designs, while Activity Messenger takes care of distribution, ensuring that your custom creations reach the right audience. Together, these tools allow you to streamline your workflow, maintain a professional image, and connect with your audience on a more personal level. Start experimenting with mail merge in Canva and see how Activity Messenger can take your campaigns to the next level.
Ready to simplify your mail merge process? Try Canva for design and Activity Messenger for distribution-your time and your audience will thank you!
Click here to book some time with one of our experts.