Home
Account setting
Staff
Lists
Forms
Templates (HTML emails/SMS messages)
Sending messages by SMS and email
Classes, events, attendance and Zoom
Automation
Create a birthday invitation and automation
Communication
Microsite
E-Commerce
Networks, Federations and Franchises
How to guides
Personal information and electronic message laws in Canada and the USA
Get support
Terms and conditions
https://activitymessenger.com/
10410 Waverly, Montréal, H3L 2W4
Terms and conditions
Accounting (payments, ledger codes and bank account reconciliation)
Activity Messenger provides comprehensive tracking of all financial transactions. The transactional engine follows the principles of double-entry accounting. Each invoice item has one or more associated payment items, allowing for refunds to be processed directly to the customer's credit card and simplifying bank reconciliation.
# Accounting Codes
Activity Messenger allows you to associate an accounting code with the items you sell. To configure the accounting codes, click on the three dots to the right of your logo and choose the Accounting Codes option.

# Create a ledger code
Click the (+) button to add a new ledger code.
Enter the number and term of the ledger code.
Repeat the process to create as many ledger codes as needed.
It's important to carefully consider the organization of your ledger codes, as this will impact the export of data to your accounting software.

# Assign a ledger code to a class/event
Click on the Classes tab, and select the option All Classes and Events. Open the class and enter the appropriate ledger code in the field provided.

# Make a ledger code required when creating a class/event
Use this if you would like a ledger code applied at the time of class set up. The class will be prevented from saving if the code hasn't been entered.
1. Navigate to the three dots (⋮) next to your logo.
2. From the dropdown menu choose Ledger codes.
3. Click on the settings gear icon.
4. Toggle on Ledger codes are required.
5. Fill in the tax and ledger fields.
6. Save.
# Class duplication
When you duplicate a course, the assigned accounting code is also duplicated.
# Bulk assignment of ledger codes to classes
If you have dozens or hundreds of classes, you can use the Bulk operation to assign a ledger code to multiple classes at once. Click on the more button (⋮) and choose "Ledger codes". Pick the classes, and assign the ledger code.


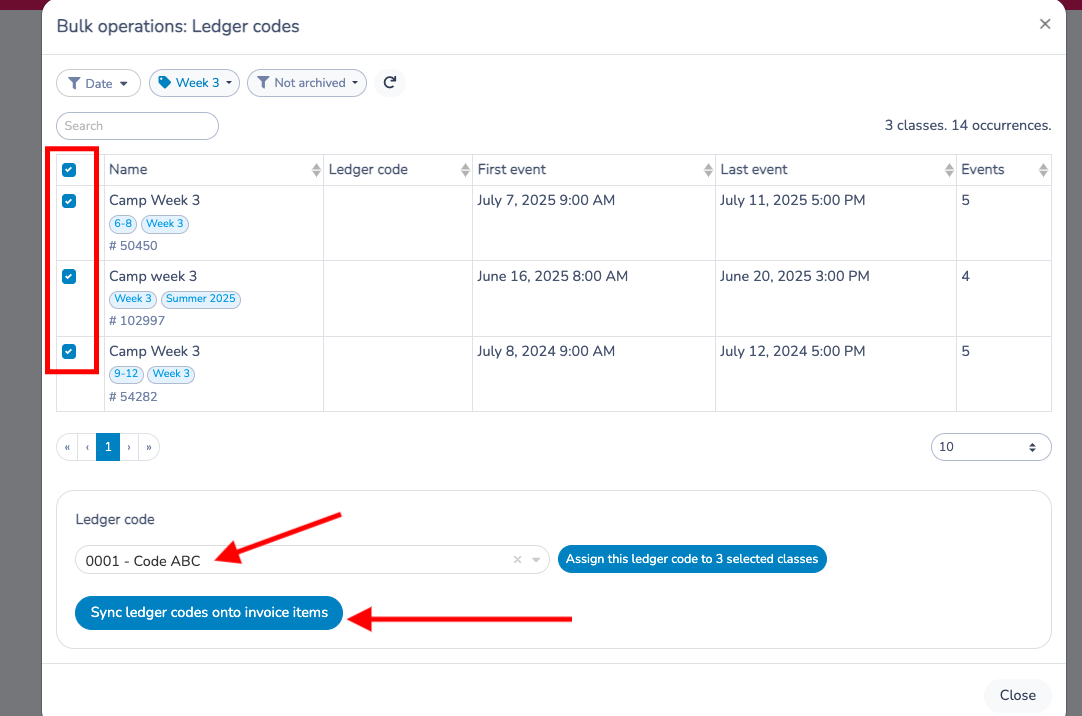
# Retroactively add ledger codes to previously created invoices
In the event that you add ledger codes after a registration or decide to add ledger codes to invoices that have been previously created. Here are the steps to take:
1. Go to the Classes tab.
2. Select All classes and events.
3. Click on the three vertical dots (⋮) and choose the Bulk Operation - Ledger codes.
4. Add a checkmark beside the classes that you would like to edit.
5. Add the ledger code in the field provided.
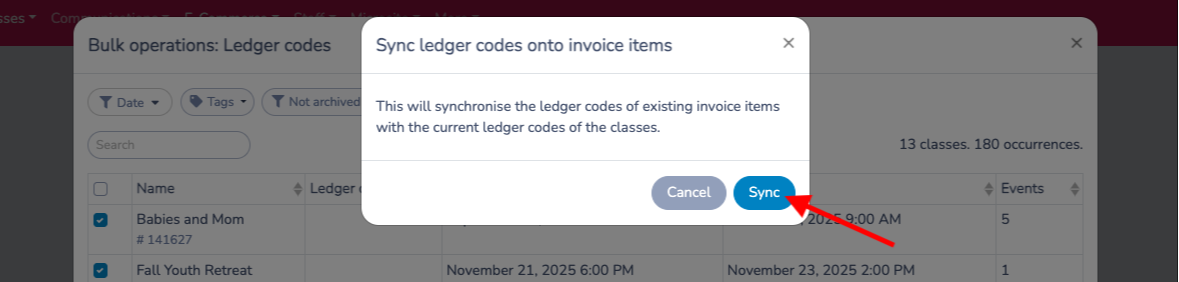
6. Click the blue button "Sync ledger codes onto invoice items".
7. In the next pop up window choose Sync.
# Assign a ledger code to a subscription
Go to the E-Commerce tab.
Select Subscriptions.
Create or modify a subscription.
Assign an accounting code to the subscription.

# Assign a ledger code to a product
Go to the E-Commerce tab.
Select Products.
Create or modify an product.
Assign an accounting code to the products.

# Payments report by ledger code
To view payments broken by ledger codes, click on E-Commerce, Reports. Choose a date range. Activity Messenger will list all payments and break them down by ledger code. You can export the report to Excel as well.

# Bank account reconciliation with Stripe and Activity Messenger
Using the Payments report in Activity Messenger, along with the Payout report in Stripe, your accountant can easily reconcile payments against your bank account deposits.
We recommend you program the Stripe payouts on a regular interval using the Automatic payouts feature. Read the Stripe Payout reconciliation report docs to find out more.