How to Create a Registration Form with Microsoft Forms

Olivier Rousseau
25 October 2024 2 min read

When you need to create an online registration form, Microsoft Forms can be a useful and simple tool. It’s included with Microsoft 365 subscriptions and allows you to create forms quickly for events, classes, and surveys.

In this guide, we’ll walk you through the process of creating a registration form using Microsoft Forms and discuss its benefits and limitations.

  1. Go to Microsoft Forms
  2. Create a New Form
  3. Add Questions to the Form
  4. Customize Your Form
  5. Adjust Settings
  6. Review and Test Your Form
  7. Share Your Registration Form
  8. Collect and Manage Registrations

We will also discuss some of the limitations of Microsoft Forms, particularly when it comes to online registration for classes, activities or events, as well as alternatives that may be more appropriate for certain situations or types of registration forms.

Author’s note: Olivier is the co-founder of Activity Messenger & shares tips and tricks that have helped hundreds of dance studios, gymnastics clubs, swim schools, Soccer Academies and camps design mobile-friendly registration forms that streamline operations and increase revenue.
1. Go to Microsoft Forms

  • Microsoft Forms is available through Microsoft 365, so the first step is to log in to your account. If you’re using a business or educational version of Microsoft 365,
  • Forms will be available in the app launcher (the grid icon in the top left corner). If you’re using a personal Microsoft account, you can go to forms.microsoft.com to get started.

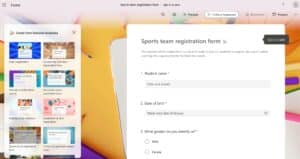
Go to Microsoft Forms

For full functionality, especially if you want to create professional forms with advanced features, a Microsoft 365 subscription is recommended. Some free features might be limited in scope, so check what is available depending on your subscription.

2. Create a New Form

Once you’ve accessed Microsoft Forms, creating a new form is straightforward. Here’s how you can get started in more detail:
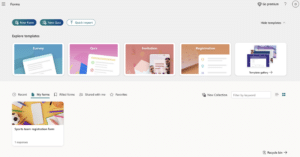
  • Choose a type form: After opening Microsoft Forms, click on new form. Select one to go to the Form Builder. From there you can modify and select a different template.

Create a form with Microsoft Forms

  • Give Your Form a Title: The title is the first thing people see when they open the form. Make sure it’s clear and easy to understand and relevant to the event or class, for example, “Dance Class Registration”, “2024 Summer Camp Registration”, or “Workshop Registration”.
  • Add a Form Description: Below the title, you can add a description that gives participants more context about the form. The description is optional but useful for providing extra details, such as important dates, deadlines, or event-specific information.

Add a Form title and Description

  • Add Custom Branding: You can also include your organization’s logo or theme, which can make the form look more professional and aligned with your brand identity.
  • Keep it Simple and Focused: The title and description should be concise but informative. Participants should know exactly what they’re signing up for, how long the form will take to fill out, and any essential information they need to know upfront.

By setting a clear title and providing a relevant description, you ensure participants immediately understand the purpose of the form and feel confident proceeding with the registration process.

3. Add Questions to the Form

This is the core of your registration form. Microsoft Forms offers a variety of question types that allow you to collect the specific information you need:
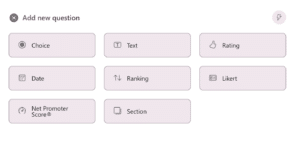
  • Text Questions: These are open-ended fields where participants can provide information such as their name, address, or other details. You can set restrictions on these fields, such as limiting the number of characters or making them mandatory.
  • Choice Questions: This question type is ideal for multiple-choice answers. For example, if you’re asking participants to choose a date for an event or select a class, this is the best option. You can even allow them to select multiple options if necessary.
  • Date Questions: If you need participants to select a specific date, such as their preferred session or event date, this question type ensures responses are uniform and easy to process.

Add Questions to your microsoft Form

  • Rating and Likert Scales: These can be used if you want participants to rate something, such as their interest level or satisfaction. While not commonly used in registration forms, these could be useful for collecting feedback at the time of registration.
  • Net Promoter Score (NPS): This type of question is used to gauge customer loyalty by asking how likely someone is to recommend your service on a scale from 0 to 10. Including an NPS question in your form helps identify advocates and areas for improvement, giving you valuable insight into customer experience.
  • Ranking Questions: These allow participants to rank their preferences or priorities in order. For example, you might ask them to rank the most important aspects of a class, such as timing, location, or instructor. Ranking questions offer a clearer understanding of participants’ preferences and help you tailor your offerings accordingly.

When adding questions, think carefully about the data you need. For registration forms, typical questions include name, email, phone number, event/session preference, and any special requests. You can customize each question to require an answer or set restrictions.

An online registration form builder like Activity Messenger allows you to create multiple classes with attendance list, waitlist automation, online payments and much more.

4. Customize Your Form

Customizing your registration form helps ensure that it looks professional and is aligned with your brand. Microsoft Forms provides some basic customization options:

  • Style: You can choose from various pre-set style and layouts to change the look and feel of your form. You’ll want to select a style that matches your organization’s branding or the nature of the event.
  • Descriptions and Instructions: Providing clear instructions on your form is essential, especially if some sections might be confusing. This reduces the chance of participants making mistakes and ensures the form is filled out correctly.
  • Logical Organization: Group related questions together. For example, gather all contact information in one section and session or class preferences in another. This makes the form easier to navigate.

While the customization options are somewhat limited in Microsoft Forms, these basics ensure the form is still functional and visually appealing.
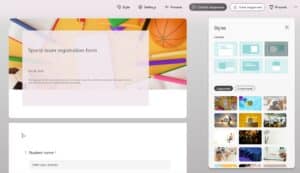
Customize Your Form

Note: Some of the features that are not available in Microsoft Forms, but are very important when collecting online registrations, are the ability to accept terms and conditions, to digitally sign a liability payment, and to securely pay for the class, camp or activity.

5. Adjust Settings & Set Restrictions

Setting restrictions helps guide participants in providing the right information. For instance:

  • You can set a start and end date for when respondents can complete the form.
  • Set a maximum time for people to complete the registration form
  • Display a progress bar for multi-page registration forms
  • Receive email notifications each time a registration form is completed
  • and more

Tailoring the settings to your organisation’s needs will improve the quality of responses and ensure that you collect the information you need without errors.
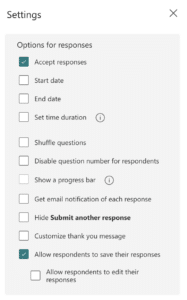
Settings in Microsoft forms

6. Review and Test Your Form

Once you’ve added all your questions and customized your form, it’s essential to test it before sending it out. Microsoft Forms offers a Preview option, allowing you to see the form as your participants will. Take the time to fill out the form yourself to ensure everything works as expected, from answering the questions to submitting the form.

Testing is crucial because even a small mistake can cause confusion for respondents or lead to incomplete registrations.
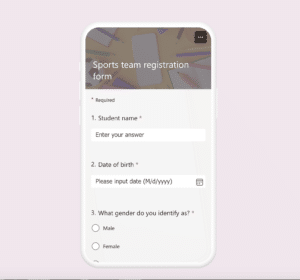
Review and Test Your Form

7. Share Your Registration Form

After testing your form, you’re ready to share it. Microsoft Forms provides several options for sharing:

  • Link: Click on Collect Responses. You can copy the form’s URL and share it via email, on your website, or on social media.
  • Embed: If you prefer, you can embed the form directly into a webpage. This is useful if you have an event or class registration page on your website.
  • QR Code: Microsoft Forms generates a QR code that can be scanned by mobile devices, offering another convenient way for participants to access the form.

Share Your Registration Form

8. Collect and Manage Registrations

Once your form is live, Microsoft Forms provides several ways to easily collect and manage attendee registrations. As responses come in, they are automatically saved and organised in an easy-to-use interface. Simply select View Responses to see the details of how your registrations are progressing.
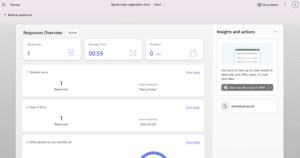
Collect and Manage Registrations

  • Real-Time Response Tracking: Microsoft Forms automatically saves responses as they are submitted. You can view individual responses one at a time by clicking the Individual Responses option.
  • Export to Excel: If you need to analyze the data in greater depth, you can export all responses to an Excel spreadsheet. This gives you the ability to sort, filter, and organize the data as needed (e.g., group participants by session or class)
  • Manage Responses: Within the Forms dashboard, you can easily sort and filter responses to focus on specific participants or details.

By using these built-in tools, you can efficiently collect and manage registrations without the need for additional software. However, for more complex workflows, you may need to integrate Microsoft Forms with other solutions to fully optimize the registration process.

Limitations of Microsoft Forms for Registration Forms

No Capacity Limiting or Waitlist Feature

A significant limitation of Microsoft Forms is the inability to automatically limit the number of responses or the number of participants per option. For example, if you have a class with a maximum of 10 seats, Microsoft Forms will not automatically close registrations once those seats are filled. You must manually monitor the number of registrations and close the form when the limit is reached, or remove the option yourself.

This limit can be time-consuming to manage for larger events with multiple sessions. If this feature is critical to your registration process, you may want to consider a tool like Activity Messenger, which not only closes registrations when a class is full, but also automates a waitlist.

No ability to reach participants with SMS/Texts

When you run events or classes, many things can happen that force you to change your schedule or cancel a class. And they always seem to happen at the last minute. Not having the ability to send bulk SMS to specific people in a specific class can cause people to miss your email and show up to an empty room.
Introducing Activity Messenger - A Microsoft Forms Alternative

Activity Messenger Software

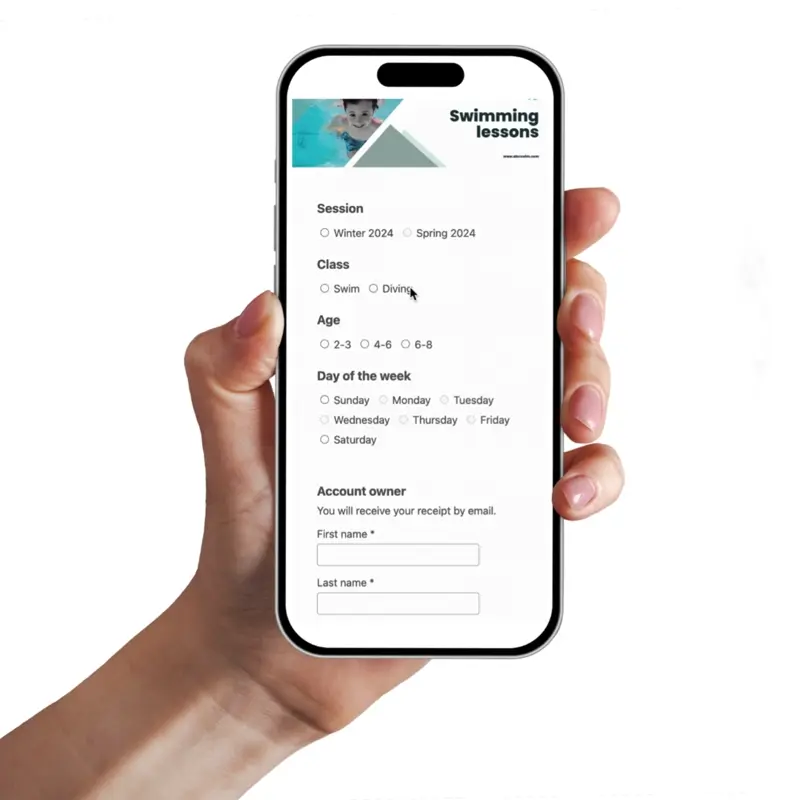
For more advanced registration needs, Activity Messenger provides a form-building tool that is designed for online registration and has all of the functionality of more complex class management software.

Here are a few reasons why you may want to consider Activity Messenger for your registration needs.
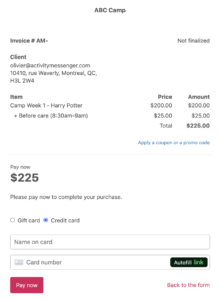
1- Online Payments:

Integrate payment option to your form

2- Include Advanced form options:

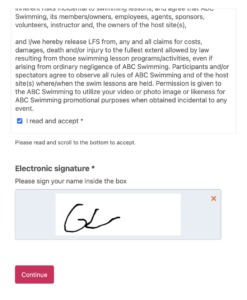
  • E-Signature: Have participants sign a code of conduct or consent form to collect legally binding signatures on agreements.
  • Liability Waiver: Include waivers that attendees can acknowledge during registration. This ensures legal compliance and reduces administrative overhead.Include liability waiver and digital signature to registration form
  • Conditional Logic: You can show or hide fields based on user responses to help streamline the registration process. For example, additional fields appear to collect more information when an attendee selects “yes” for special accommodations.

Conditional logic

  • Invoice Items: Break down various fees and costs for transparency. For example, break down fees for materials, equipment rental, or optional add-ons.

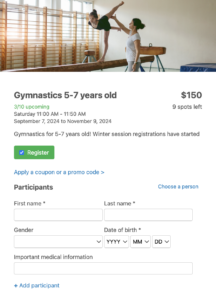
Class registration form

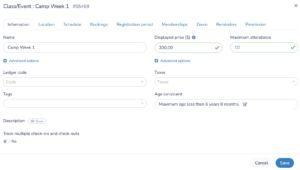
  • Classes or Events: Within a single form, you can manage multiple class or event options. This simplifies the registration process for events that have multiple options for a class or workshop.

Add classes and activities to your forms

3- Automated Communications:

  • Confirmation Emails: Send instant confirmation e-mails with personalized details about the class they have selected and the invoice that will be sent to them.
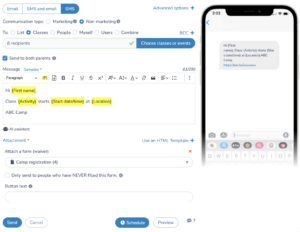
  • Reminders: Schedule SMS notifications at the start of a session, or in the event of a class cancellation or last-minute change, target specific lists of attendees from that class.
  • Post-Event Survey: Create a survey to automatically send to all attendees after the last day of the session.

Send SMS reminder to clients who have filled a registration form

4- Custom Branding:

  • Professional Look: Customize forms to match your brand identity with the Activity Messenger & Canva integration.
  • Consistent Messaging: Create professional-looking, branded email and text message templates, including a mail merge feature for personalization.
  • Detailed Reports: Analyze registration trends, form abandonment rates, and demographics.

Customize email communications for your form builder


5- Marketing Capabilities

  • Retargeting and Conversion Tracking: Retarget potential clients who have started but not completed registration and payment. Understand and improve your marketing effectiveness by tracking conversion rates.
  • Email Marketing Integration:Communicate with your audience in the form of a newsletter using built-in email marketing tools (Mailchimp alternative). Depending on the type of class or activity you offer, target specific audiences with tailored messages.
  • Upselling Opportunities: Offer additional products, items, or services during the registration process to increase the average transaction value.t revenue.

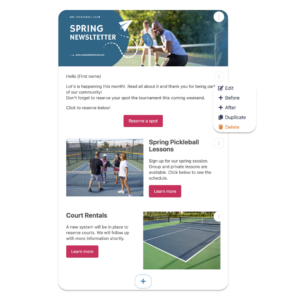
How to send a newsletter for pickleball


Final Thoughts and Recommendations

When choosing a registration tool, start by assessing your needs. If you only require basic course registration without payments or advanced features, Microsoft Forms can do the job. However, for more complex class options involving payments, liability waivers, and you want to improve conversion rates, Activity Messenger is a better fit.

While Microsoft Forms offers a free option, Activity Messenger’s added features for automation and revenue generation can in many case justify the cost. Both platforms are easy to use, but Activity Messenger stands out with its comprehensive class management tools.

To learn more about Activity Messenger, book a demo with one of our experts.

Written by Olivier Rousseau Olivier is a kids sports programs owner who has been operating for over a decade with locations in Montreal, Quebec city & Ottawa. He also helps Gymnastics Club, Swim Schools and Dance Studios streamline their operations. He is the co-founder of Activity Messenger an online registration platform for the sports & leisure industry.

How to Create a Registration Form with Microsoft Forms

Subscribe for exclusive content

Receive News and Updates about our product

© Activity Messenger

info@activitymessenger.com