Google Forms is a versatile tool for creating surveys, quizzes, and forms, but sometimes a single, long list of questions can overwhelm respondents. By adding sections, you can break your form into manageable parts, improving clarity and respondent experience.
In this article, we’ll guide you through the process of adding sections to your Google Forms, highlight their benefits, and share some best practices.
Why Add Sections to Your Google Form?
Adding sections to your Google Form can:
- Improve organization: Group similar questions into themed sections for easier navigation.
- Enhance user experience: Prevent respondents from feeling overwhelmed by long forms.
- Enable logic jumps: Direct respondents to different sections based on their answers.
- Encourage completion: Bite-sized sections make forms less intimidating, increasing the chances of completion.
Step-by-Step Guide to Adding Sections in Your Google Form
Follow these simple steps to add sections to your Google Form:
1. Go to Google Form
Log in to your Google Forms accounts and create a new form or open an existing one.
2. Go to Section Icon
In the form editor, find the Add Section button. It’s represented by two rectangles (≡≡) and is located on the right-hand menu under the question options.
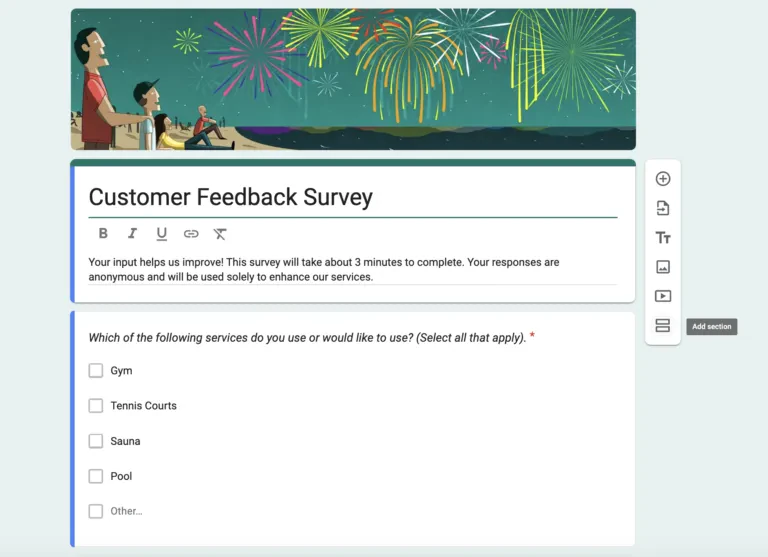
3. Add a New Section
- Click the Add Section button. A new section will appear below your current question.
- Name your section by clicking on the “Untitled Section” header and entering a descriptive title. You can also add a description if needed.
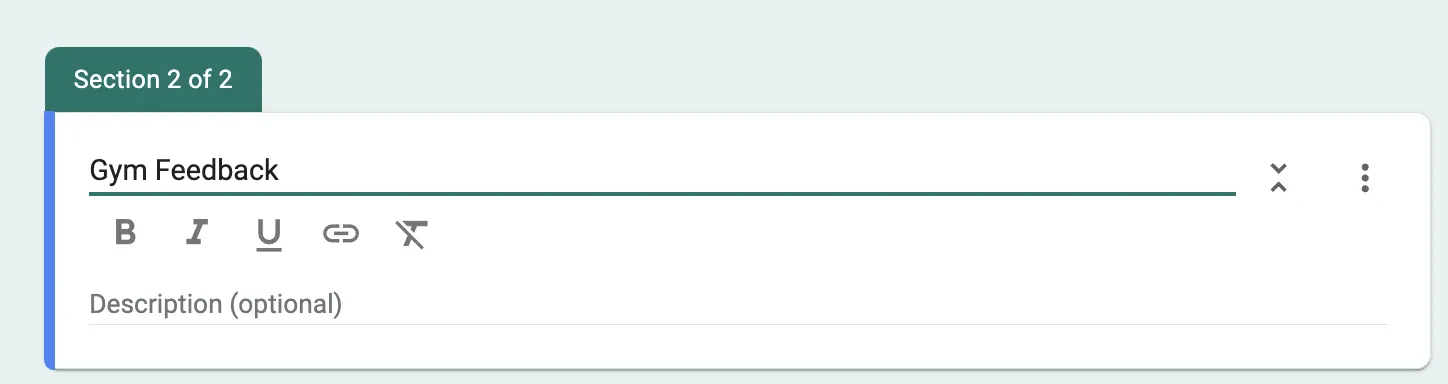
4. Move Questions to the New Section
If you’ve already added questions to your form, you can drag and drop them into the newly created section.
5. Customize Section Navigation (Optional)
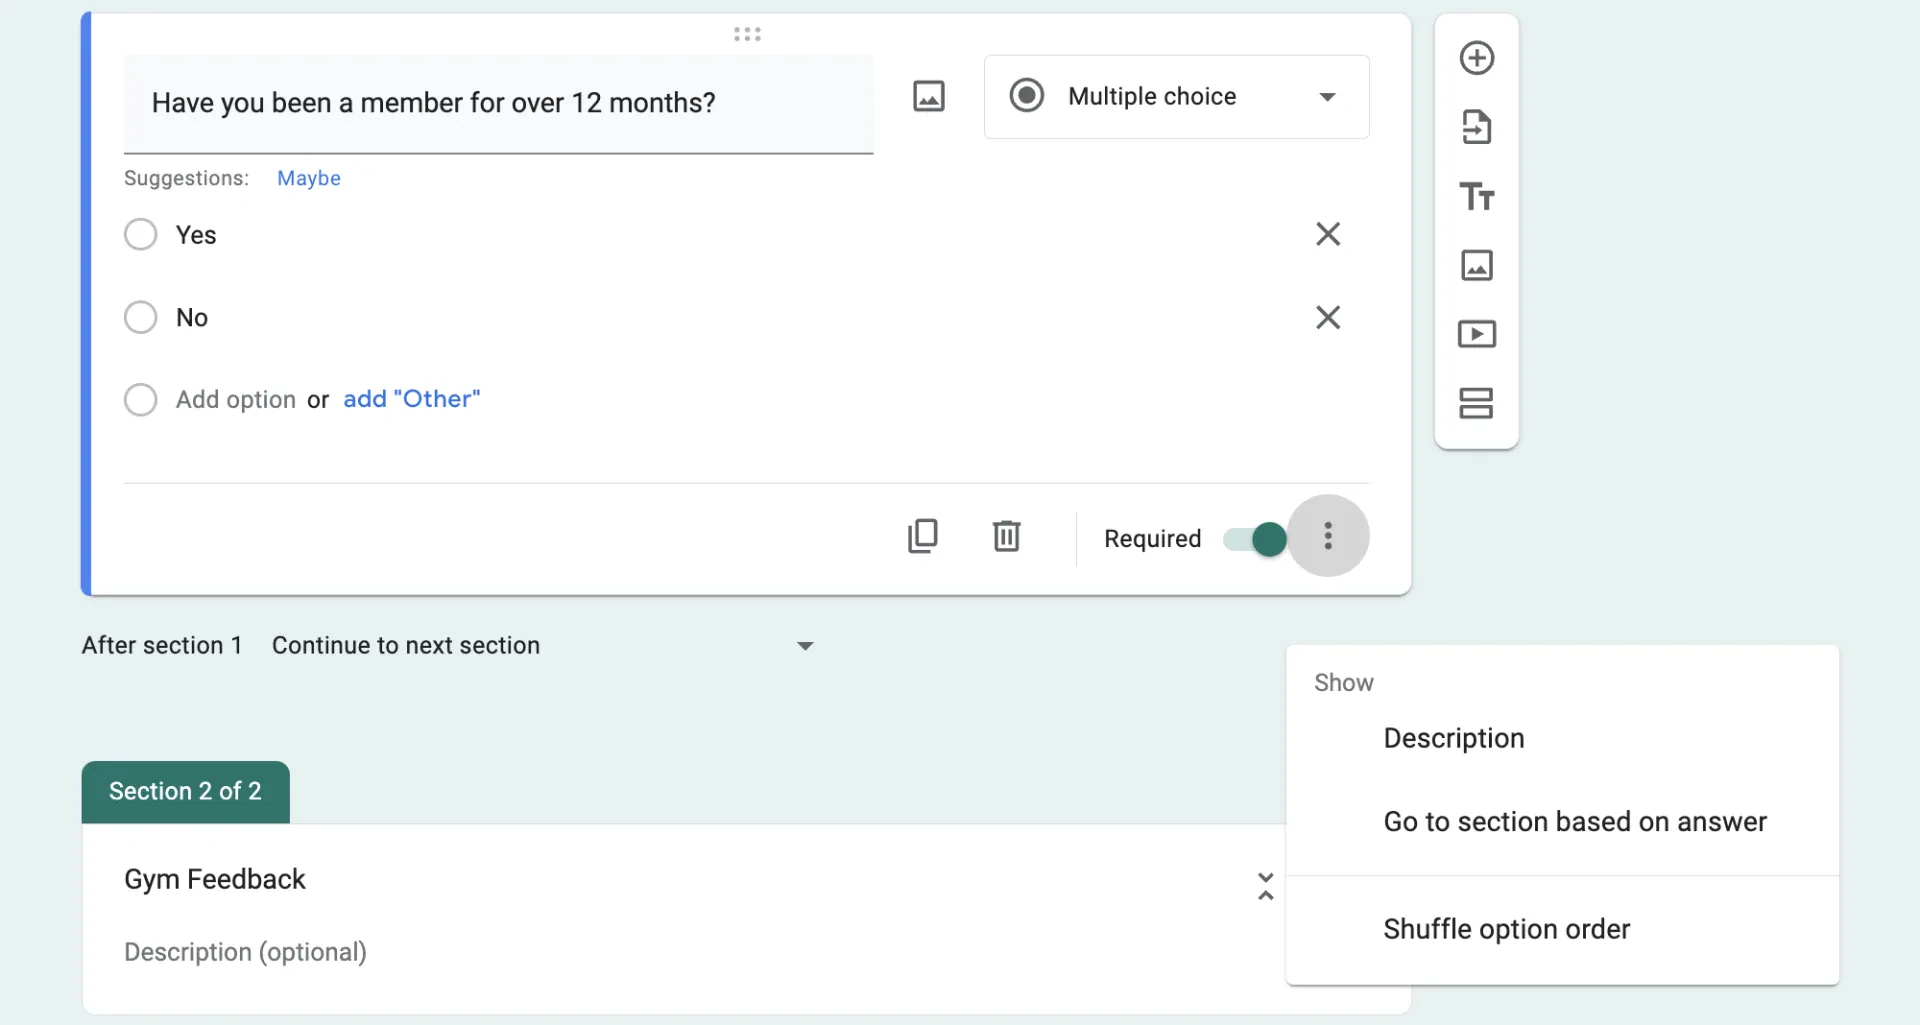
Google Forms allows you to guide respondents through the form using logic. To set this up:
- Select a question in the previous section.
- Click the three-dot menu (⋮) at the bottom right of the question.
- Choose Go to section based on answer and specify which section to navigate to based on each response.
6. Preview and Test
Click the Preview icon (eye symbol) to see how your form looks to respondents. Test the navigation between sections to ensure everything works smoothly.

Limitations of Google Forms Customization
While Google Forms offers several ways to personalize your forms, it has some limitations:
- Font and Color Options: The choices are limited compared to dedicated form builders like Jotform or Activity Messenger.
- Design Flexibility: You can’t adjust the layout or arrange questions freely.
- Brand Integration: Advanced branding options, such as adding custom CSS, are not available.
Alternatives to Google Forms
If you need advanced customization, consider these alternatives:
- Jotform: Known for its drag-and-drop editor, extensive templates, and branding flexibility.
- Activity Messenger: Perfect for creating forms with integrated email marketing and SMS reminders.
- Typeform: Offers sleek, conversational forms for a modern user experience.
Read more about the 7 best form builders on the market in this in-depth analysis.
Conclusion
By customizing Google Forms, you can create professional forms that match your companies branding.
Whether it’s changing colors, adding your logo, or using conditional logic, these small tweaks can greatly enhance your forms. However, if you need more advanced features, exploring alternatives like Jotform or Activity Messenger may be the next step for your organization.
If you’re looking to take your form building to another level, book a demo with an Activity Messenger expert.