Organizing ticketed events, such as a year-end gala, a theatre show, or a fundraising dinner, often requires more than just collecting payments. You want attendees to choose their seats, select meal preferences, and receive scannable tickets that can be added to their phones for easy access.
Activity Messenger offers a drag-and-drop form builder and seat map system that integrates directly with ticket sales and attendance management, taking the stress out of planning your next event.
In this short guide, based on a demo walkthrough, you’ll learn how to create a ticketed event inside a form, design a seat map, collect attendee information, manage check-ins, and communicate with guests all in one place.
This article is inspired by insights from Olivier Rousseau, co-founder of Activity Messenger, who brings over twelve years of experience in online registration for kids’ sports programs.
💡 Did you know? Activity Messenger acts as a Canadian alternative to Eventbrite, offering lower fees and an all-in-one platform for event management. You can also check out this blog post for a comparison of the best event ticketing platforms in Canada.
Seat assignments improve the attendee experience and simplify event logistics. When attendees choose their seats during purchase, you cut down confusion at the door and make room setup (name tags, special dietary seating, VIP sections) much easier.
In addition, scannable tickets and integrated attendance lists let you run fast check‑ins and track who is sitting where.
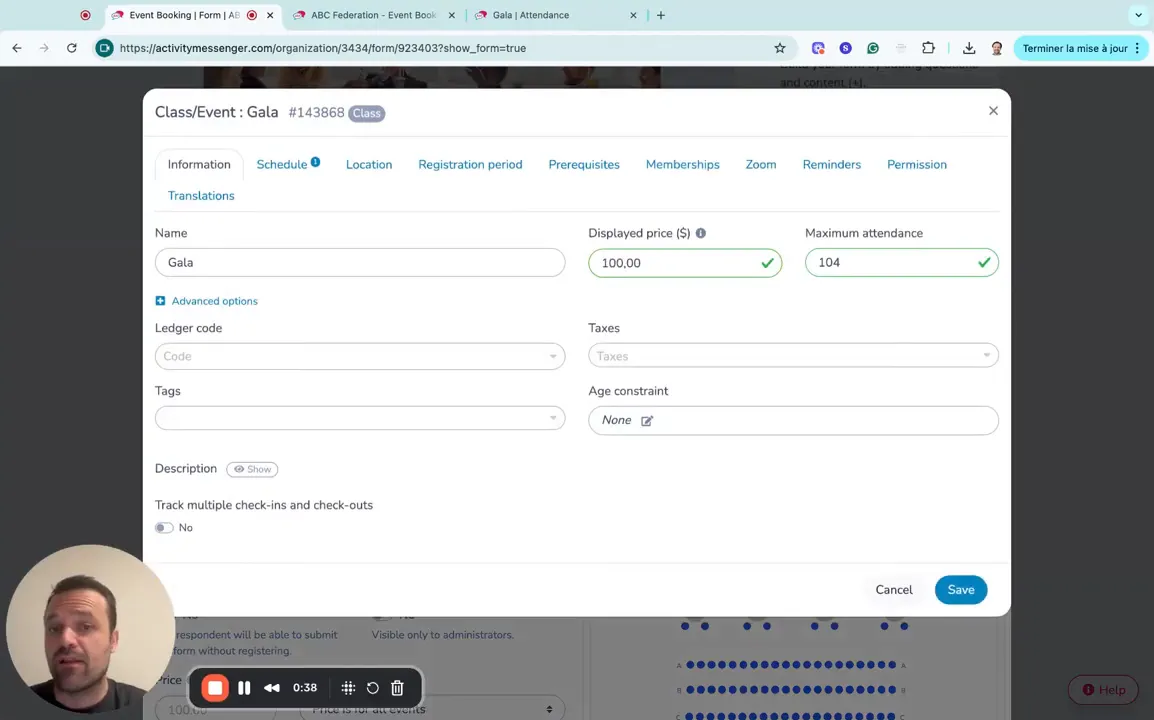
Start in the form builder and add a ticket sale question. Editing that question allows you to define the event itself:
These are the foundational settings the seat map and checkout will read from. When the event is defined, you’re ready to build the seat map that attendees will interact with.
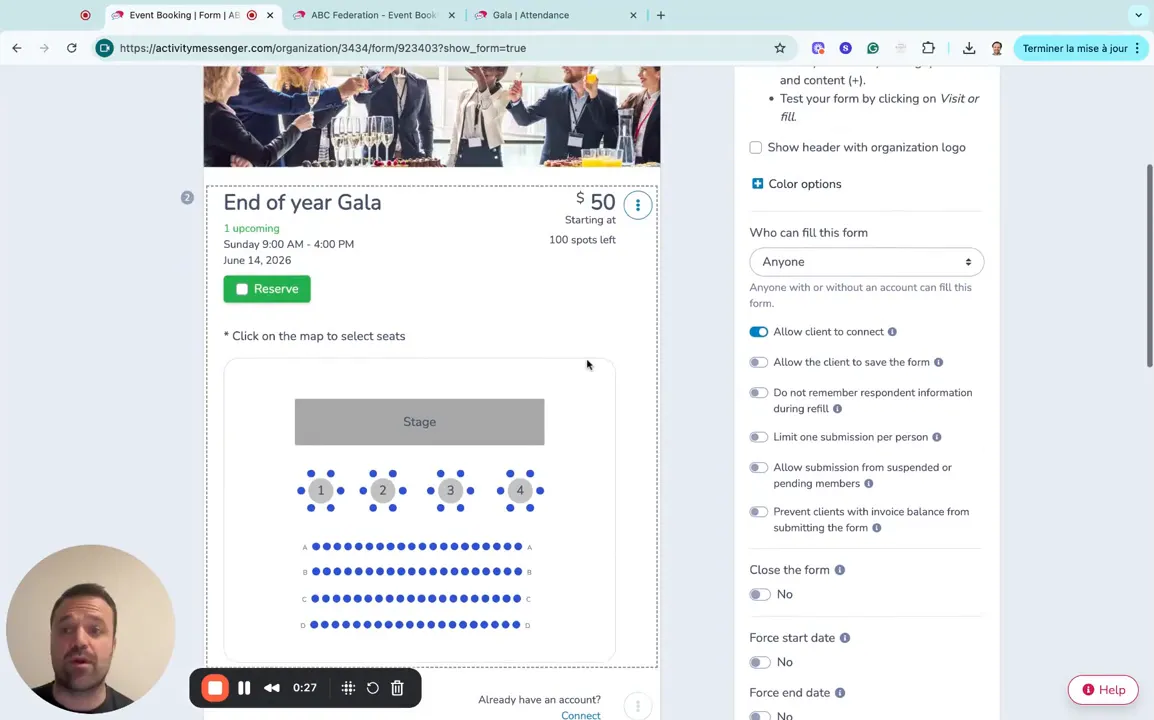
Click “manage my seat map” to open a visual editor. You can create as many seat maps as you need. For example, separate maps for balconies or different rooms. The editor supports different item types:
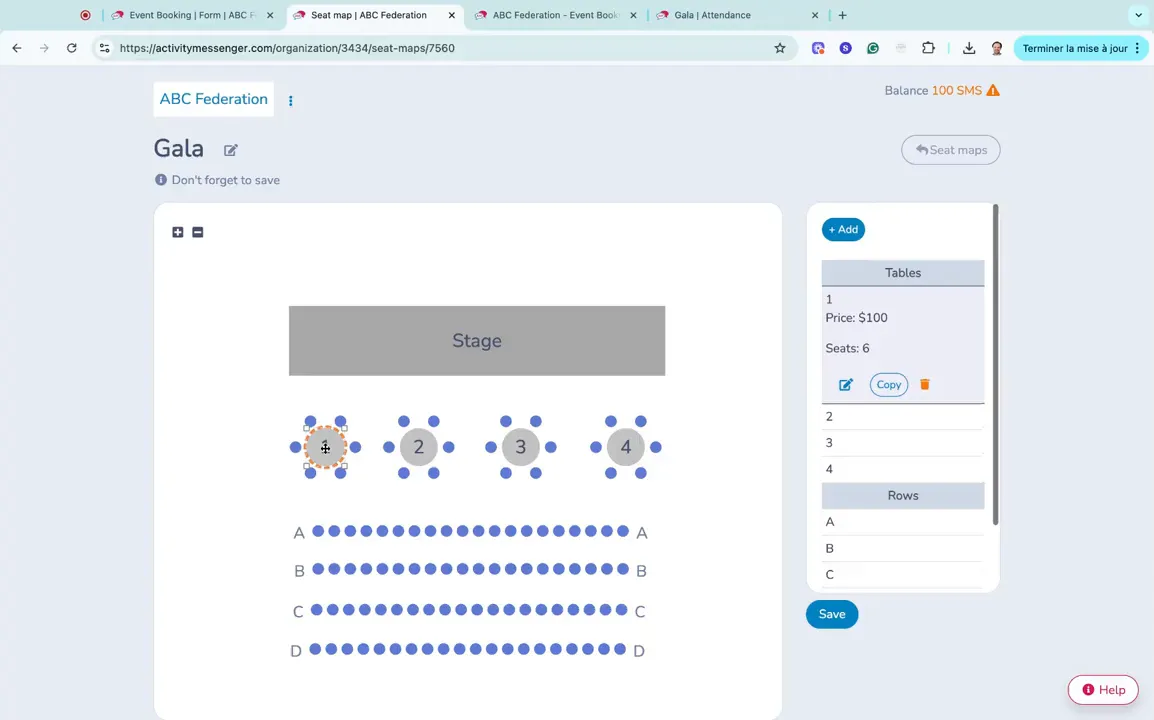
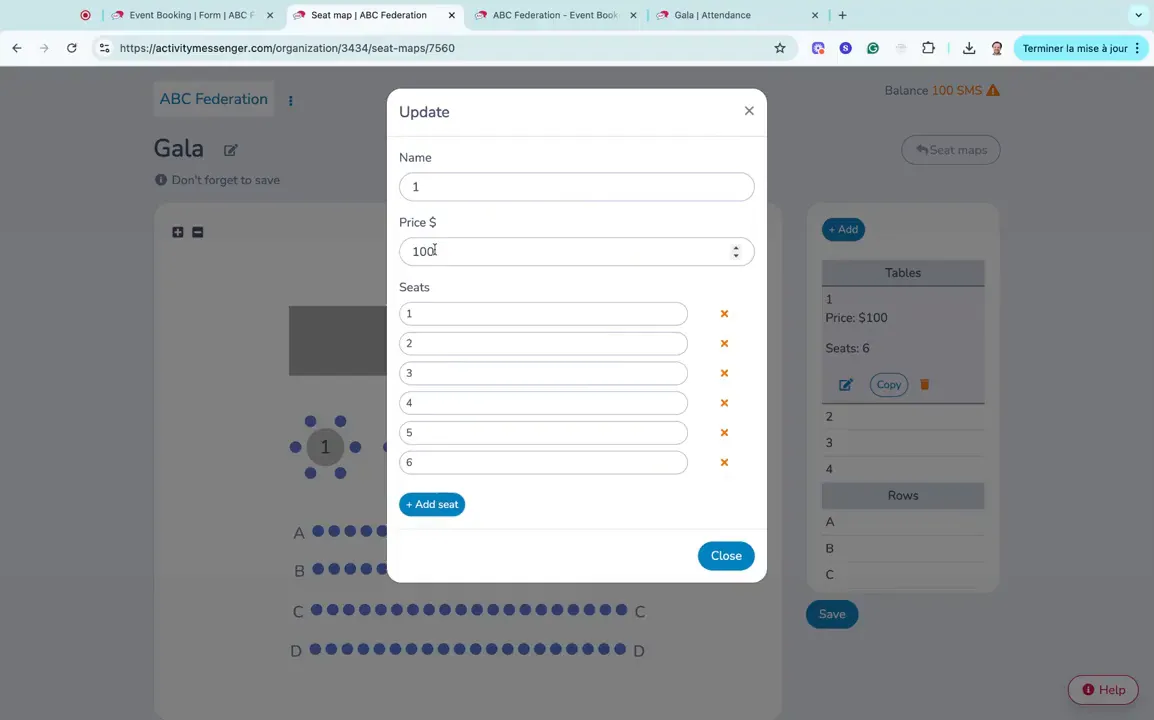
Each item has editable properties. For example, a table might show a price and the number of seats. You can change the seat count, set a unique price for that table, rename the table, move it around the map, and add or remove items until your venue layout looks right.
Rows are useful for continuous seating areas. You can set the seat count and a per‑seat price. If a section is cheaper (e.g., back rows), set the lower price on that row. After building the map, click save to import it into the ticketing question inside your form.
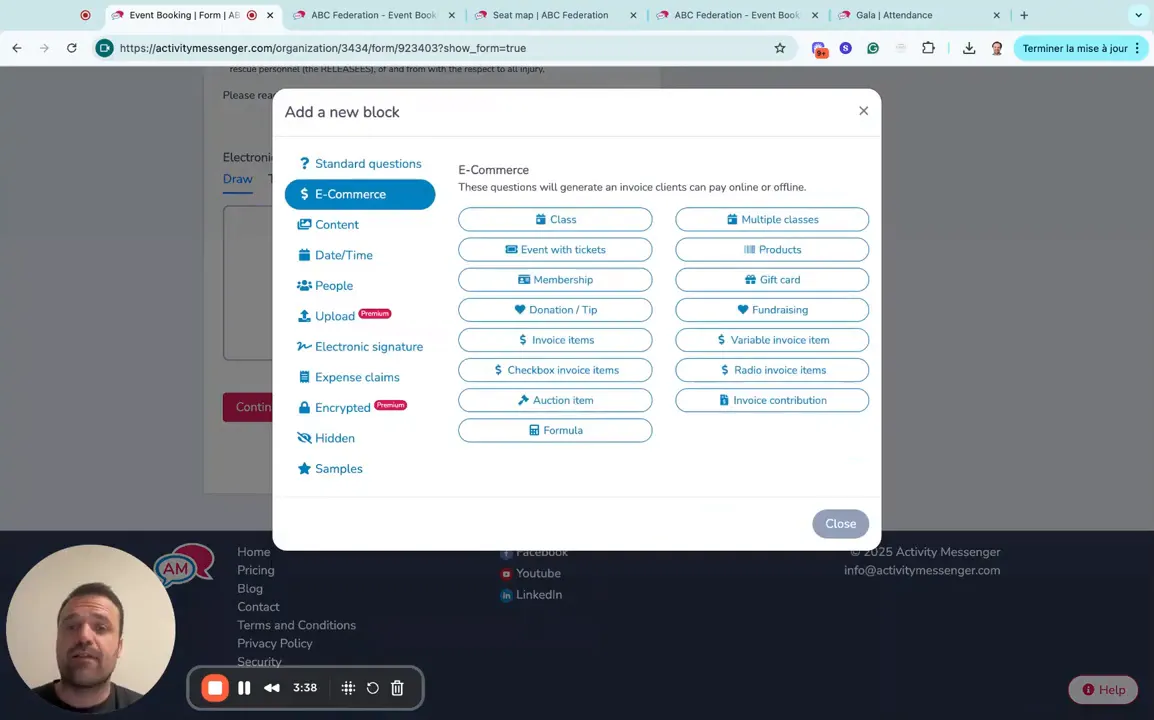
Beyond seat selection, decide what ticket holder information you need. Activity Messenger lets you collect:
You can also add eCommerce items to the form, such as flowers, merch, or donations, to upsell during checkout. These options appear on the same invoice as the tickets so attendees can pay for everything in one transaction.
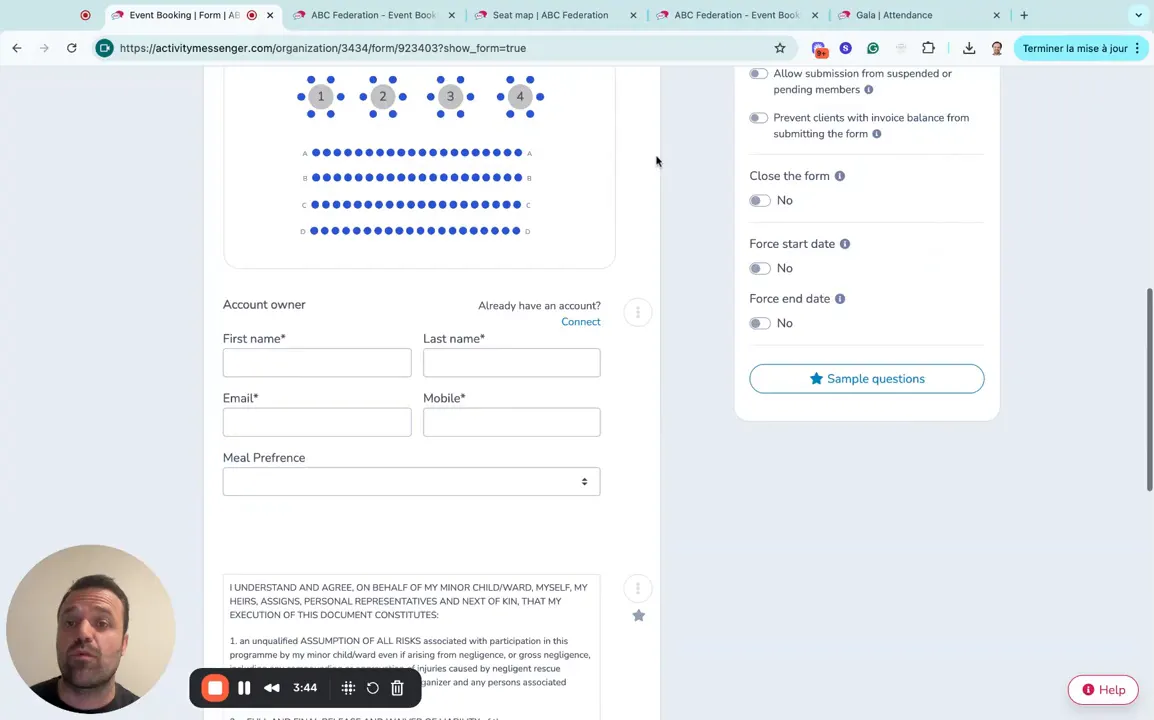
From the public side, visitors click to reserve seats and see the seat map you created. Seats that have already been taken are shown in grey, so users know what’s unavailable.
Hovering or clicking a seat reveals its label (for example, Seat 14, Row A) and the ticket price for that seat. Visitors select seats, and the system builds an invoice based on the number and type of seats chosen.
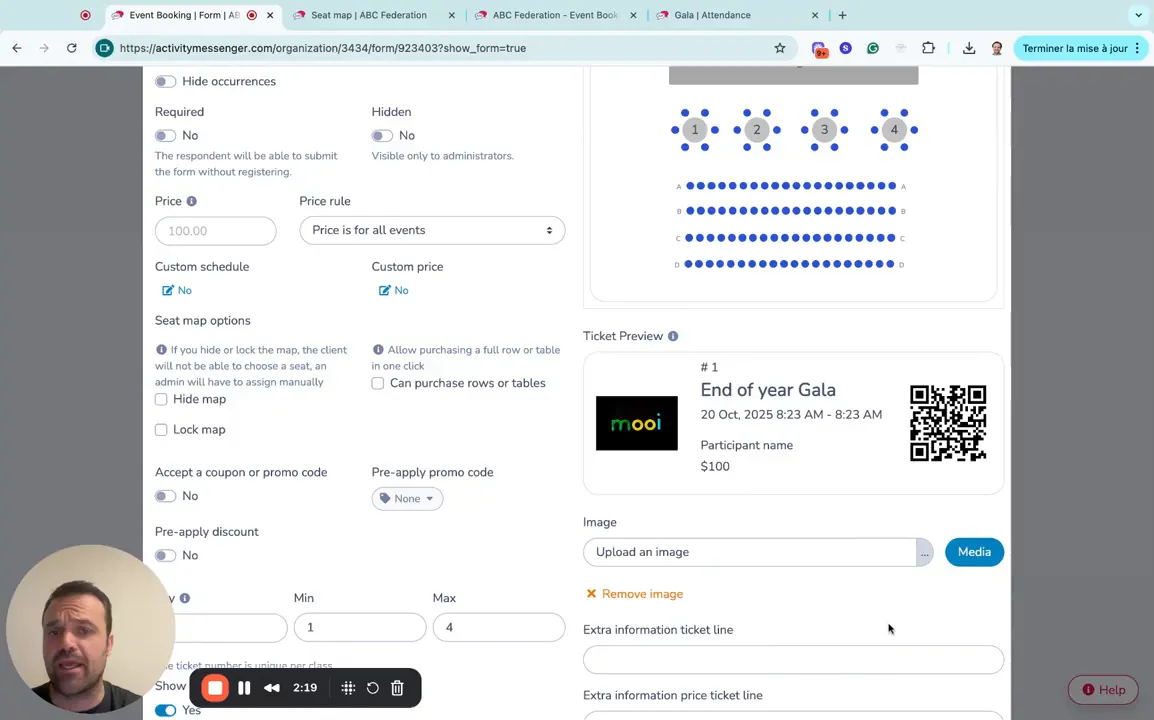
After selecting seats, visitors complete any required ticket holder fields (names, meal choices) and proceed to payment. Once paid, they receive a ticket preview and can add the ticket to their Apple or Google Wallet. The ticket is then scannable at your event entrance.
As people register, the platform builds an attendance list you can use onsite. Key functions include:
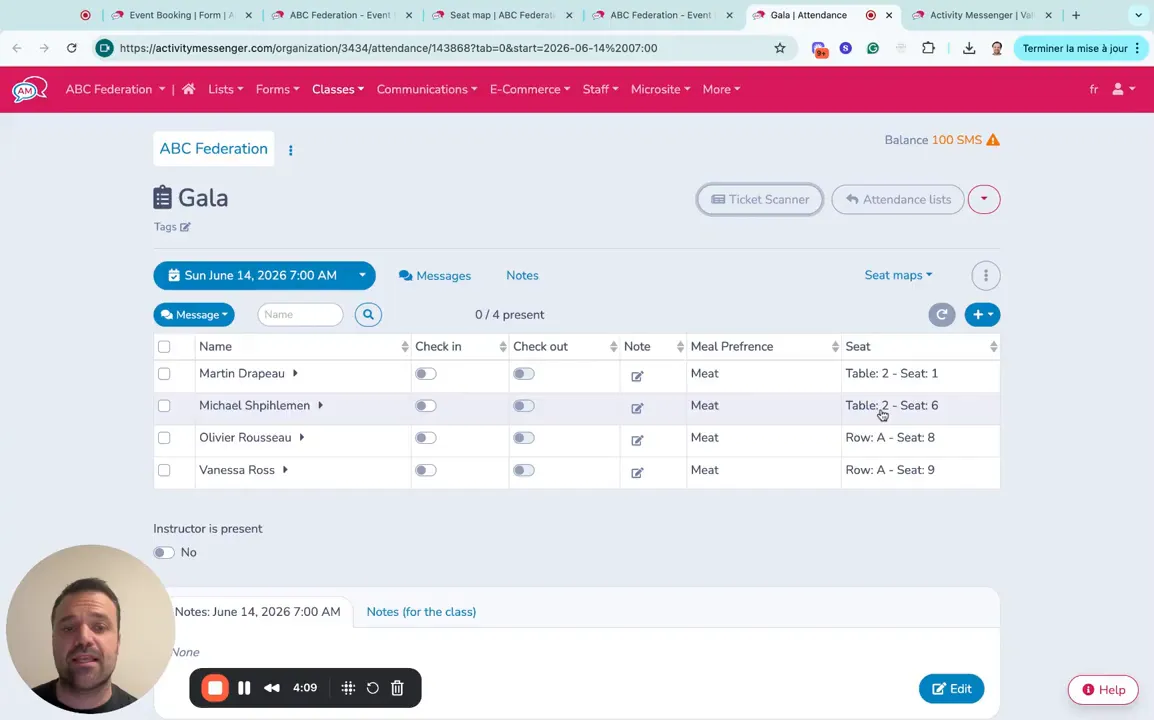
This structure makes the setup on the day of the event much smoother: create name tags from the attendee list, arrange tables by meal preference or special requirements, and quickly verify payments at the door.
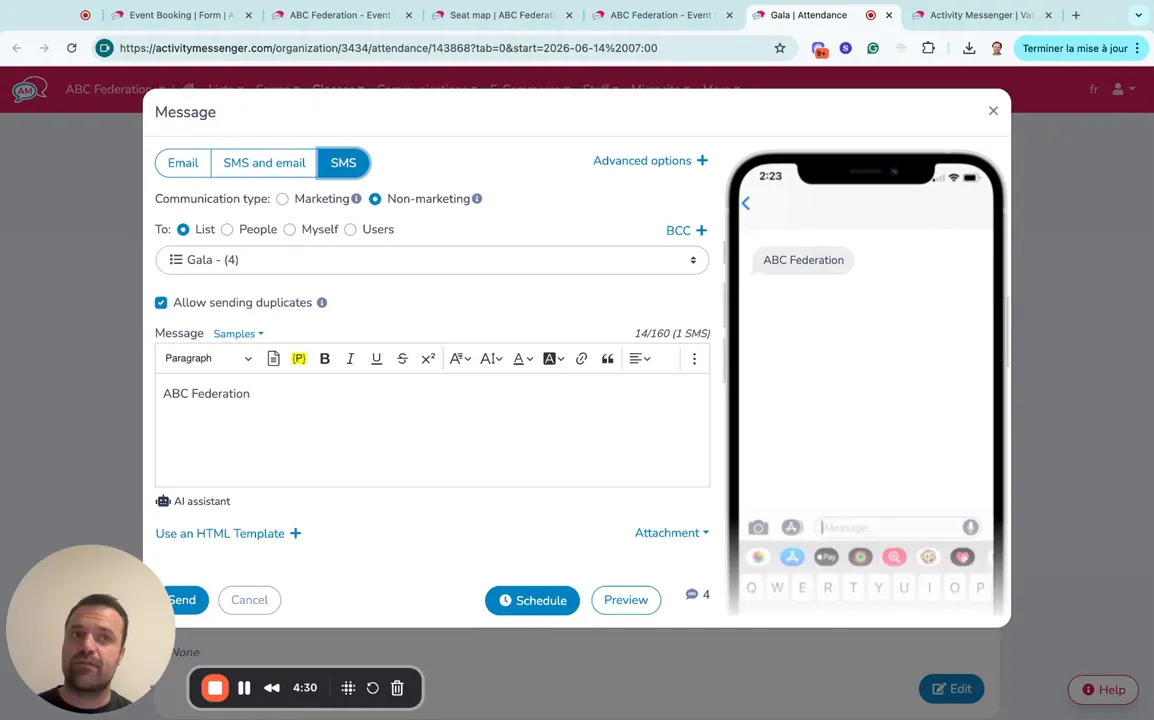
Activity Messenger allows you to message attendees directly. Need to tell everyone parking has changed or the start time is delayed? Send a text to all ticket holders or targeted groups, such as VIPs or individuals at a particular table. Messaging reduces last‑minute confusion and keeps your guests informed.
📌 Read More: Need to cancel your event? Check out this blog post for the best practices on cancelling your event efficiently by keeping guests informed with Activity Messenger.
Ensure seamless seat selection, easy check-ins, and hassle-free attendee management with Activity Messenger.
Book a demoYes. When you create tables or rows in the seat map editor, you can assign a price per table or per seat. The ticket question uses these prices to generate the invoice during checkout. This allows front rows or VIP tables to be priced higher than back rows.
Add questions to your form (text, multiple choice, or dropdown) that apply to the ticket holder. You can require fields like meal preference, dietary restrictions, or accessibility needs. These responses will appear on the attendance list and can be exported for catering and seating assignments.
Yes. After purchase, attendees receive a scannable ticket preview, which can be added directly to their Apple Wallet or Google Wallet for quick access at the event entrance.
Use the attendance list to manually check attendees in or use the ticket scanner. Scanning a ticket marks the attendee as checked in and can prevent duplicate entries. The system supports check-in and check-out, allowing you to track attendance duration if needed.
Yes. You can send messages (email or text) to all attendees or to a subset (for example, everyone at Table 5). Use messaging to share last‑minute updates like parking changes or schedule delays.
Managing ticket sales, seat assignments, and attendee details doesn’t have to be complicated or stressful. With Activity Messenger, you can design interactive seat maps, let guests pick their exact seats, collect meal preferences and extras, and generate scannable tickets.
Attendance tracking, check-ins, and on-the-fly communication are all built into the same platform, so you can stay organized and focused on creating a seamless event experience. Check out the full video above for a step-by-step visual tutorial to get started today.
💡 Ready to take the hassle out of ticketed events? Book a demo today to see how Activity Messenger can streamline seat selection, checkout, and attendance management from start to finish.


