
Managing ticket distribution for an event can be a daunting task, especially if you have a large guest list. With a ticketing solution like Activity Messenger, you can import a list of attendees and efficiently send them their tickets.
Whether you’re hosting a sporting event, a dance recital, or a community fundraiser, this guide will walk you through the steps to import your attendee list and send event tickets in bulk.
Step 1: Prepare Your Attendee List
Step 2: Import Your List into the Ticketing System
Step 3: Generate and Send Tickets
Step 4: Monitor and Manage Tickets
Learn more: 8 best event ticketing tools
Step 1: Prepare Your Attendee List
Before importing your list, make sure it is properly formatted. Most ticketing systems accept CSV (Comma-Separated Values) or Excel files. Your file should contain:
- First Name
- Last Name
- Email Address (required for e-ticket delivery)
- Phone Number (optional for SMS ticket delivery)
- Ticket Type
- Quantity
- Unique Identifiers (such as registration numbers, if needed)
Formatting Tips:
- Make sure all email addresses are valid.
- Remove duplicate entries to avoid sending multiple tickets to the same person.
- If using phone numbers for SMS delivery, format them in international format (e.g., +1 555-123-4567 for U.S. numbers).
Read more: 7 Reasons why your small business should not have an App
Step 2: Import Your List into the Ticketing System
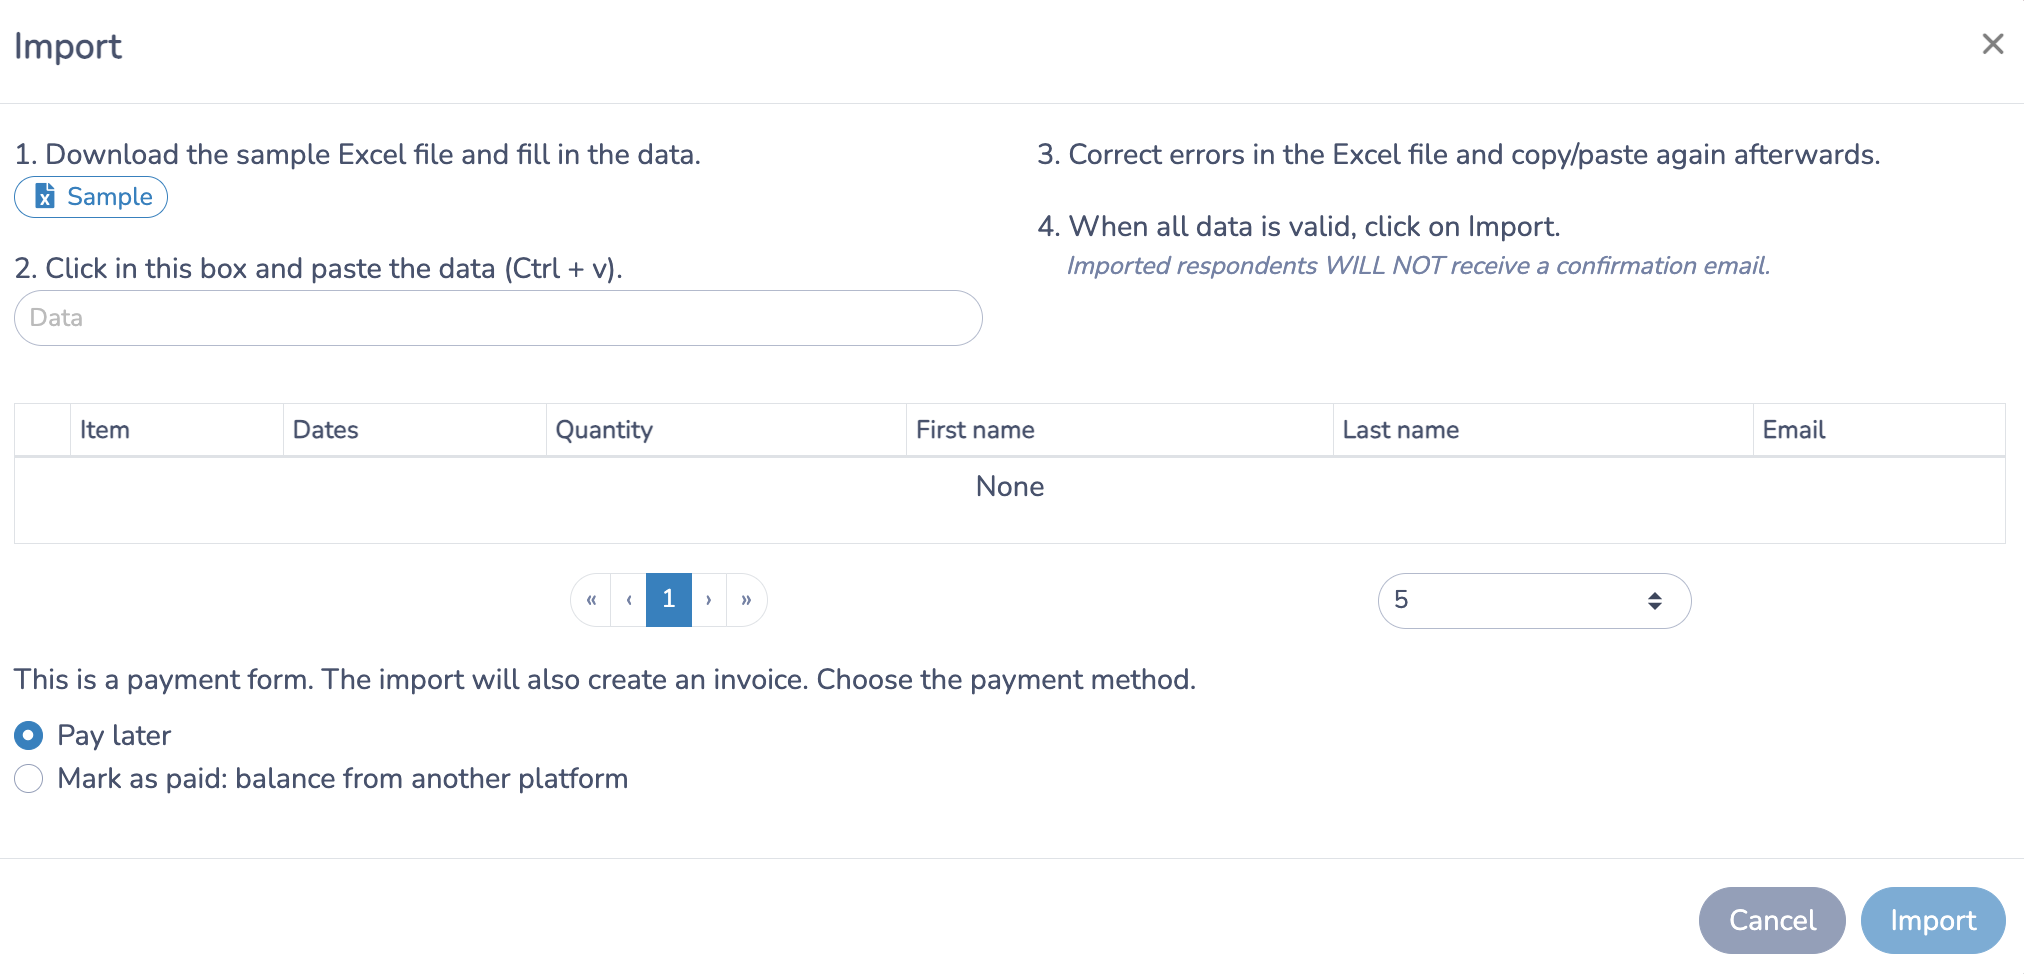
Most event management platforms, like Activity Messenger, Eventbrite, and Ticket Tailor, allow you to upload your attendee list. The process typically involves:
- Navigate to the import section: Look for an option such as “Import Attendees” or “Bulk Upload.
- Uploading your file: Select your CSV or Excel file and match the columns to the platform’s required fields.
- Validate the data: The system may highlight errors (such as missing emails or incorrect formatting). Fix them before proceeding.
- Confirm the import: Once validated, confirm the import to process the data.
Step 3: Generate and Send Tickets
The next step is to generate and send tickets once you have successfully imported your attendee list.
Send via email:
Most platforms allow for automated email ticket delivery. You can:
- Customize the email subject and body.
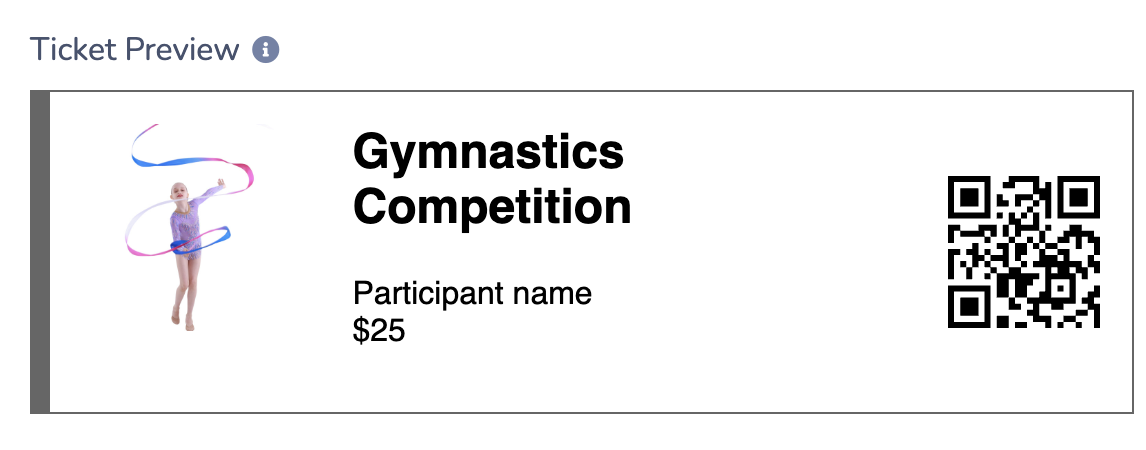
- Include a QR code or barcode for easy check-in.
- Include a PDF ticket for printing.
Add event details such as location, time, and instructions.
Send via SMS:
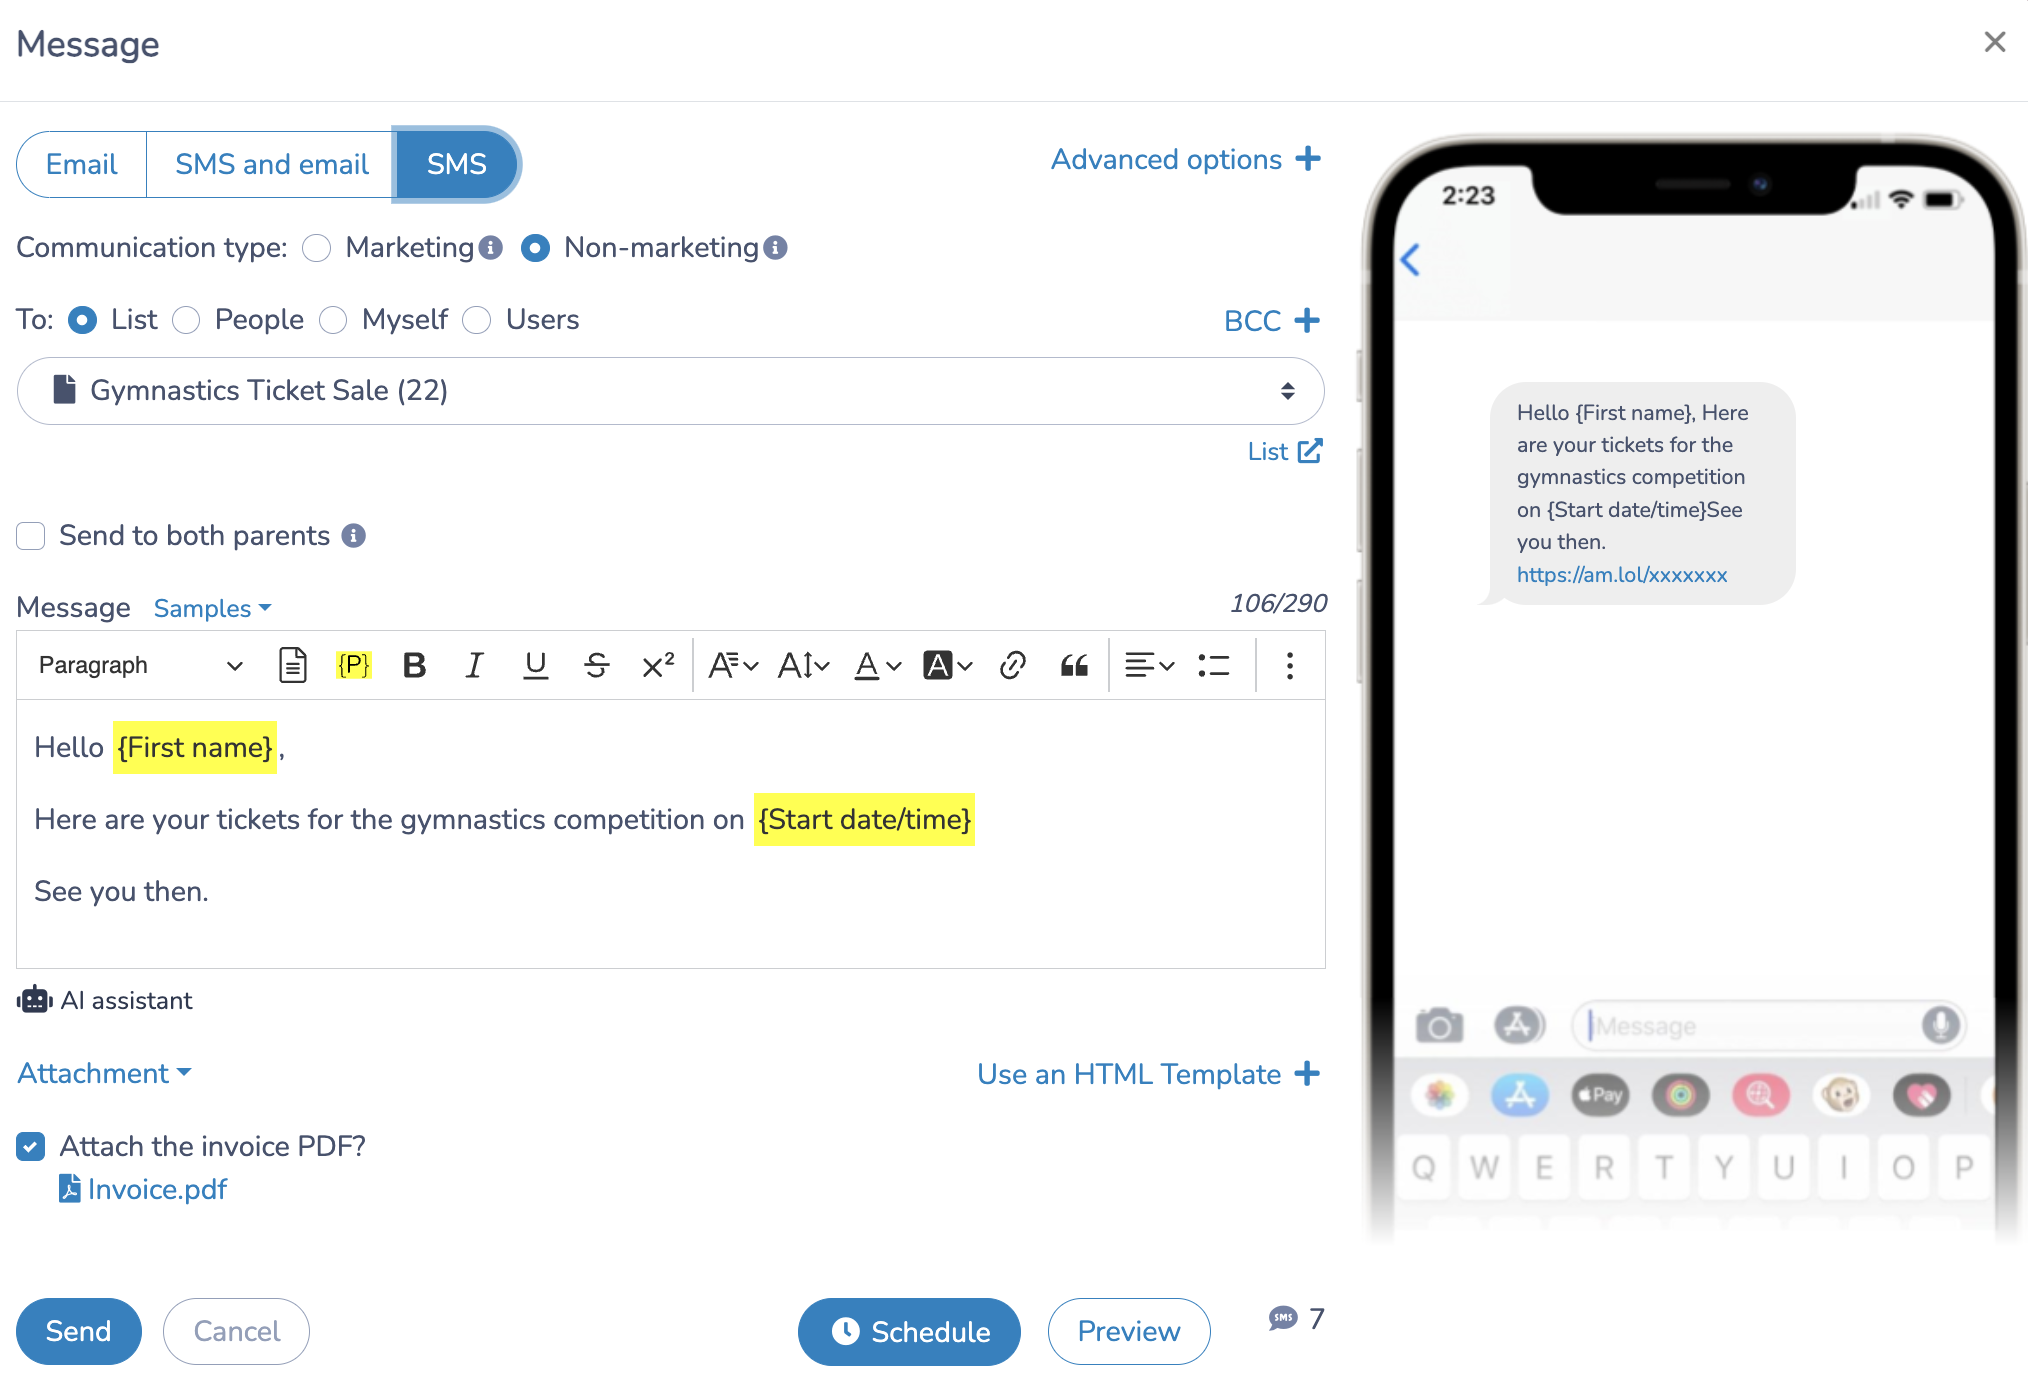
Some platforms, such as Activity Messenger, allow you to send tickets via SMS. This is useful for last-minute reminders and ensures that attendees have quick access to their tickets on their phones.
Storing Tickets:
Once attendees receive their tickets, they need a place to store them. Sure, they can save them in their email inbox, but those are crowded and harder to find on the day of the event, which can cause delays at the door.
Make sure to provide an easy link for attendees to save the tickets in their Apple or Google Wallet.
Step 4: Monitor and Manage Tickets
Once tickets are sent, keep track of deliveries and confirmations. Use your event platform’s dashboard to:
- Track Open Rates: See how many emails were opened.
- Resend Tickets: In case an attendee did not receive or lost their ticket.
- Manage Attendance Lists: To check who has received and confirmed their tickets.
- Automate Reminders: Send SMS or email reminders closer to the event date.
Final Thoughts
Importing a list to send bulk event tickets is an efficient way to manage large guest lists. By ensuring your attendee data is clean, using a reliable ticketing platform, and utilizing both email and SMS delivery, you can streamline the process and improve the attendee experience.
If you’re looking for a ticketing solution that supports bulk imports and automated delivery, consider using Activity Messenger to simplify your event registration and ticketing workflow.
Ready to Get Started?
Book a demo with an Activity Messenger expert.