
Building a summer camp website involves more than choosing a template and adding a few photos. Parents visiting your site want to know what your camp offers, which weeks are available, how much it costs, and what happens after they click “register.”
That means your website needs to do more than look professional: it needs to help families find the right program and move through registration without unnecessary steps.
A summer camp website can also become the place where families find schedules, policies, staff information, optional purchases, and their account details. The more of these pieces you can connect, the less time your staff spends maintaining separate systems.
This guide walks through how to build a summer camp website from the ground up, including what pages to create, what information parents are looking for, and how registration fits into the site.
Key Takeaways:
- A good camp website should help parents understand your programs, find the right dates, and register without having to search through several different systems.
- Camp-specific information such as weekly themes, age groups, staff, drop-off procedures, what to bring, and cancellation policies should be easy to find.
- A summer camp website builder that connects directly to registration can keep forms, schedules, payments, and other information in the same system.
- Mobile design matters because parents often research and register for camps from their phones.
- Returning families benefit from features such as client logins, while optional purchases such as merchandise and extended care can be handled alongside registration.
- Before choosing a summer camp website builder, look at how well it integrates with the systems you already use to run your camp.
Table of Contents
- Step 1: Decide What Your Summer Camp Website Needs to Do
- Step 2: Map Out Your Camp’s Pages
- Step 3: Set Your Branding
- Step 4: Build a Homepage That Answers Parents’ Questions
- Step 5: Add Registration Directly to Your Website
- Step 6: Add a Client Portal and Optional Purchases
- Step 7: Test Your Website on Mobile
- Step 8: Publish and Share Your Website
- How to Build Your Summer Camp Website with Activity Messenger
- Frequently Asked Questions
- Final Thoughts on How to Build a Summer Camp Website
Step 1: Decide What Your Summer Camp Website Needs to Do
Before choosing a template or writing your homepage, decide what you want parents to accomplish on your site.
A summer camp website should help families:
- 🏕️ Understand what your camp offers
- 👧 Find programs that match their child’s age and interests
- 📅 Compare camp weeks and dates
- 💰 See pricing and available discounts
- 👥 Learn about your staff and approach
- 📋 Find important policies and practical information
- 📝 Register and pay online
- 🔐 Return later to access their account or registration details
This is also the right time to think about what happens behind the scenes.
Your website may need to connect with registration forms, schedules, payments, waivers, client accounts, and merchandise. A summer camp website builder that connects these pieces can save you from maintaining the same information in multiple places.
👉 The goal is to decide what the website needs to accomplish before you start worrying about how it should look. Once you know what your site needs to do, you’re ready to actually build a summer camp website that supports it.
Step 2: Map Out Your Camp's Pages
The next step in how to build a summer camp website is mapping out the pages.
A typical summer camp website might include:
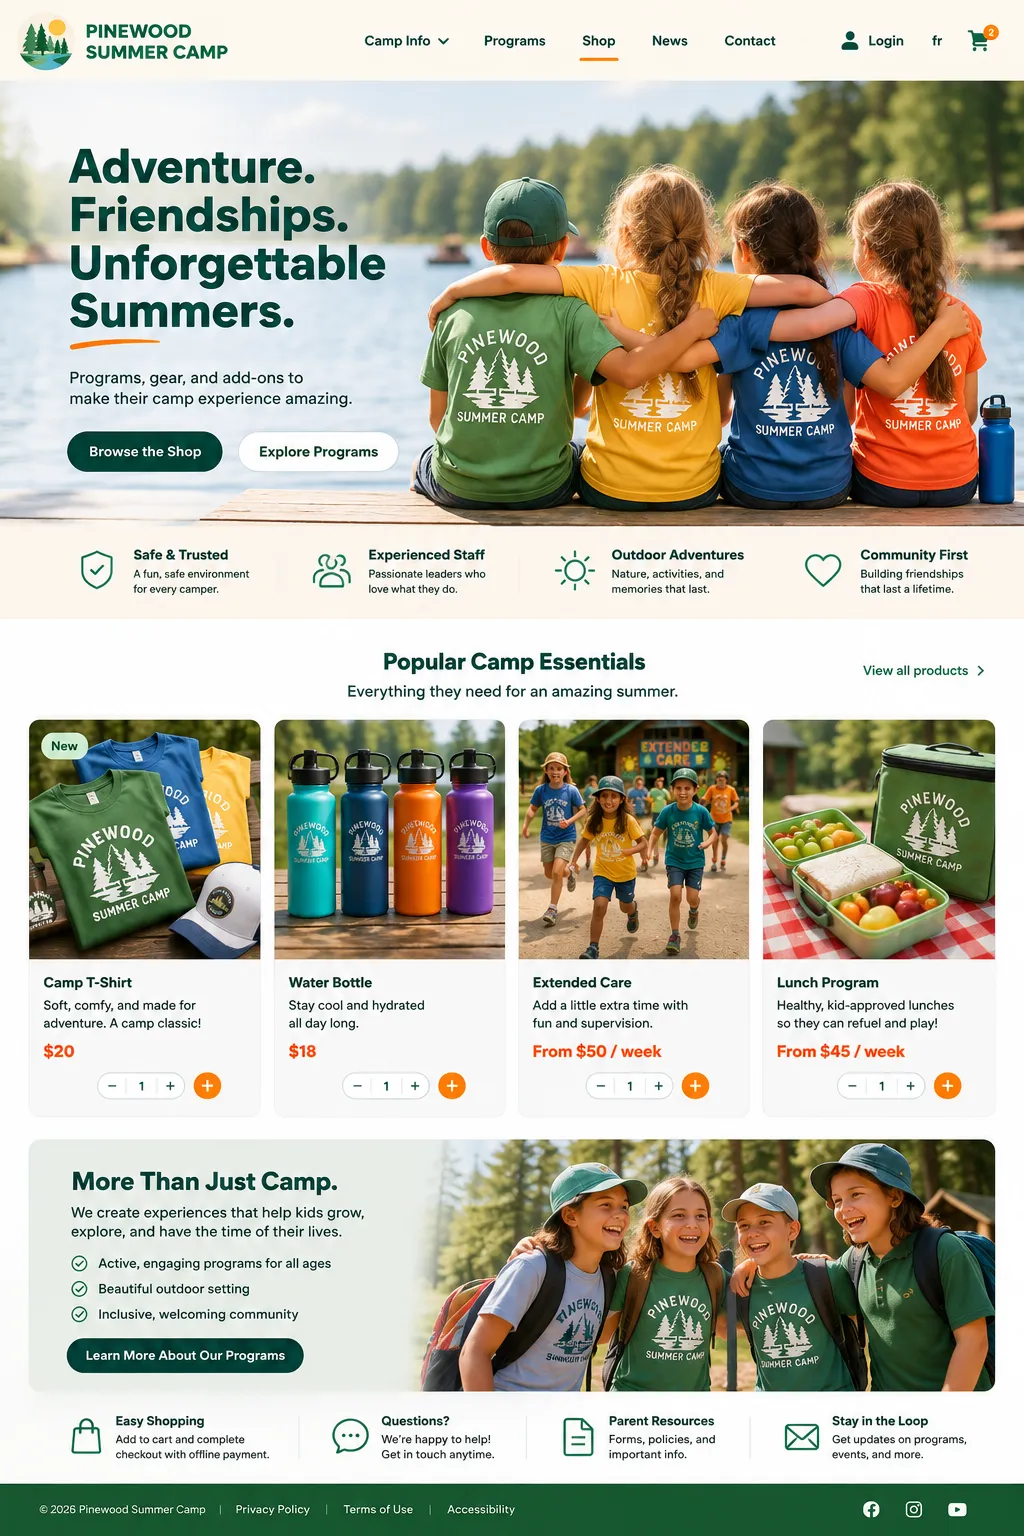
- 🏠 Home: Give visitors a quick overview of your camp, who it is for, when it runs, and where to start.
- 🏕️ Camp Programs or Weeks: Break programs down by age group, theme, activity, or week.
- 📅 Schedule and Dates: Show camp dates, daily schedules, drop-off and pick-up times, and deadlines.
- 💰 Pricing: List the cost of each program clearly, including discounts and additional fees.
- 👥 Staff: Introduce your camp directors, counsellors, instructors, or other staff members.
- 🎒 What to Bring: Tell parents what campers need to bring each day.
- ❓ FAQ: Answer common questions about registration, allergies, medical information, cancellations, refunds, transportation, meals, and other policies.
- 📞 Contact: Give families an easy way to reach your team.
Depending on your camp, you may also want pages for testimonials, photo galleries, field trips, extended care, camper policies, or information about your facilities.
💡 If you’re using a summer camp website builder connected to your registration system, you may also be able to reuse information you already have.

With Activity Messenger’s website builder, existing registration forms, schedules, and other blocks can be reused on your pages, so you don’t have to recreate information that already exists in your account.
Step 3: Set Your Branding
Before building individual pages, establish the visual style for your website. You’ll need to choose:
- 🎨 Your primary and secondary colours
- 🔤 Fonts
- 🖼️ Logo placement
- 🧭 Navigation style
- 🔘 Button styles
- 📸 Image style
- ↔️ Spacing between sections
Your branding should feel consistent from the homepage through registration and account pages.
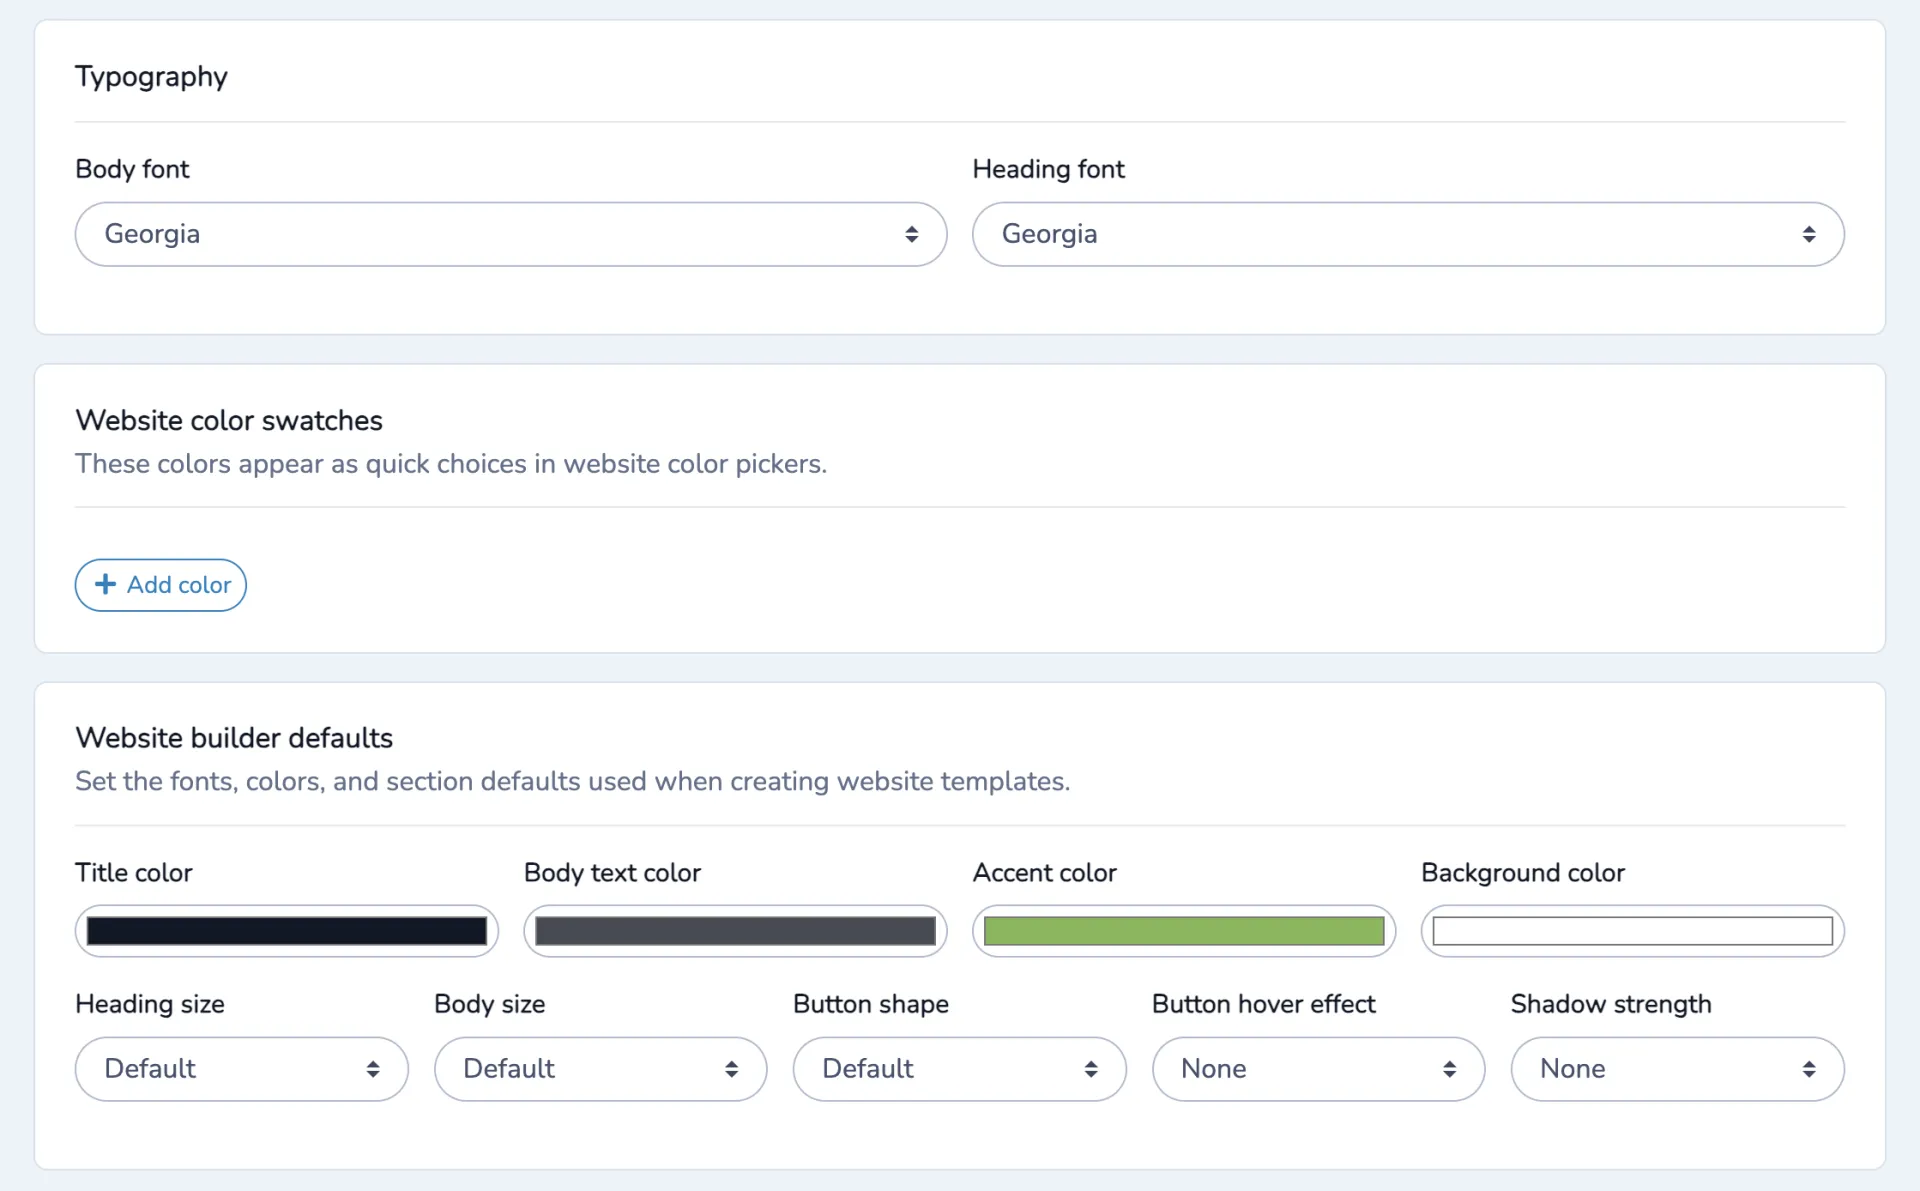
A summer camp website builder with centralized branding controls can make this easier. Instead of changing the appearance of every section manually, you can set your basic design choices once and apply them as you build additional pages. This is especially useful if several people on your team will be adding or updating pages throughout the year.
💡 Activity Messenger lets you set fonts, colours, navigation style, and spacing as part of the initial setup, then carries those choices across new sections as you build.
Step 4: Build a Homepage That Answers Parents' Questions
Your homepage is usually the first stop for a new family, so it should answer the most important questions quickly. This is often the section that makes or breaks your camp website, since it’s the page doing the most persuading.
A useful camp homepage can follow a simple structure:
1. Start with a clear hero section
Tell visitors what the camp is, who it’s for, and when it runs.
For example:
Summer Day Camp for Kids Ages 6 to 12
Weekly sessions from July 2 to August 23
Then give parents a clear button, such as “View Camp Weeks” or “Register Now.”
2. Introduce your programs
Show the different camp weeks, themes, age groups, or activity options. Keep the information brief and link to the full program details.
3. Make pricing easy to find
Parents shouldn’t have to dig through several pages to find out how much camp costs.
4. Explain what makes your camp different
This could include your activities, facilities, staff experience, small group sizes, outdoor programming, or other details that matter to your families.
5. Show parents what a typical day looks like
A simple example schedule can answer practical questions about activities, meals, outdoor time, and transitions before a family ever needs to contact your staff.
6. Add photos or testimonials
Photos from previous summers can help parents understand what a typical camp day looks like. Testimonials can also provide reassurance for families who haven’t attended before.
7. End with a clear next step
Give visitors an obvious way to continue, whether that’s viewing available weeks, contacting your team, or starting registration. Parents comparing several camps may only spend a few minutes on each website. Make those minutes useful.
Step 5: Add Registration Directly to Your Website
This is one of the most important parts of building a camp website.
A polished homepage can still create friction when the registration button sends parents to a completely different website. They may have to create another account, find the camp week again, and learn a new interface just when they’re ready to register.
Camp registration also tends to involve more information than a standard online purchase.
Depending on your program, you may need:
- 👨👩👧 Parent and camper information
- 🚨 Emergency contacts
- 🏥 Allergies and medical information
- 💊 Medication details
- 🚗 Authorized pickup contacts
- ✍️ Waivers
- 📸 Photo permissions
- 📝 Camp-specific questions
- 💳 Payment information
Rebuilding these forms in a separate website tool creates another system for your staff to maintain.
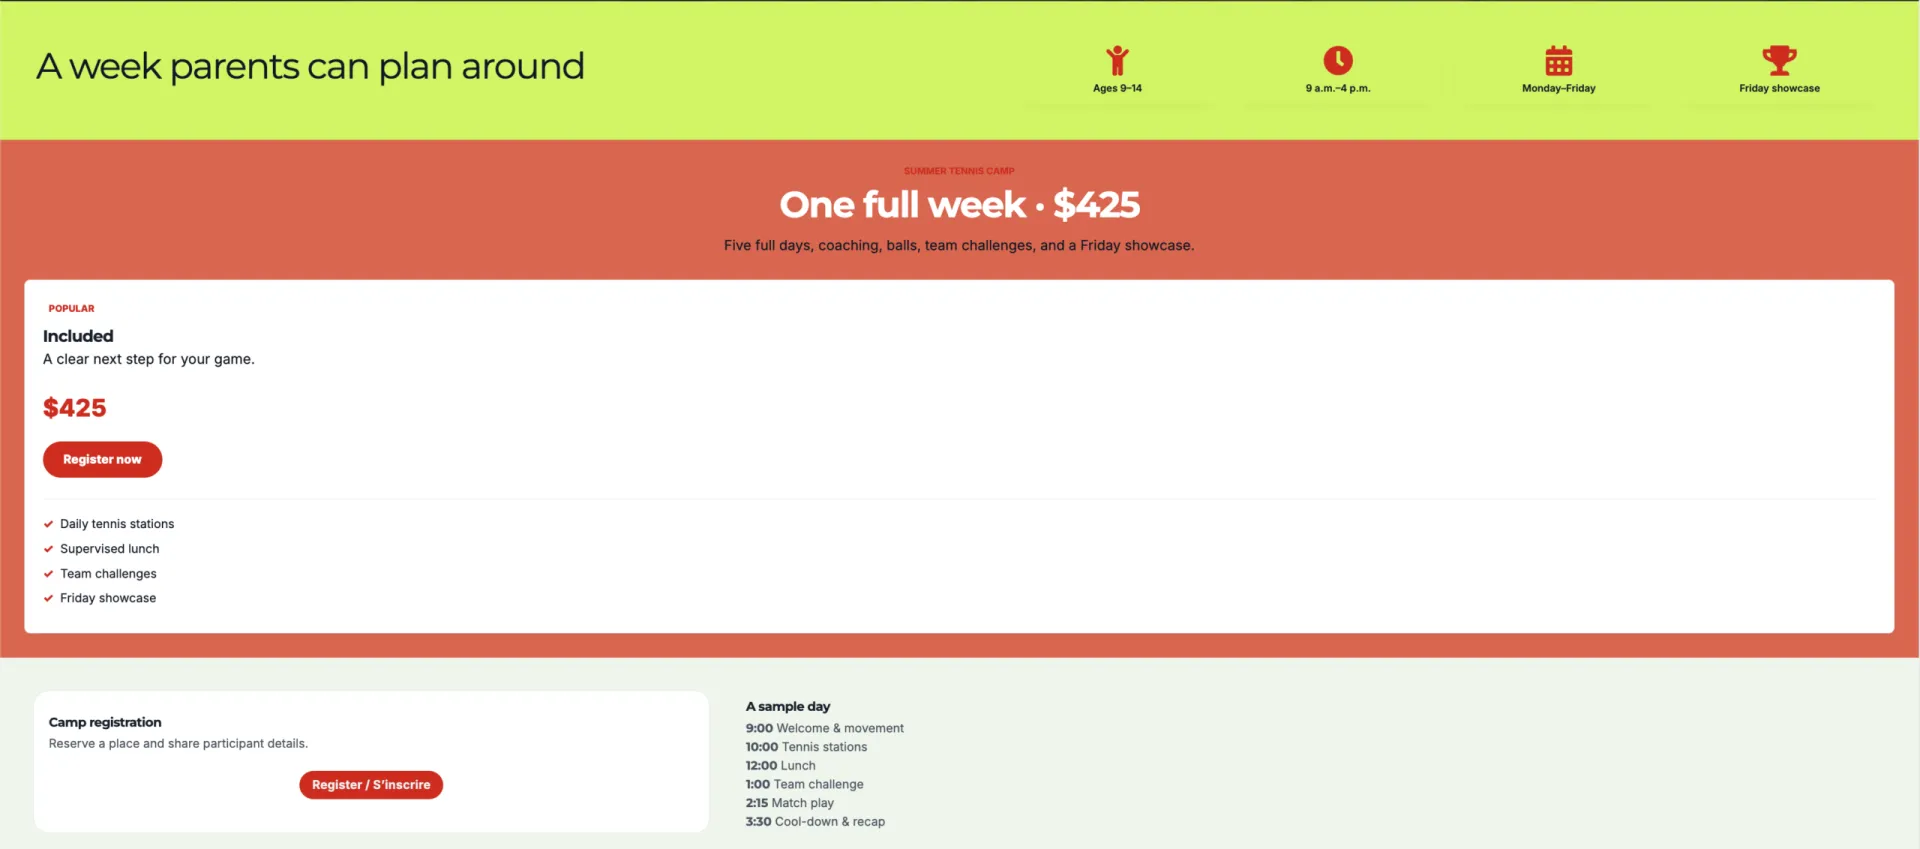
💡 Activity Messenger’s website builder takes this approach by letting you add the registration forms already in your account directly to your website.
When a parent selects a camp week, the registration process can lead directly to the relevant form and checkout, rather than sending every parent to one general registration page. Link each “Register” button to the appropriate camp week or session.
That makes it easier for a parent to move from:
Camp Week 3: Art & Creativity → Register
instead of:
Summer Camp → Registration → Choose Program → Find Week 3 → Register
Fewer steps can make a noticeable difference, especially when parents are registering more than one child or several weeks at once.
Step 6: Add a Client Portal and Optional Purchases
Summer camps often have returning families who register multiple children, book several weeks, or come back every year.
A client portal provides families with a place to access their account information after registration. Depending on the system you use, they may be able to view classes, memberships, registrations, or other account details without starting from the beginning each time.
You can also use your website to promote and sell optional purchases.
For example, your camp might offer:
- 👕 T-shirts and other merchandise
- 💧 Water bottles
- 🕒 Extended care
- 🥪 Lunch programs
- 🚌 Field trips
- 📸 Photos
- ➕ Other camp add-ons
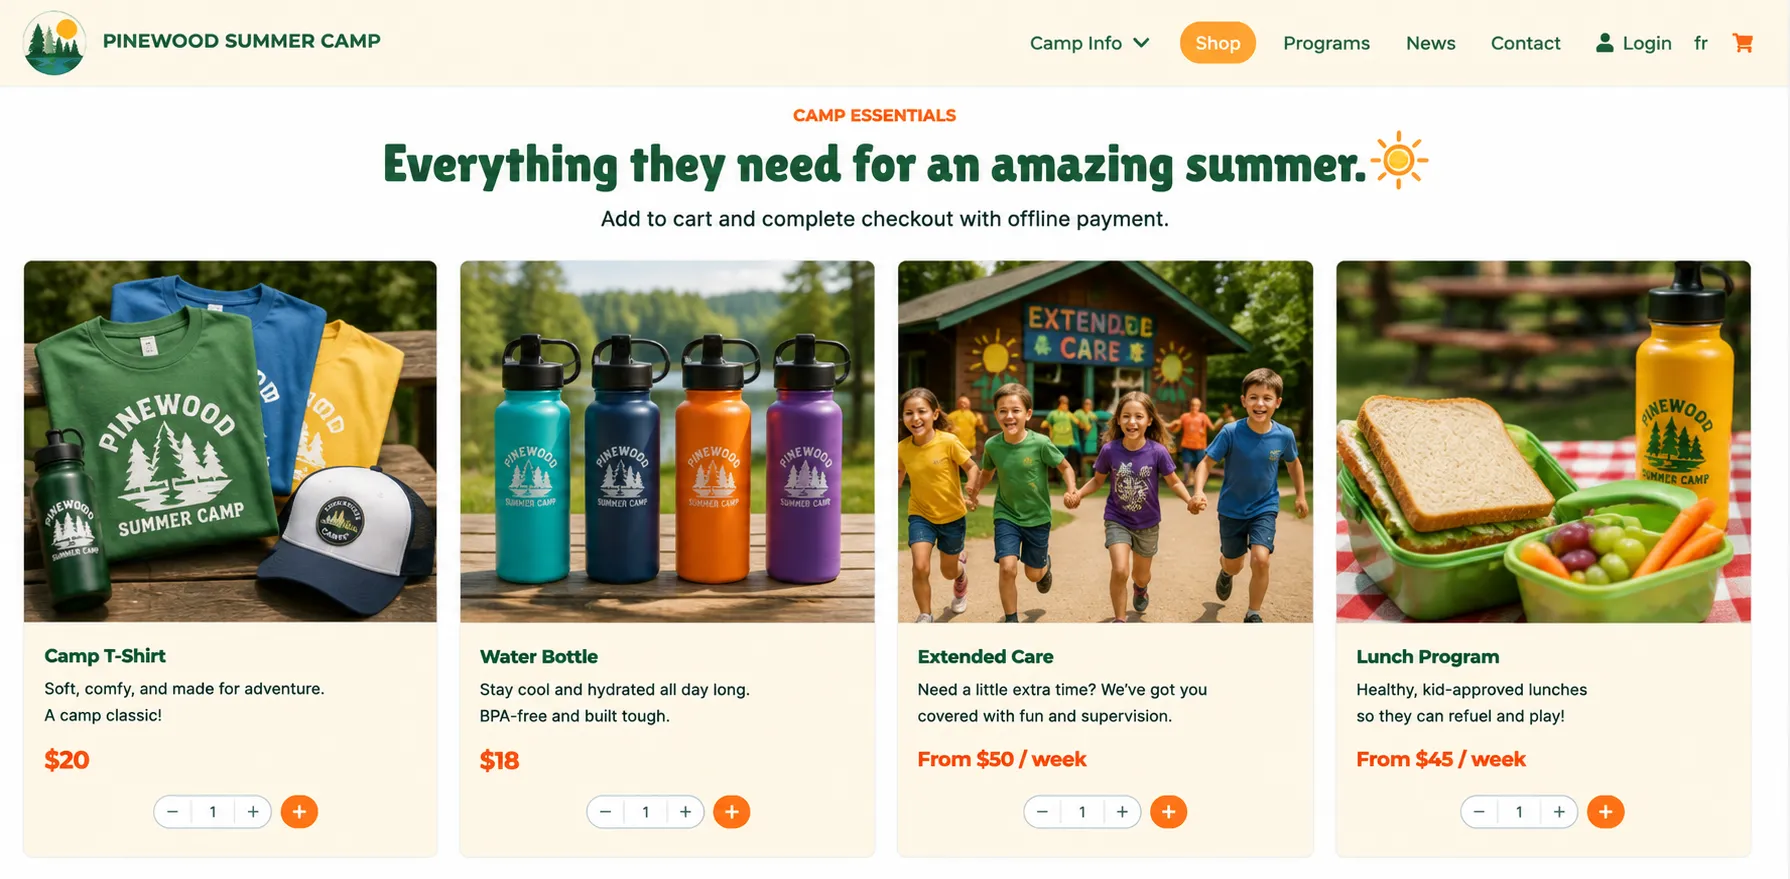
A website builder with integrated product listings can display these items directly on your site, giving families another way to purchase merchandise and other optional items without sending them to a separate storefront.
Keeping these purchases within the same system can also reduce the number of platforms your team needs to manage during registration season.
Step 7: Test Your Website on Mobile
Parents may be researching camps from their phones while commuting, waiting for an appointment, or handling other tasks. A page that looks fine on a large monitor can be difficult to use on a small screen. Mobile testing is an easy step to skip when you build a summer camp website quickly, but it’s where many camps lose registrations.
Before publishing, check each important page on mobile and tablet. Look for:
- 👆 Buttons that are easy to tap
- 🔤 Text that is large enough to read
- 💰 Pricing tables that don’t require awkward scrolling
- 📅 Schedules that fit the screen
- 🖼️ Images that load properly
- 🧭 Navigation that is easy to understand
- 📝 Registration forms that are comfortable to complete
- 🔗 Links and registration buttons that work correctly
If your summer camp website builder includes mobile and tablet previews, use them before publishing each major page.
A Quick Parent Experience Test
Pretend you’ve never seen your website before and ask:
- ✅ Can I find the camp dates quickly?
- ✅ Can I tell which programs are right for my child?
- ✅ Can I find the price?
- ✅ Can I understand what a typical day looks like?
- ✅ Can I find the cancellation policy?
- ✅ Can I start registration without getting lost?
- ✅ Can I complete registration comfortably on my phone?
If any answer is no, fix that page before sending families to it.
Step 8: Publish and Share Your Website
Once you’ve tested the site, it’s time to get it in front of families.
Start with the audiences that already know your camp:
- 📧 Email past camper families
- 📱 Share the site on social media
- ✉️ Add the URL to your email signature
- 📝 Include it in registration announcements
- 📲 Add a QR code to printed flyers
- 🤝 Share it with local community organizations
- 📍 Add the link to your Google Business Profile and other relevant listings
If you run camps at multiple locations or operate separate programs with different audiences, consider whether they should have separate sites or subdomains.
Some summer camp website builders allow multiple websites to be managed from one account, which can be useful when each location needs its own branding, schedule, or registration links.
How to Build Your Summer Camp Website with Activity Messenger
If you’re already using Activity Messenger for online registrations, you don’t have to build your website and registration system separately. The website builder lets you build branded pages around the registration forms, schedules, and other information already in your account.
You can create pages using pre-built sections, add existing forms and schedules where parents need them, and link buttons directly to the appropriate registration flow. You can also preview the site across devices before publishing.
For camps with returning families or multiple locations, the builder also supports client portals, product listings, and separate websites with their own domains or subdomains.
That gives your team one place to build the public-facing side of your camp and manage the information families need once they register.
Frequently Asked Questions
How do I build a summer camp website without hiring a developer?
Most camp directors use a visual, drag-and-drop website builder rather than hiring outside help. Look for one with pre-built sections for things like pricing tables, staff bios, and FAQs, so you’re arranging existing blocks instead of coding from scratch.
Should my camp’s registration form live on the website or a separate platform?
Your camp registration form should live directly on the website, where possible. A registration button that sends parents to a completely different, differently branded tool introduces friction right when they’re ready to commit. A builder connected to your registration system lets you embed the actual form on the page, so everything is convenient and aligned.
What pages does a summer camp website actually need?
At minimum, include a homepage, camp programs or weeks, dates and schedules, pricing, registration information, a frequently asked questions section, and contact information. Staff, what-to-bring information, policies, testimonials, and photo galleries can add useful context for families.
How do I add registration when I build a summer camp website?
You can link to a separate registration platform, embed a registration form, or use a website builder that connects directly to your registration system. The last option can reduce the number of steps between finding a program and completing registration, leading to higher conversions from curious parents.
How important is mobile design for a camp website?
Mobile design is very important for building camp websites. Most camp research and registration happens on a phone, often between other tasks. Preview every page on mobile and tablet before publishing, since layout issues that are invisible on a desktop are often the first thing a parent notices on a phone.
Can I build separate websites for different camp locations?
Yes, if your locations are different enough to warrant separate branding or messaging. Some camp platforms support multiple sites or subdomains under a single account, which is worth checking if you run more than one program.
Final Thoughts on How to Build a Summer Camp Website
Parents need to find the right program, understand what they’re signing up for, and register without unnecessary steps. Your team needs to keep schedules, forms, payments, and other information accurate throughout the season.
That’s why the connection between your website and registration system matters.
If you’re starting from scratch, look for a summer camp website builder that can handle more than the visual side of the site. The right platform can connect your pages with registration forms, schedules, payments, client accounts, and optional purchases so you don’t have to piece everything together yourself.
Activity Messenger’s website builder lets you create a branded website while reusing registration forms, schedules, team listings, and other blocks already in your account. You can build pages using pre-built sections, edit elements directly on the page, and preview the site on mobile, tablet, and desktop before publishing.
If you’re planning a new camp website or replacing one that’s been patched together over several seasons, book a free demo to see how Activity Messenger can bring your website, registration, and payments together.
📖 Related Reading: