Microsoft Forms is a user-friendly tool that allows you to create basic surveys, quizzes, and polls quickly and efficiently. Whether you’re gathering feedback from customers, employees, or students, Microsoft Forms provides a seamless experience for both creators and respondents.
In this guide, we’ll take you step-by-step through the process of creating professional-looking forms, engaging your respondents, and gathering meaningful results in your very own Microsoft survey.
To get started, navigate to forms.office.com. Note that you’ll need a Microsoft account, such as a Microsoft 365 or Outlook account, to begin building your first survey. You can always click “Try for free” to test it out, but note that you need an account to save any changes.
Once logged in, you’ll be presented with options to create a new form or quiz.

Click on the “survey” option to begin creating your form. Once selected, you’ll be prompted to enter a title for your form and an optional description to inform respondents about the purpose of the survey.

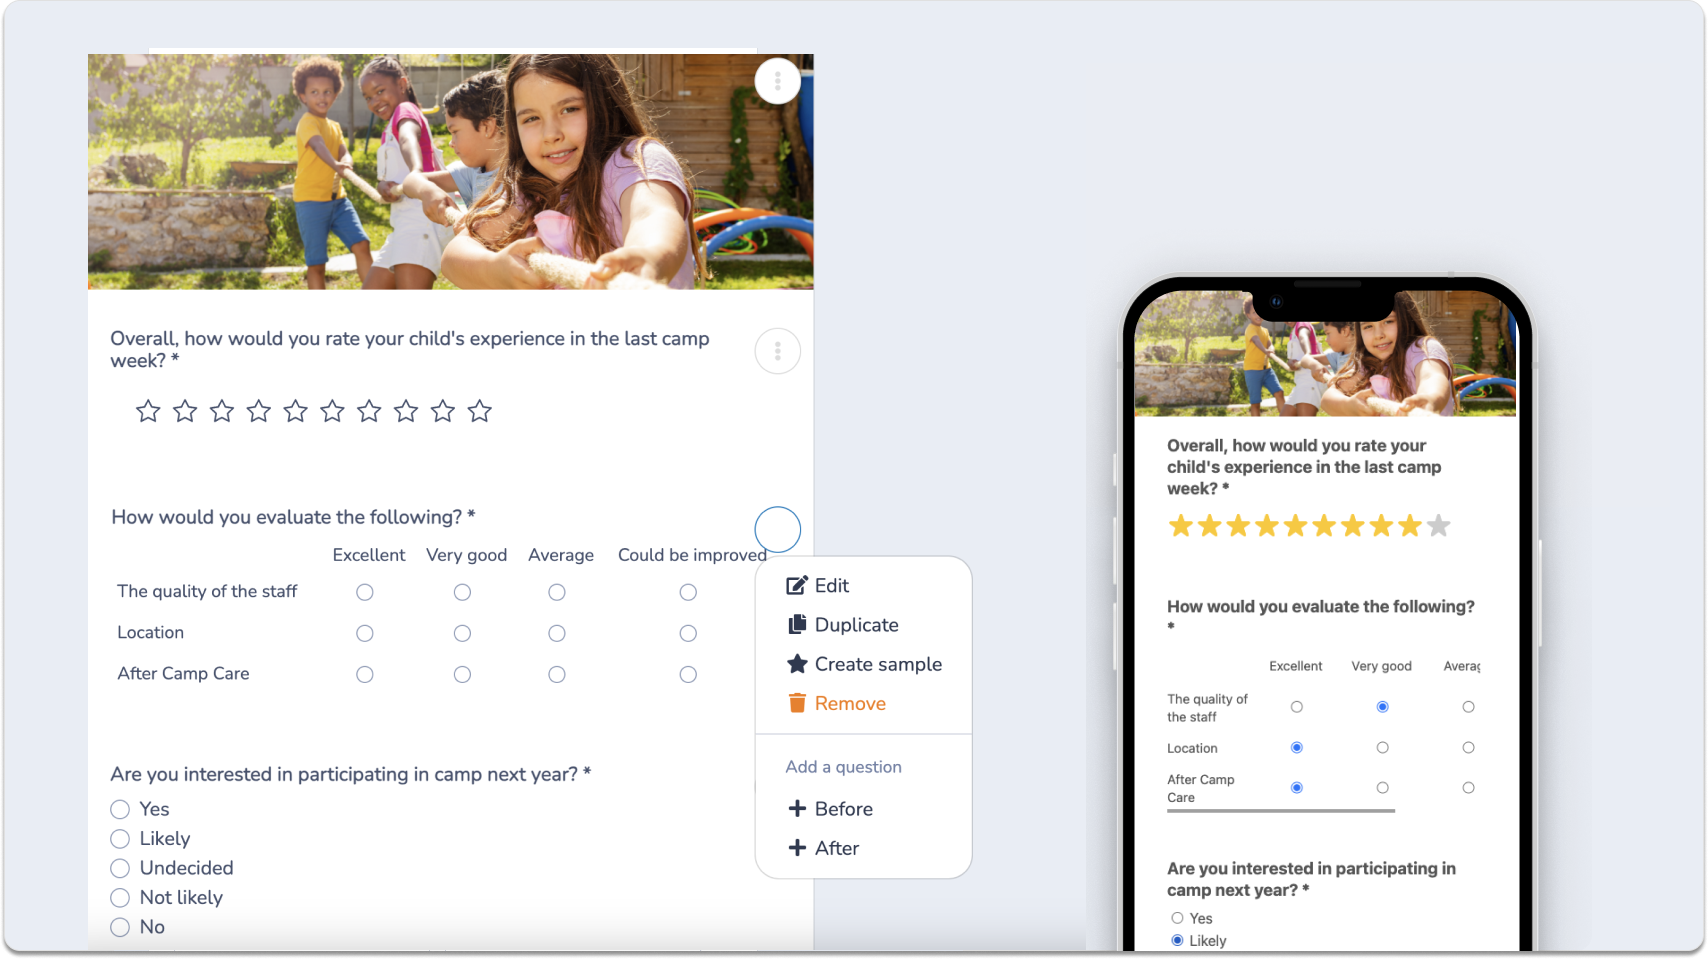
Microsoft Forms offers a variety of question types to suit your survey needs:
To add a question, click on “Quick start with” and select the desired question type. Consider organizing your questions into sections, with subheadings, to improve the flow of your survey. Additionally, Microsoft Forms supports branching logic, allowing you to direct respondents to different questions based on their previous answers.

Enhance the visual appeal of your survey by customizing its design:
These customization options help make your survey more engaging and aligned with your brand identity.


Adjust the settings of your survey to control who can respond and how responses are collected:
These settings ensure that your survey is tailored to your specific needs and audience.

Before sharing your survey, it’s important to preview and test it:
Testing helps identify any issues before distributing the survey to your intended audience. Don’t forget to delete your test responses to ensure they don’t affect your results!

Once you’re satisfied with your survey, it’s time to share it:
Choose the sharing method that best reaches your target audience.

💡Did you know? Activity Messenger allows organizations to send surveys via SMS to improve open rates, get quicker responses, and increase engagement.
After collecting responses, analyze the data to gain insights:
Analyzing the data helps you make informed decisions based on the feedback you’ve received.

While Microsoft Forms makes it easy to create basic surveys, quizzes, and polls, it’s not the only way to collect meaningful feedback. Alternatives like Activity Messenger offer advanced features that can help your organization gather more insightful responses and streamline operations.
Benefits of Activity Messenger:
Regardless of the tool you choose, surveys remain one of the most valuable ways to understand your audience. Using a platform like Activity Messenger ensures you’re not just collecting responses, but improving data collection overall.
📌 Read More: Check out our “SurveyMonkey vs Jotform vs Activity Messenger” article for an in-depth look at top survey platforms in Canada and the US.
| Feature | Microsoft Forms | Google Forms | Activity Messenger |
| Ease of Use | Simple, intuitive interface for creating surveys within the Office 365 ecosystem. | Simple interface for creating surveys. | User-friendly with additional features and automation. |
| Customization | Limited customization for themes, fonts, and branding; offers basic colour and image options. | Limited customization for themes, fonts, and branding. | Advanced branding options with custom logos, colours, and full Canva integration. |
| Question Types | Offers multiple choice, text, rating, date, ranking, Likert, NPS, file upload; supports branching logic. | Offers basic question types (multiple choice, dropdown, short answer, etc.). | Offers more advanced survey question types, conditional branching, and integration with workflows. |
| Distribution Methods | Share via link, email, QR code, Teams, or embed on websites. | Share via email, link, or website embed. | Send surveys via email, SMS, QR code, or embed on websites; allows multi-channel distribution for higher reach. |
| Response Tracking | Responses stored in Microsoft Forms; can be exported to Excel for analysis. | Responses stored in Google Forms or exported to Google Sheets. | Tracks responses directly in the platform with detailed analytics; integrates responses with attendance or class data. |
| Automation | Limited; no built-in automation for recurring surveys or reminders. | No automation for follow-up or recurring surveys. | Automates survey distribution (e.g., post-event surveys or reminders). |
| Integration | Integrates with Office 365 apps (Excel, Teams, SharePoint). | Integrates with Google Workspace and other tools. | Integrates with registration forms, newsletters, and payment processing tools like Stripe. |
| Real-Time Analytics | Basic summary charts; detailed analysis requires Excel export. | Basic response overview; requires exporting for advanced analysis. | Advanced reporting and analytics built in, with real-time insights. |
| Audience Engagement | Relies on respondents accessing the survey via link or email; no built-in SMS option. | Relies on respondents clicking links; no built-in SMS option. | Combines email and SMS to improve response rates and engagement. |
| Cost | Free with Office 365 subscription. | Free to use for most features. | Paid plans tailored to small and medium-sized organizations. |
| Best For | Teams or organizations using Microsoft 365 who need basic survey functionality. | Individuals or small teams needing basic survey functionality. | Organizations needing professional, branded surveys with automation and multi-channel distribution. |
Discover how Activity Messenger can integrate your surveys with automated messaging, streamline participant management, and provide real-time insights all in one platform.
Book a demoChoose Microsoft Forms if you need a simple, intuitive way to create surveys within the Microsoft 365 ecosystem. It’s ideal for quick polls, quizzes, or collecting basic feedback.
Choose Google Forms if your priority is a free, flexible survey tool that integrates with Google Workspace and allows easy collaboration.
Choose Activity Messenger if you want an all-in-one platform that manages the entire participant lifecycle, including registrations, payments, waivers, attendance, surveys, and automated SMS/email communication. Activity Messenger is built to save time for program-based organizations while boosting participant engagement.
Creating a Microsoft Forms survey is a straightforward process that allows you to gather valuable feedback from your audience. By following these steps and utilizing the features available, you can design surveys that are both functional and engaging.
However, if you’re ready to move beyond basic surveys, Activity Messenger gives you the tools to engage participants across email and SMS, automate follow-ups, and connect survey data with registrations, payments, and attendance.
Schedule a demo today to discover how smarter surveys can benefit your organization!


