Activity Messenger Help Center
Step 2. Create the Guest RSVP Confirmation form
Prepare the guest-response form after setting up the birthday-party workflow. This form collects the invited child’s details and consent; it is separate from the host parent’s party booking.
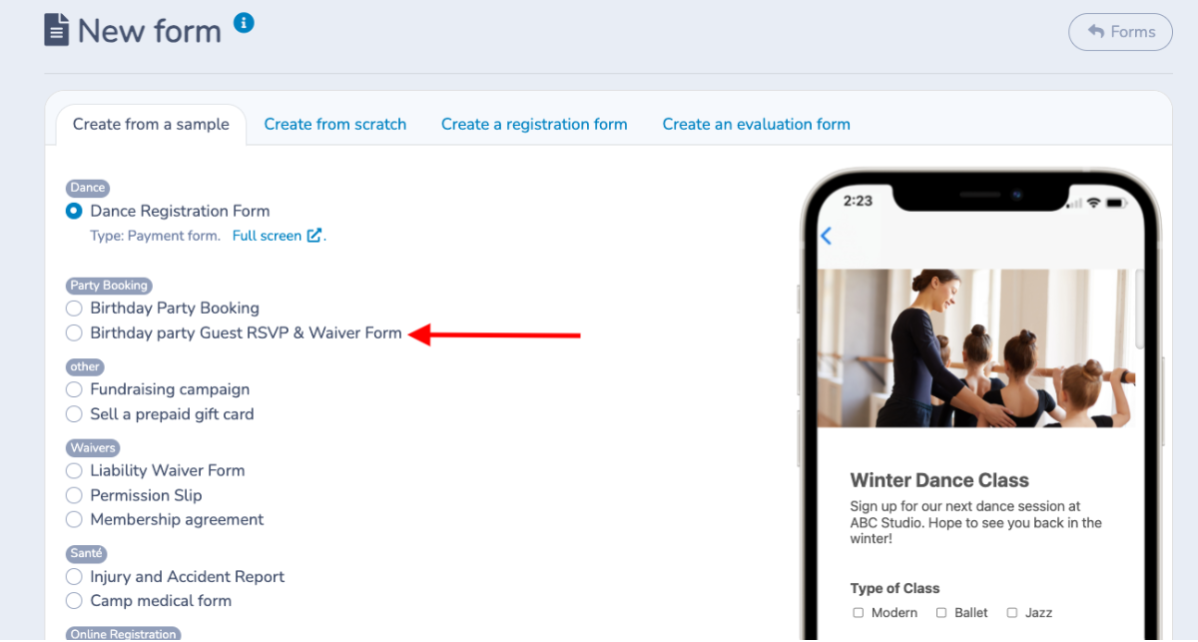
Create a second form using the Birthday party Guest RSVP & Waiver.
This form allows invited parents to confirm their child's attendance at the party by filling out their information and agreeing to the conditions.
It is configured to automatically register the child for the event without the parent having to select a date.
Do not set any attendance overrides - the no limit for max attendance will be used so anyone who RSVP's will be added to the attendance list in classes and for the parents to view who is attending.
Customize this form to include:
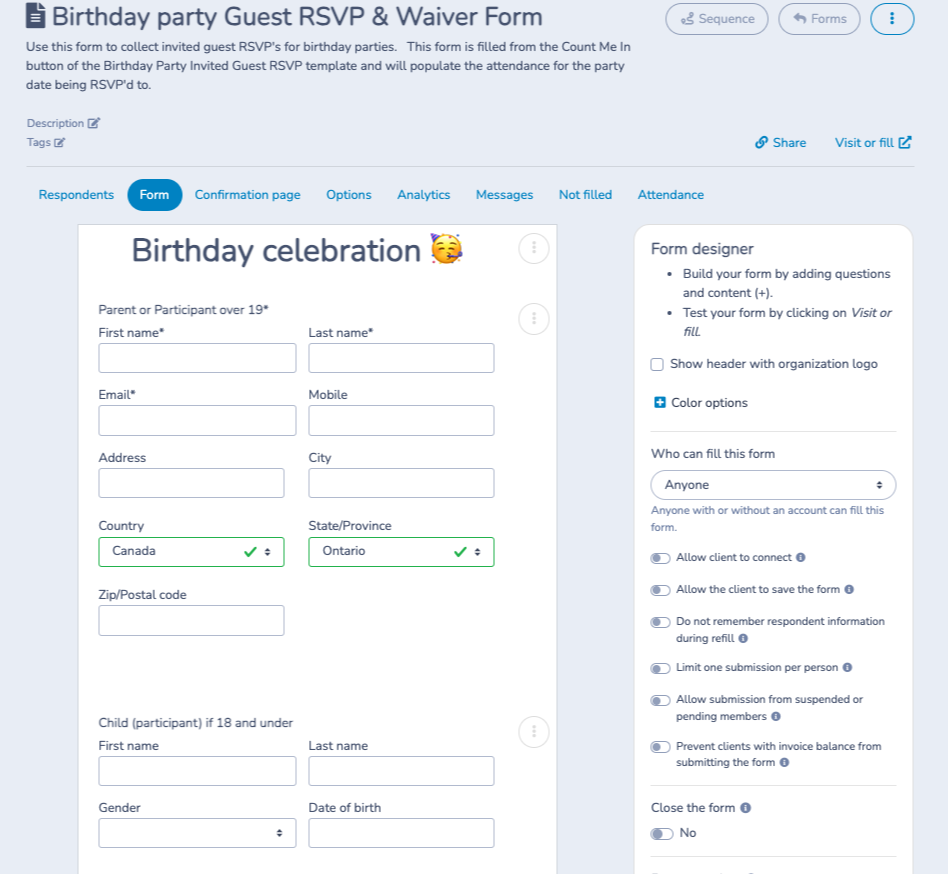
A section for guests to accept the invitation and provide their information (names of parents and the invited child).
The rules and conditions to be accepted with a signature.
The option to personalize the form with images and text to make the experience more engaging and tailored to your event.
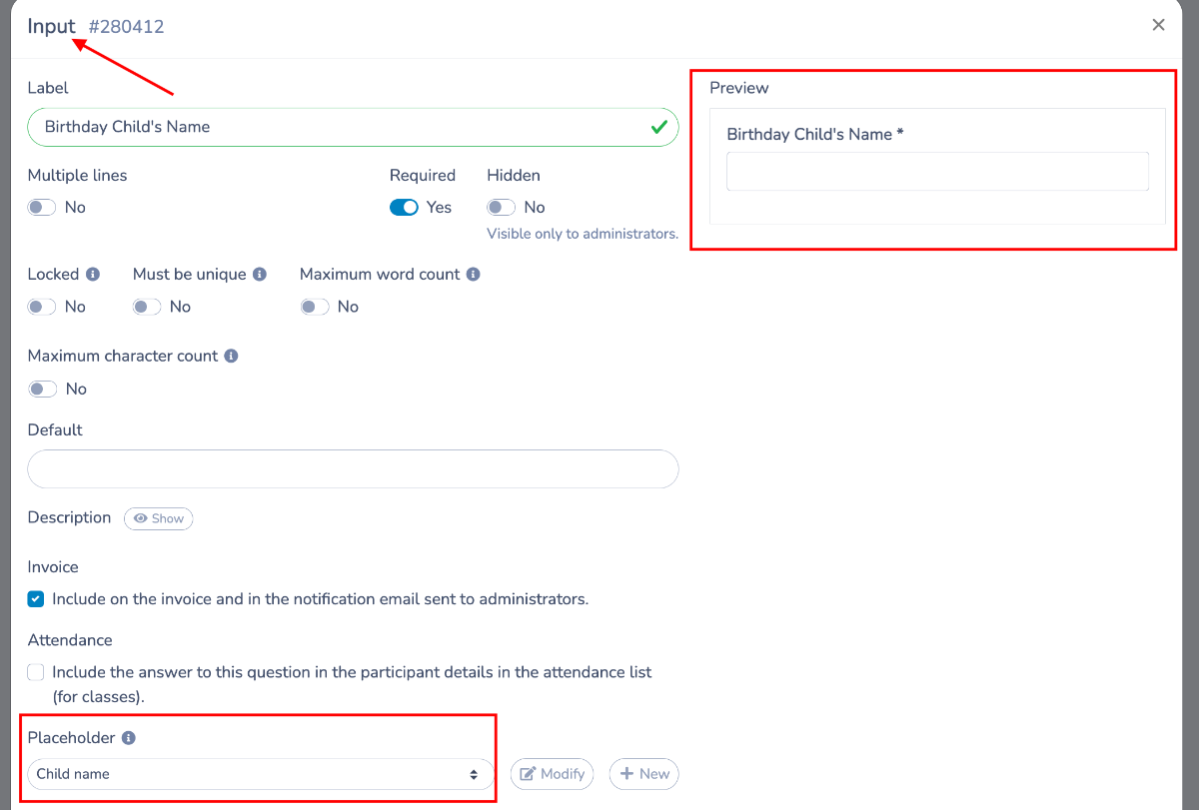
Add a question - Input block - where the invited guest will enter the birthday child's name. Make sure to also create a place holder for this question.
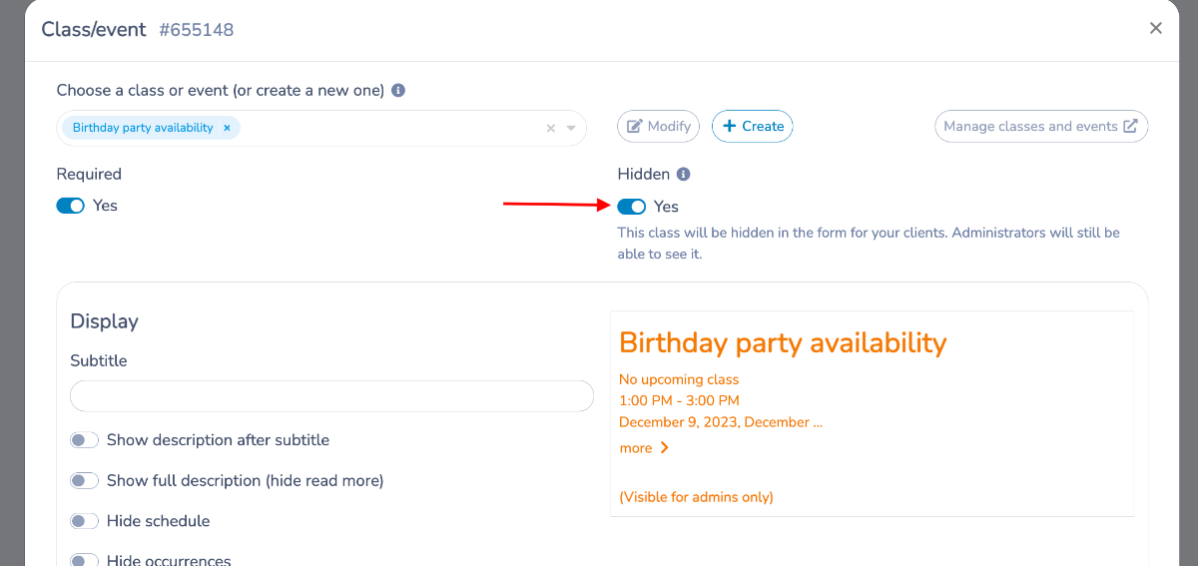
Add a hidden question related to the class/event: Link the Children's Birthday party date.
- Hide this question so guests cannot see it.
- This step is important.
- It allows the system to automatically detect the date associated with the invitation and add participants to the correct attendance list.
Confirmation email.
When a parent registers for a birthday party they will immediately receive two emails. One is the confirmation message - called the Birthday Confirmation Email (1rst email).
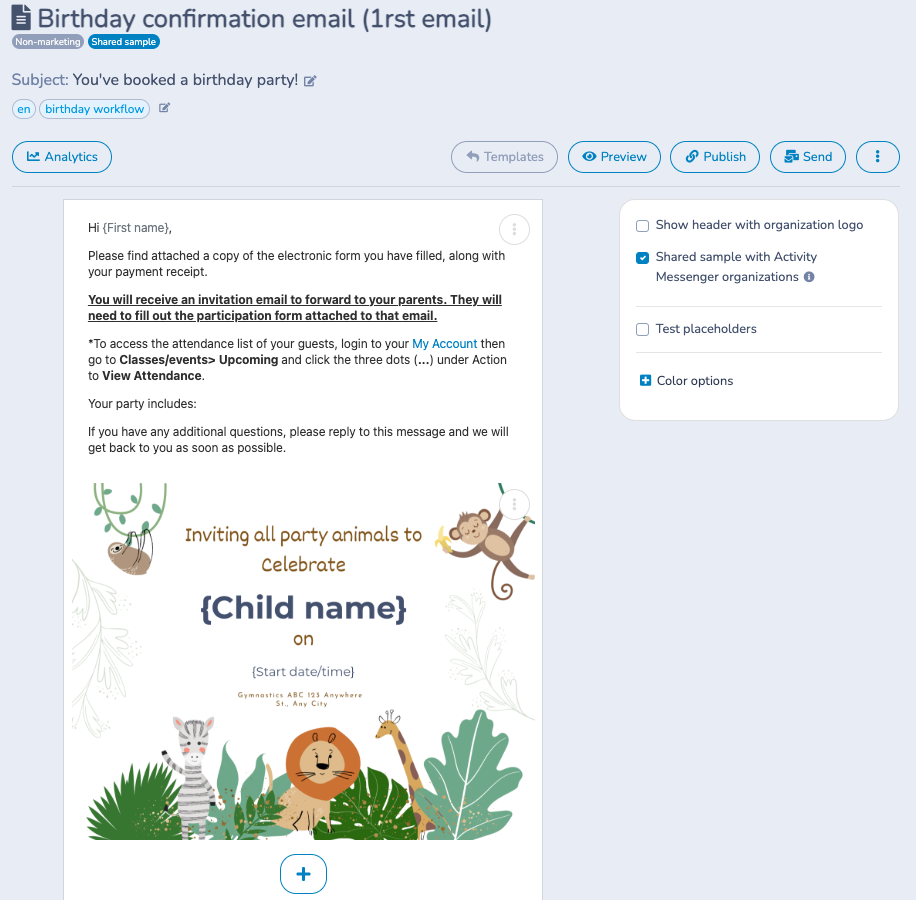
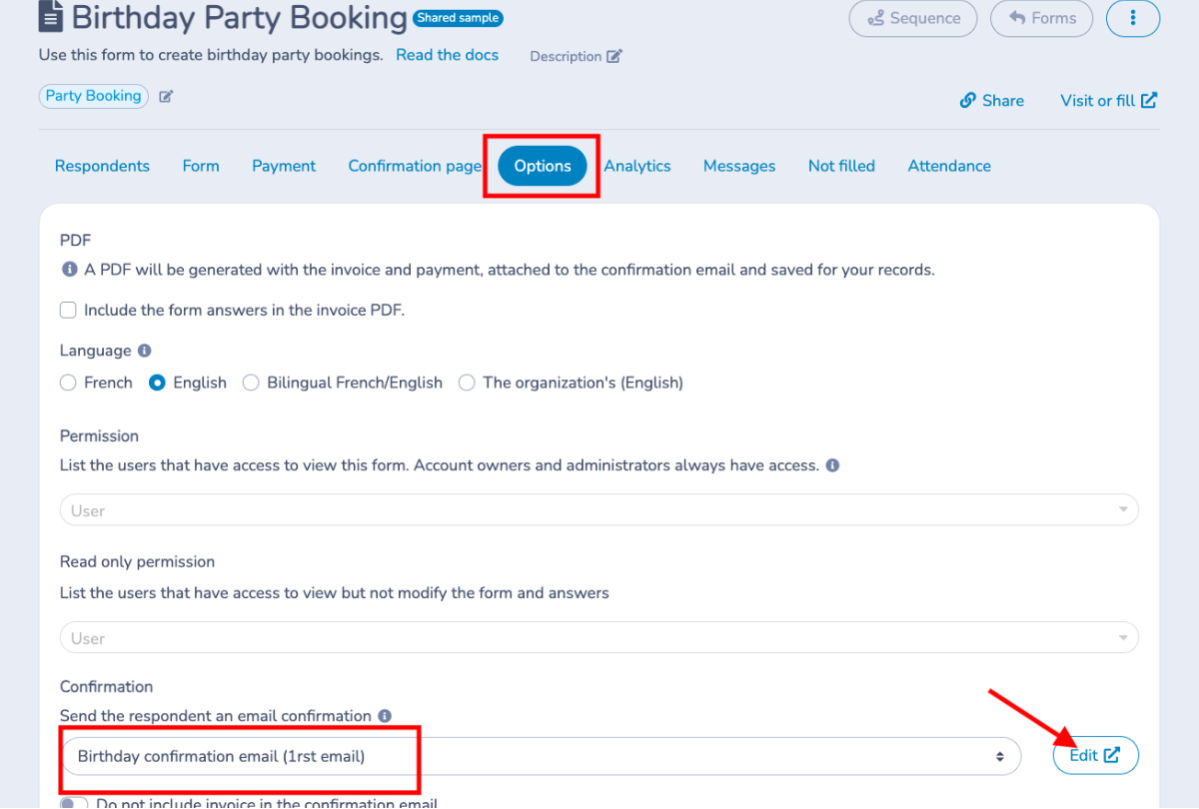
This email is from the Options tab on the form and is a template. If it's not automatically in your All templates list please go to create a template and create.
Make your modifications as needed.
Next step: Invitation template and automation