Activity Messenger Help Center
Waitlist
Here’s how to enable and set up a waitlist on registration forms in Activity Messenger. This allows participants to join a waitlist if a class is full. You can also force registrations onto the waitlist even when places remain available. The platform can automatically manage the process if you choose to use the waitlist automation workflow.
Access the registration form
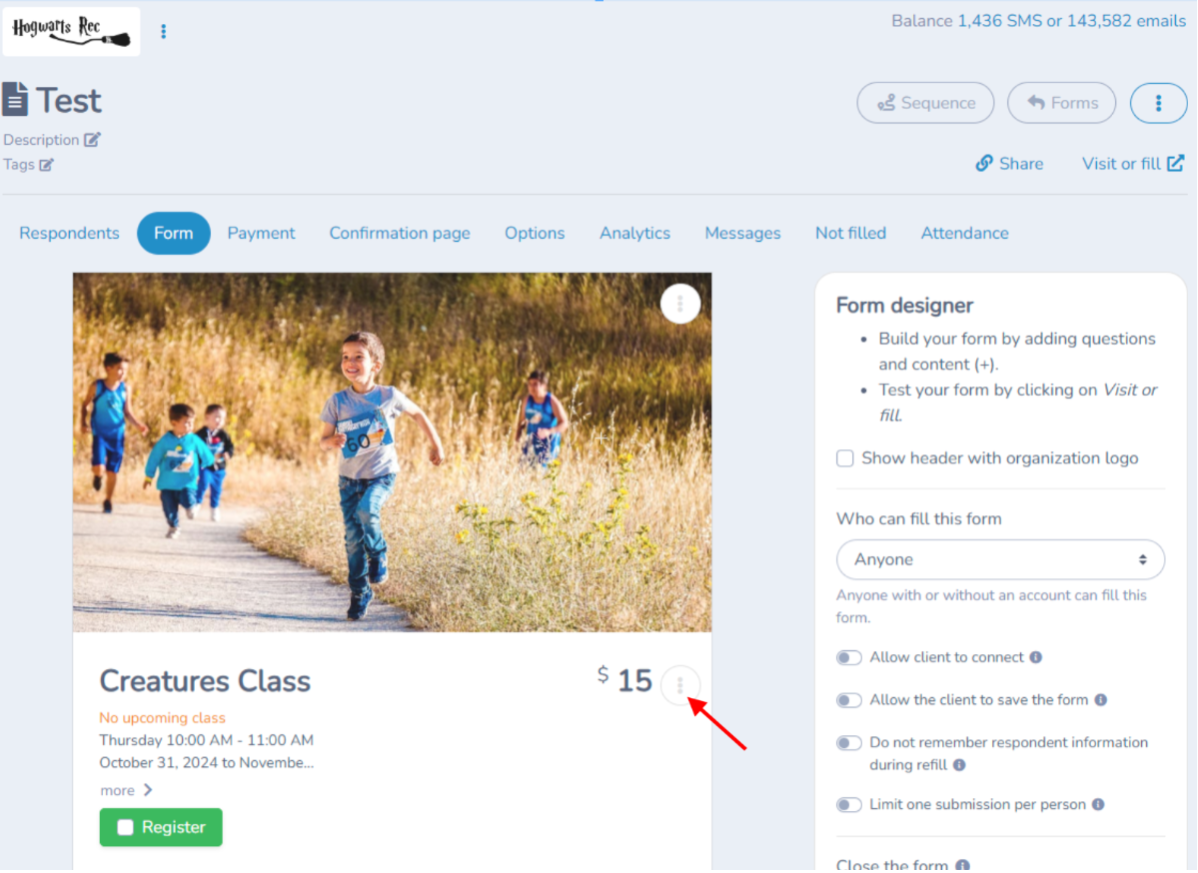
Select the registration form you want to modify (whether for a single class or multiple classes).
Scroll to the multiple classes block (if applicable), or simply to the individual class for which you want to enable the waitlist.
Click the 3 vertical dots to edit the class or multiple classes block.
Activate the waitlist
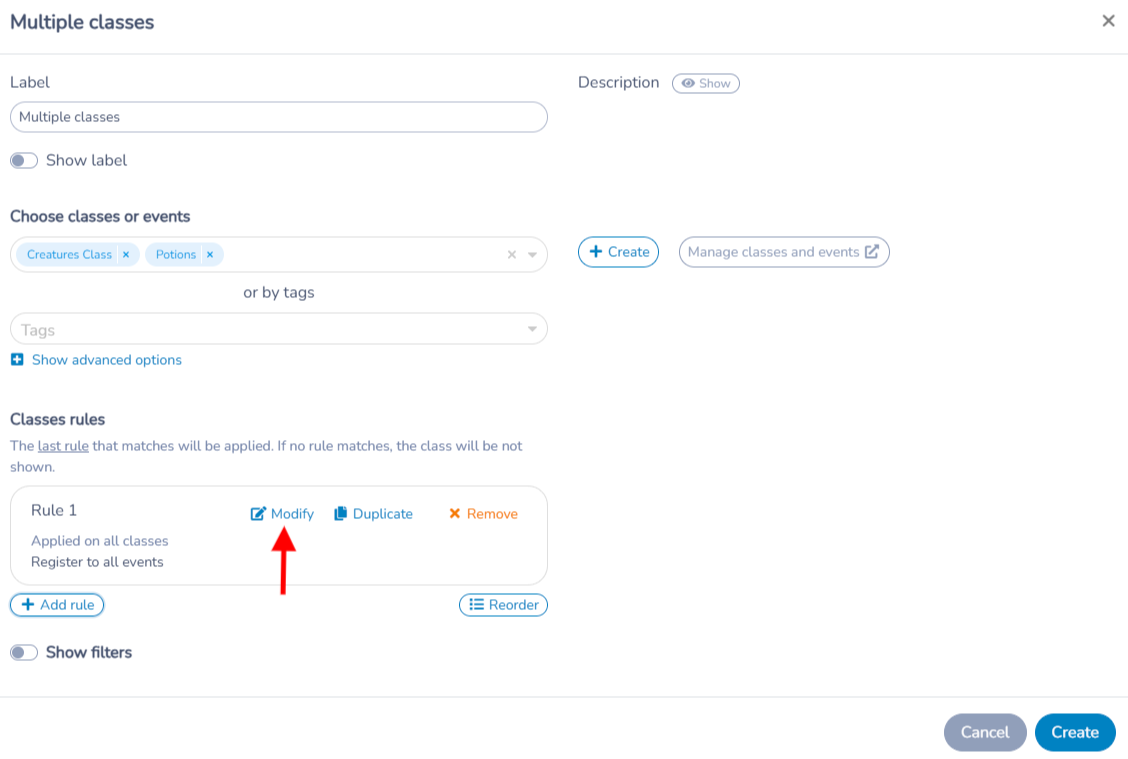
To enable the waitlist, scroll down to the toggle labeled Waitlist and turn it on. For a multiple classes block, open Class rules, click Modify for each applicable class rule, then turn on Waitlist. The waitlist setting is configured per rule, so repeat this for every class rule that should offer the waitlist.
To route registrations directly to the waitlist even when the class is not full, also turn on Force waitlist for the applicable class or class rule. While this setting is active, ordinary class registration is disabled for that selection; it does not simply show a waitlist choice alongside regular registration.
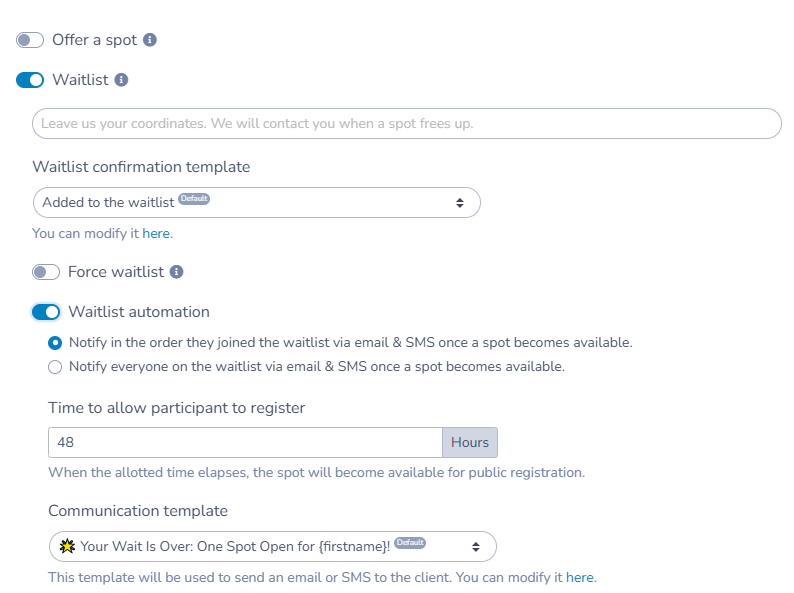
Once you have enabled the waitlist option you can either stop here and we will generate a list of names of people that wish to be notified if a spot comes available.
There are two different messages to customize:
- Instructions at the top of the waitlist pop-up, before the customer submits their information: edit Waitlist modal instructions in the class or class-rule waitlist settings. In the form editor, open the 3-dot menu on the Class question, or on the Multiple classes block open Class rules and click Modify for the applicable rule. In its Waitlist settings, edit Waitlist modal instructions. This text is displayed above the waitlist form; it is not the email sent after joining.
- Confirmation email after the customer joins the waitlist: edit the Waitlist confirmation template. This email is separate from the pop-up instructions.
Example email:
"Hello [first name], you have been added to the waitlist for [activity name]."
Alternatively, you can toggle on Waitlist Automations. When this is activated and a class is full, the participants name will be added to the waiting list and you can customize the notification experience that the account owner receives when a spot comes available and the amount of time a spot will be held before moving on to the next name on the waitlist or the spot becoming available for public registration.
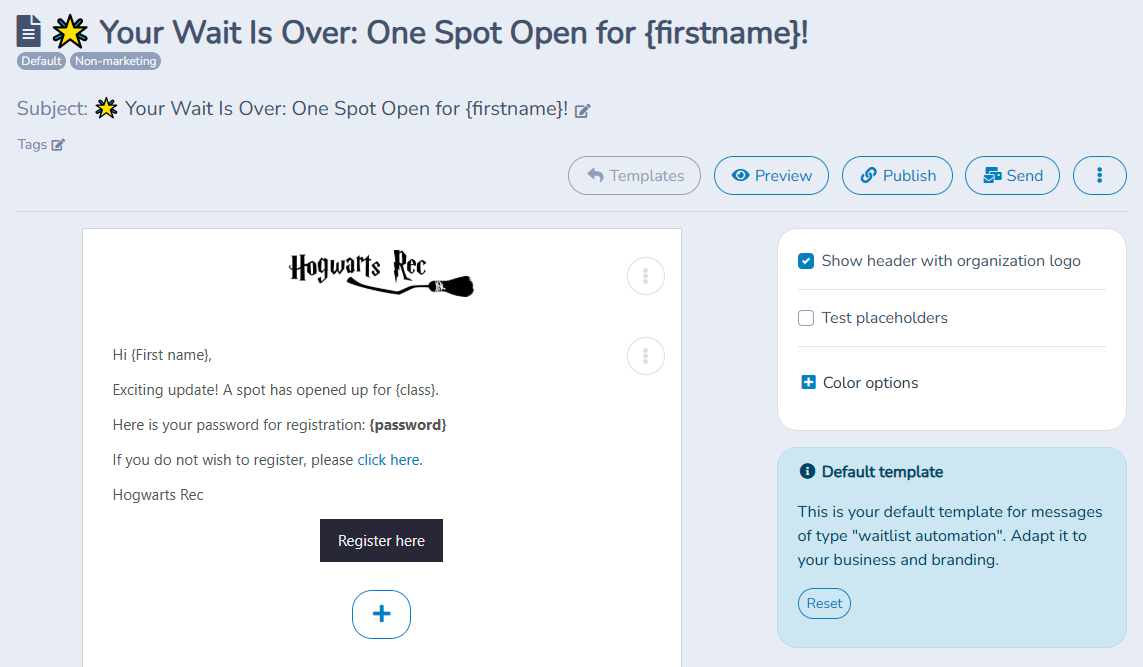
Edit the waitlist automation communication template to personalize the message customers will receive if a spot becomes available.
How registrations reach the waitlist
To offer a waitlist when a class fills up, turn on Waitlist for the class question or class rule. Set the class’s Maximum attendance so the form can tell when capacity is reached. With Waitlist enabled, customers register normally while places remain; when the class is full, the form offers the waitlist. Without Waitlist, no waitlist is offered.
- Capacity reached. With Waitlist enabled, when the class has no spots left, the form offers the waitlist button (Waitlist by default, or your Waitlist button text). Spots come from the class's Maximum attendance in Classes › class. While spots remain, customers register normally.
- Force waitlist. Turn on Force waitlist only if you want to send every respondent to the waitlist, even when places remain. The waitlist button is shown at all times and ordinary registration is disabled for that selection; you decide who gets in. Use this when you want to review or approve every registration, or collect names before opening sales.
Where the setting is
- Class question: open the question's menu (3 vertical dots) in the form editor, scroll to Waitlist and turn it on. Force waitlist, Show waitlist position to customers, Limit waitlist spots and Waitlist automation appear below it once Waitlist is on.
- Multiple classes block: open the block's menu (3 vertical dots), find Class rules, click Modify on a rule and turn on Waitlist in the rule editor. The same settings, including Force waitlist, appear in each rule. A rule applies to the classes it matches, and the last matching rule wins, so turn the waitlist on in every rule whose classes should offer it. The block itself only adds Sort by waitlist and Hide classes where waitlist is full. See Multiple classes with the use of filters.
What the respondent sees
After joining, the form confirms "Added to the waitlist." followed by "You are #N on the list." The same position appears in the customer's account next to the class. To hide it, turn off Show waitlist position to customers (on by default) under Waitlist; customers then see that they joined the waitlist without their position, including in their account. If a confirmation template is set, the respondent also receives the Waitlist confirmation template email.
Waitlist automations
Waitlist automation is configured in the same place, per class question or class rule, with the Waitlist automation toggle under Waitlist. It sends an email and an SMS when a spot becomes available:
- Notify in the order they joined the waitlist via email & SMS once a spot becomes available. The first person in line receives a message with a unique registration link, a password and a deadline. The Registration window per participant (48 hours by default) decides how long the spot is held before the next person is notified.
- Notify everyone on the waitlist via email & SMS once a spot becomes available. With Protect registration with a password on (the default), everyone receives a temporary password-protected link that is valid for the Waitlist registration window. With it off, everyone receives a plain notification; the spot is not reserved and registration is first come, first served.
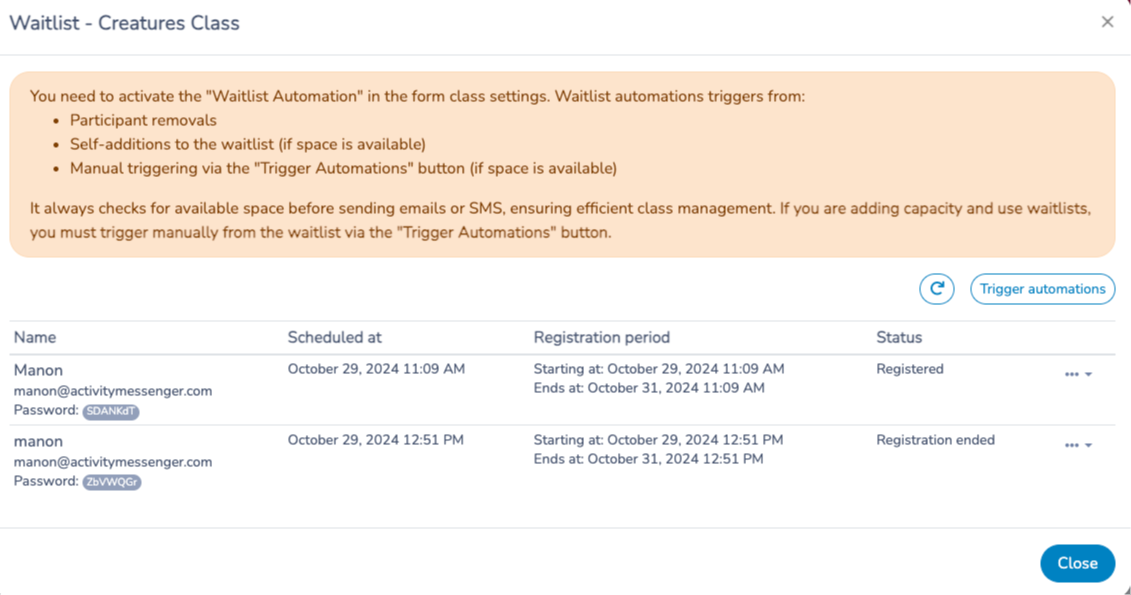
The message comes from the Communication template chosen below the automation settings. Activity Messenger creates a default template the first time one is needed; you can select another or edit it under Templates. A spot becomes available when a participant is removed, when someone joins the waitlist while space is available, or when you click Trigger automations from the class's Waitlist column in the classes list. The automation always checks for free space before sending. If you increase a class's capacity, trigger the automations manually from that waitlist.
Review waitlists across courses
For a centralized view of requests across courses and registration forms, open Classes → Waitlist. This module brings requests together in one table; it is separate from the per-course queue and its automation controls.
Use Source form to narrow requests to one or more registration forms, and Requested class to filter by one or more courses. You can combine these with the active/expired/archived scope, follow-up status, search, and other available filters. Open a request for details, or use its Manage queue action to work with that course’s queue. The module is for reviewing and organizing requests; use the individual course queue when you need to manage its waitlist and automations.
For more on the filters and request table, see Manage requests in the Waitlist module.
Managing the waitlist
You can set up an automation that will manage the waitlist notifications.
Two options are available:
- First Come, First Served: The first person on the waitlist is notified (via email or SMS).
- Notify the Entire Waitlist: Everyone on the waitlist receives a notification when a spot becomes available.
Waitlist Automations occur automatically when a participant/account owner notifies you that they wish to cancel their registration. Once you have processed that cancellation the waitlist automation will send an email based on the options you have set.
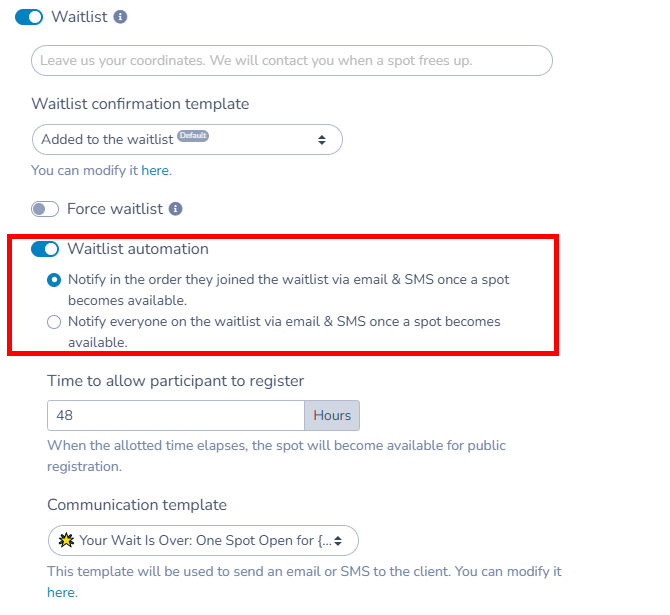
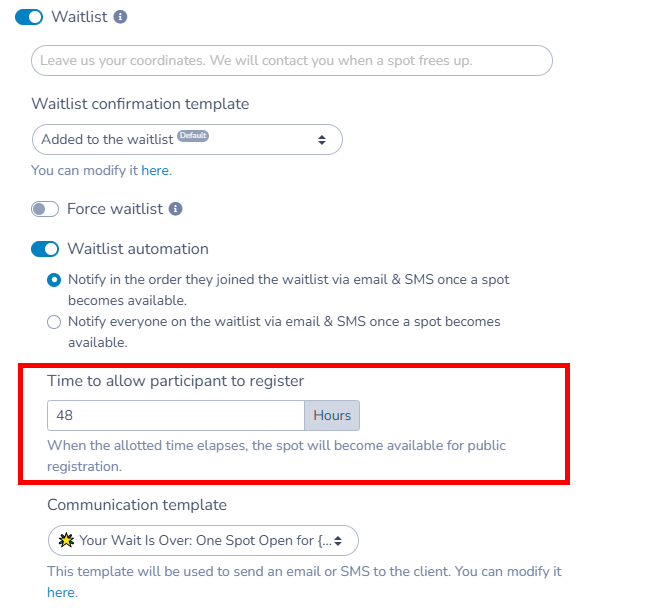
Set a time limit during which the spot is reserved for the person on the waitlist. For example, you can choose to hold the spot for 24 or 48 hours.
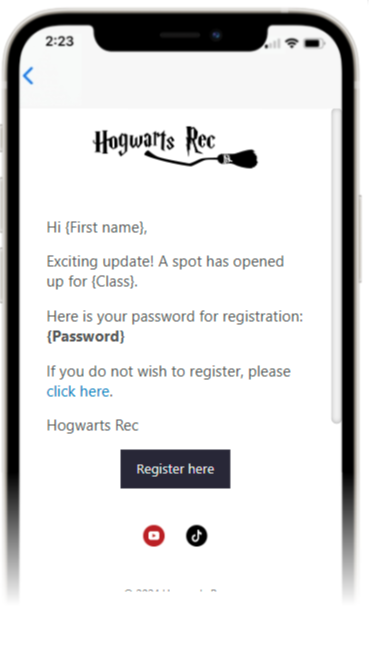
The individual will receive an email and SMS with a unique link and a password to access the registration.
Turn on Ignore the class registration closing date when a spot frees up after the class registration closing date and you still want the waitlisted person to claim it. The option is under Waitlist automation, above the registration window and Communication template.
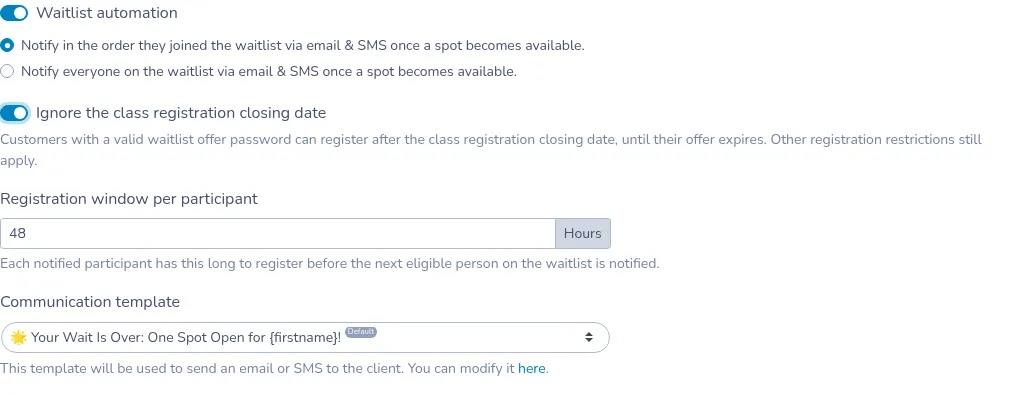
A customer with a valid waitlist offer password can register after that closing date until their offer expires. The offer lasts for the registration window you set. If you notify people in the order they joined the waitlist, that window is Registration window per participant. Each notified person has that long to register before the next eligible person on the waitlist is notified. If you notify everyone on the waitlist, the window is Waitlist registration window. Everyone can use their registration link during that time. When the window ends, the offer expires. Other registration restrictions still apply.
This option is separate from Ignore registration period on the class question. That setting is described in Selling classes and events.
If a participant no longer wishes to register, they can click a link to remove themselves from the waitlist.
This automatically triggers a notification to the next person on the list, bypassing the 24- or 48-hour hold period.
You can customize this withdrawal message in the templates so participants are informed about their removal and the activation of the next person on the waitlist.
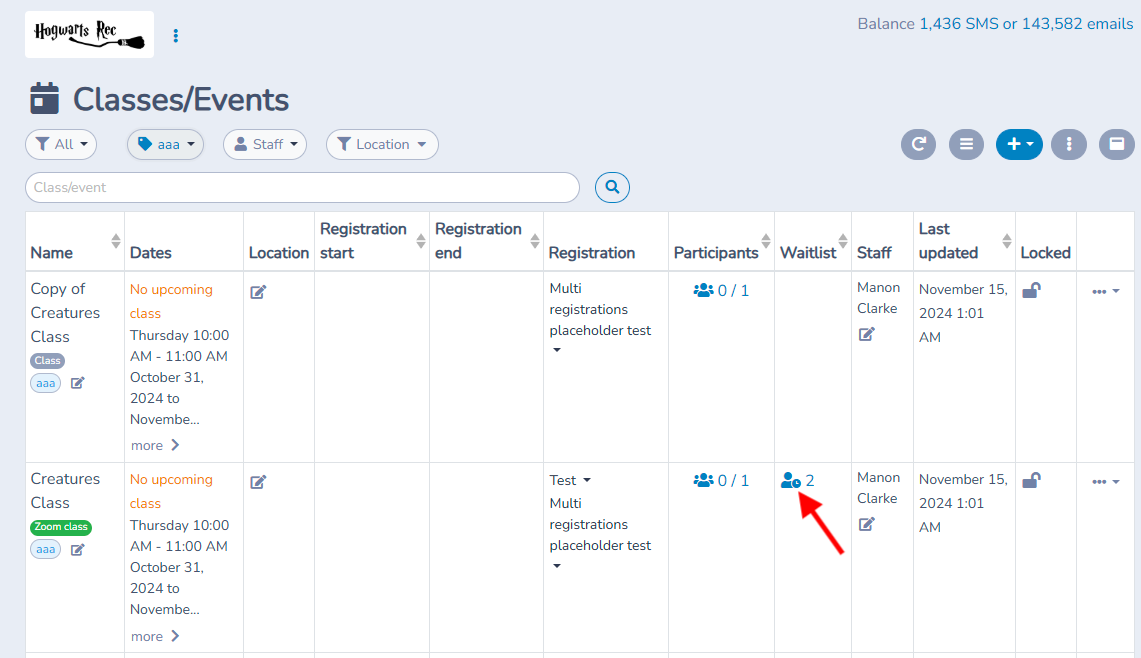
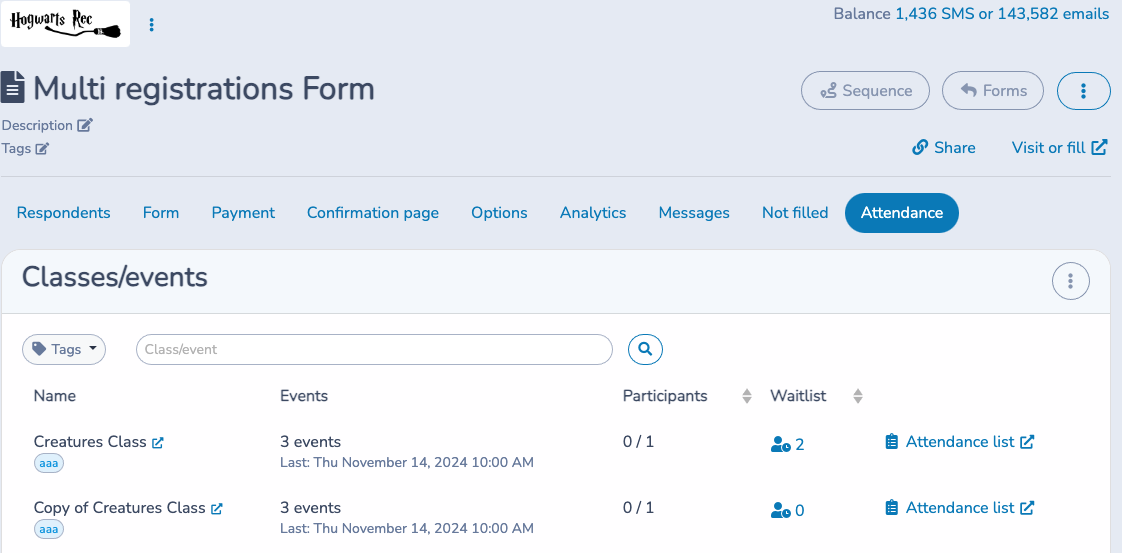
When viewing your courses in the "All Classes and Events" section, you will have the option to see the participants currently on the waitlist. Click on the waitlist column for each class to view the automation actions available.
You do not need to Trigger the Automation when a cancellation has been processed. That is handled automatically.
A waitlist offer password still has to fit a class that balances two registration categories. The offer follows the maximum difference and the places left in the class. See Balance registration categories within class capacity.
Continue your workflow
Settings reference
| Setting | Where | Default | Effect |
|---|---|---|---|
| Waitlist | Forms › form › Class question (3 dots) or Multiple classes block › Class rules › Modify | Off | Offers the waitlist button when the class has no spots left. Required for every other waitlist setting. |
| Waitlist button text | Same place, under Waitlist | Empty (shows "Waitlist") | Replaces the label of the waitlist button on the form. |
| Waitlist modal instructions | Same place, under Waitlist | Empty (default instructions) | Text shown at the top of the waitlist window before the customer enters their information. |
| Waitlist confirmation template | Same place, under Waitlist | Default waitlist confirmation | Email sent to the respondent when they join the waitlist. |
| Allow only one registration per participant | Same place, under Waitlist | Off | Prevents the same participant from joining the waitlist twice. |
| Show waitlist position to customers | Same place, under Waitlist | On | When off, customers see that they joined the waitlist without their position, including in their account. |
| Force waitlist | Same place, under Waitlist | Off | Shows the waitlist at all times, even when the class is not full, and disables ordinary registration for that class or rule. |
| Limit waitlist spots › Number of spots | Same place, under Waitlist | Off | When the waitlist reaches this number, the form shows a waitlist-full message instead of the button. |
| Waitlist apply to different question | Class rules › Modify only | Off | Sends waitlist entries to another class question on the form. |
| Sort by waitlist | Multiple classes block | Off | Pushes full classes to the bottom of the list. |
| Hide classes where waitlist is full | Multiple classes block | Off | Hides classes whose waitlist has reached its limit. |
| Waitlist automation | Same place, under Waitlist | Off | Sends an email and SMS when a spot becomes available. |
| Notify in the order they joined / Notify everyone | Under Waitlist automation | In order they joined | Chooses between one person at a time with a held spot, or everyone at once. |
| Protect registration with a password | Under Waitlist automation, notify everyone only | On | Sends temporary password-protected links. Off sends a plain notification with no reserved spot. |
| Ignore the class registration closing date | Under Waitlist automation | Off | Lets a customer with a valid offer password register after the class registration closing date. |
| Registration window per participant / Waitlist registration window | Under Waitlist automation | 48 hours | How long the offer and password stay valid. |
| Communication template | Under Waitlist automation | Default waitlist automation template | Email and SMS sent to the notified customer. |
| Maximum attendance | Classes › class | Empty (unlimited) | The capacity that, once reached, makes the form offer the waitlist. |
Common questions
Is the waitlist automatic once a class is full? Only when Waitlist is on for the class question or class rule. The form then shows the waitlist button as soon as the class's Maximum attendance is reached. Without the toggle, a full class simply cannot be registered. Offers to waitlisted people are automatic only if you also turn on Waitlist automation; otherwise you contact them yourself. See How registrations reach the waitlist.
Can I put everyone on the waitlist? Yes. Turn on Waitlist and then Force waitlist on the class question or class rule. The waitlist is shown even when spots remain and ordinary registration is disabled for that selection, so every respondent lands on the waitlist and you decide who gets in. Add people yourself with Manually add someone to a class waitlist if needed.
Where is the waitlist setting on the form? Open the form, click the 3 vertical dots on the Class question and scroll to Waitlist. In a Multiple classes block, open the block, go to Class rules, click Modify on the rule and turn on Waitlist there. It is not a form-level or organization-level setting. See Building a form and Selling classes and events.
Does it apply to every class in a multiple-classes block? No. Waitlist and Force waitlist live on each class rule, and a rule applies only to the classes it matches (all classes, one class, or classes with chosen tags; the last matching rule wins). Turn the waitlist on in every rule whose classes should offer it. See Multiple classes with the use of filters.
Can I send a registration link from the waitlist? Yes, through Waitlist automation. When a spot frees up, or when you click Trigger automations in the class's Waitlist column, Activity Messenger emails and texts the next person (or everyone) a registration link, with a password and deadline when the offer is password-protected. The automation only sends when there is free space; after raising a class's capacity, trigger it manually. See Managing the waitlist.
Open the same queue from the Waitlist module
You can also open Classes → Waitlist, filter the Source form and Requested class, then click Manage waitlist queue on a request. The same class window opens with its form and occurrence context when available. To add someone manually, click Add and follow the manual-add guide. Queue management is unavailable for deleted or missing courses.
The module’s Form settings button edits the common form that collects waitlist information. It does not enable class automation. Configure that in the registration form’s class block or applicable Multiple classes rule. See the module guide and per-class waitlist setup.
Removal and cleanup of old requests
Remove and archive does not remove a confirmed class enrollment. For an ended or deleted course, removing old requests does not send email or SMS availability invitations to other waitlisted people; previously scheduled invitations for those courses are also blocked at execution. The module’s action does not send the archived person a removal message either.
To clean up only ended courses, choose Expired, then Expired — course ended in the module. An Invitation expired for a still-active course is different: removal can recalculate the queue and reassign the offered place to another person. Choosing a removal reason does not disable that automation.