Activity Messenger Help Center
Manage forms and submitted responses
Use this guide after you have created a form. Find the right form, organize access for your team, and review or update submitted answers. To change questions, confirmation messages or sharing options, use Build and share your first form.
Search and permissions
Click on Forms and select Manage Forms.
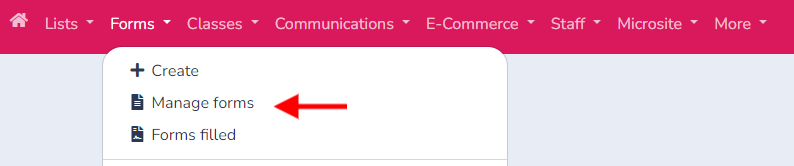
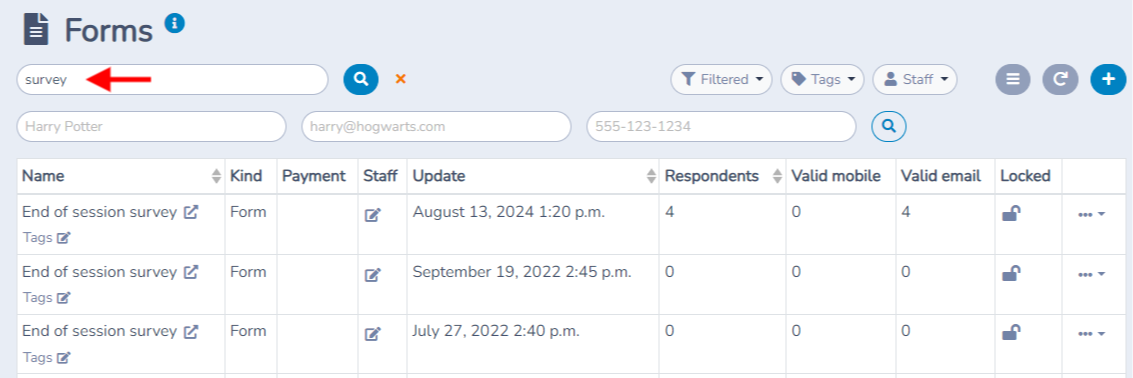
In Forms → Manage Forms, you can find the forms available to you. The forms you can see depend on your access and permissions; access to forms can be managed for individual staff members. If you cannot find a form, ask an administrator to check your access. Filter the available forms by name by entering it in the search bar.
To unlock a locked form, use the switch in the Locked column on the Forms → Manage Forms page. Unlocking is controlled by a separate can-unlock permission; it is not limited to owners or administrators. If you cannot turn off the lock, ask an administrator to grant the appropriate permission.
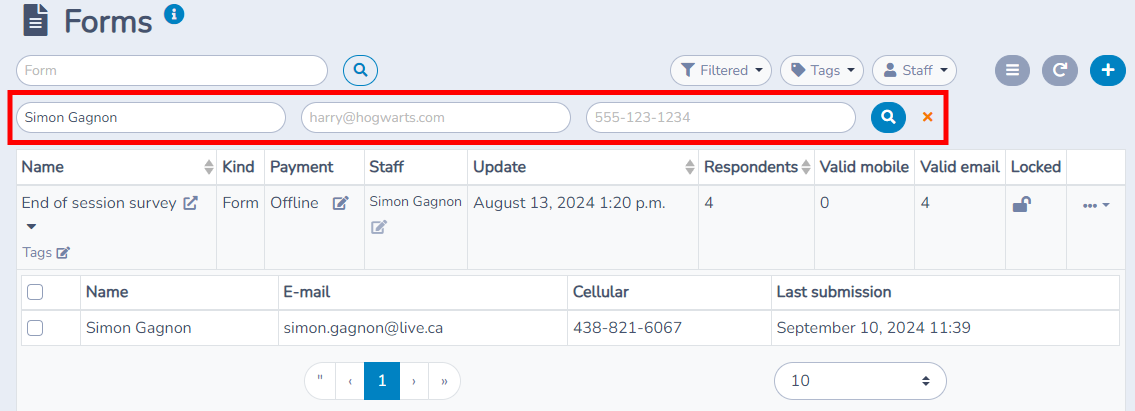
You can also search by a specific person. For example, if you want to see all forms submitted by a client, you can search for their name, phone number, or email address.
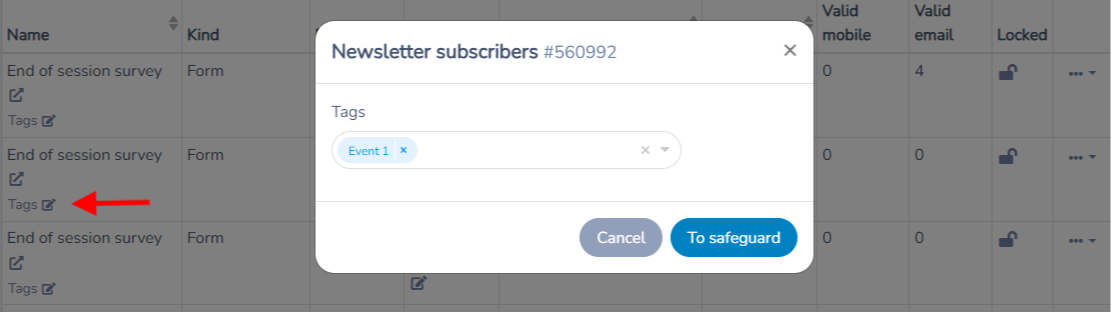
Tags
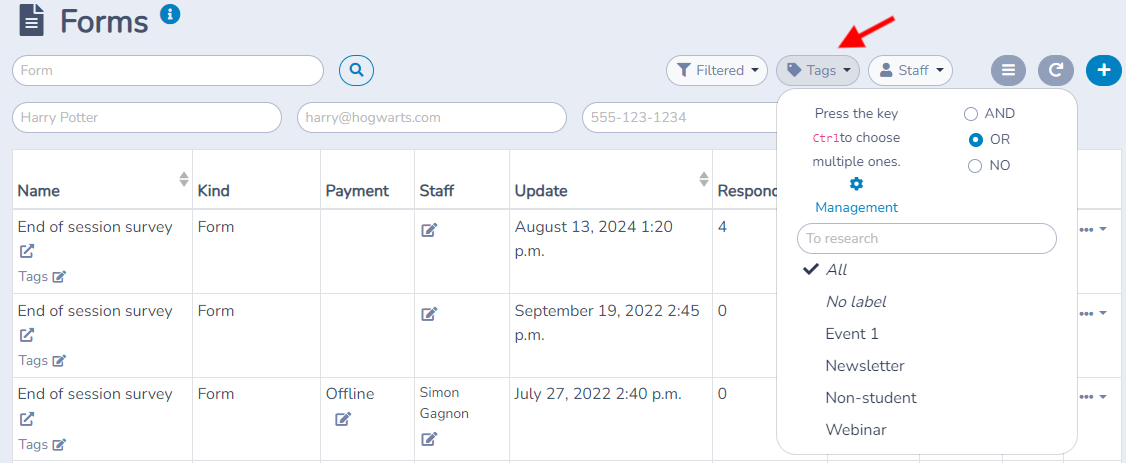
One of the important features is the addition of tags, especially when you have more than one over time. By pressing "Tags," you can assign new tags to forms. For example, you can assign a "Request for Information" tag to certain forms.
By accessing the list of tags, you can easily find the corresponding forms.
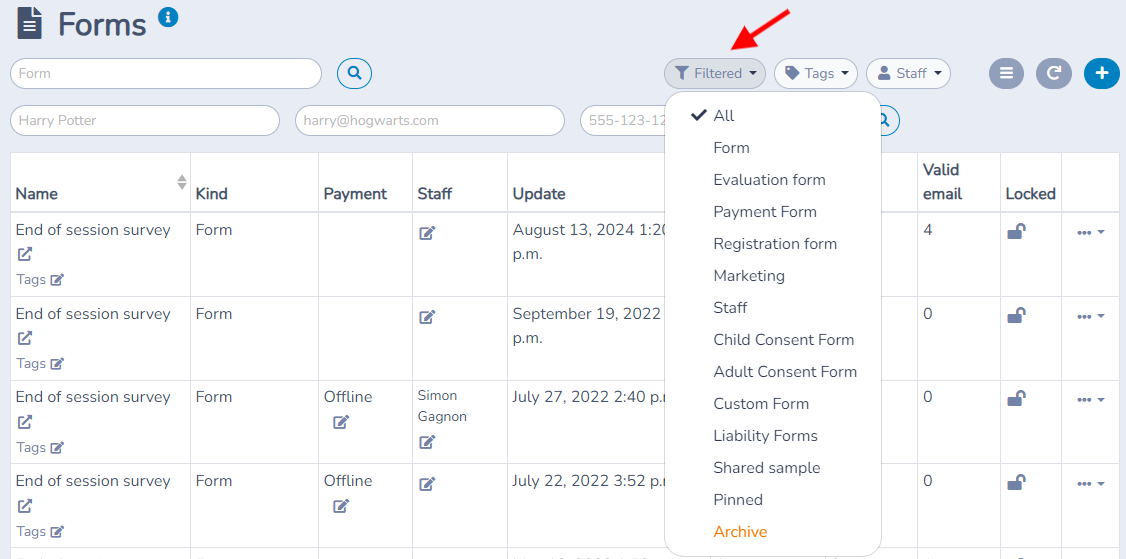
You can also filter forms by the type. For example, subscription, registration, or review forms.
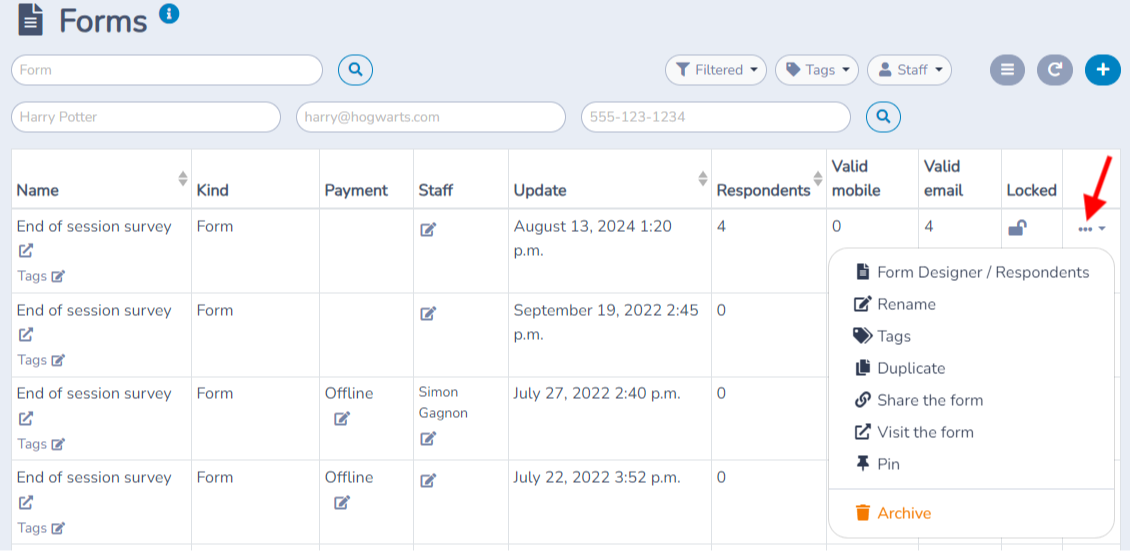
It is possible to duplicate, modify, share, archive or visit the form directly using the three points associated with each form.
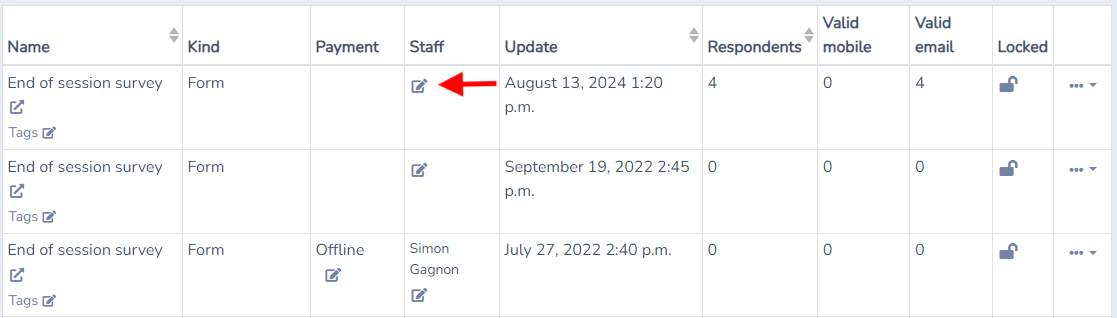
You can grant form access to individual staff members. Assign a staff member access to each form they need without granting access to other forms. For example, if someone needs every form except one, grant access only to the forms they should use and leave the excluded form unassigned. Before relying on this restriction, check the staff member’s role and form permissions: account owners have broader form access, and administrators may also have broader access depending on their permissions. See Invite users and manage their access for role and permission details.
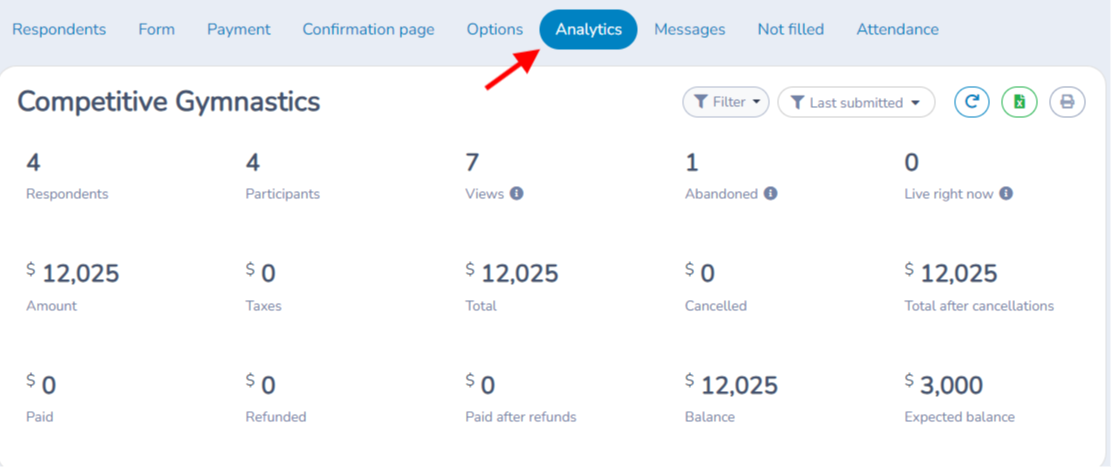
Analytics
To get an overview of the responses to your surveys, it is also possible to export them into an Excel file.
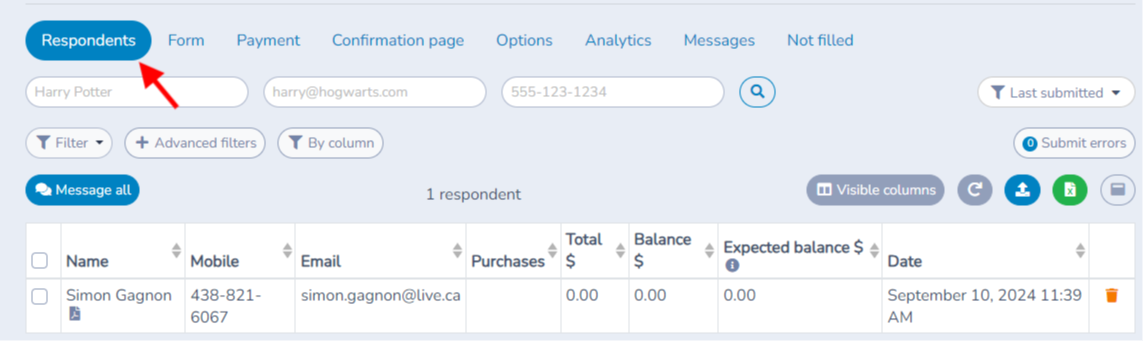
Respondents
You now have your first respondent in your form.
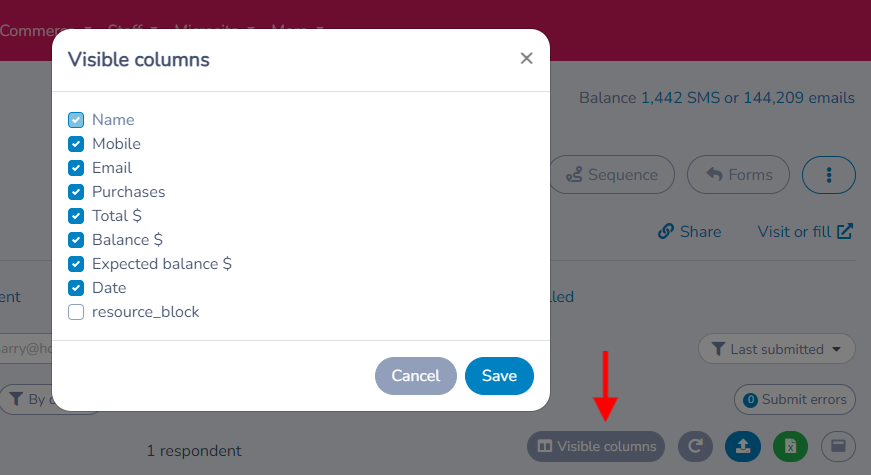
You have the option to choose the columns you want to display. All you have to do is check the ones you want to see appear. For a form with graded questions, see Quiz forms and passing scores for the score.
When downloading PDFs for selected respondents, select no more than 100 respondents for each ZIP download. You can download the complete PDFs or only answers to specific questions.
You can add approvals for administrators. By clicking on the respondent, you can check whether the request is approved or not.
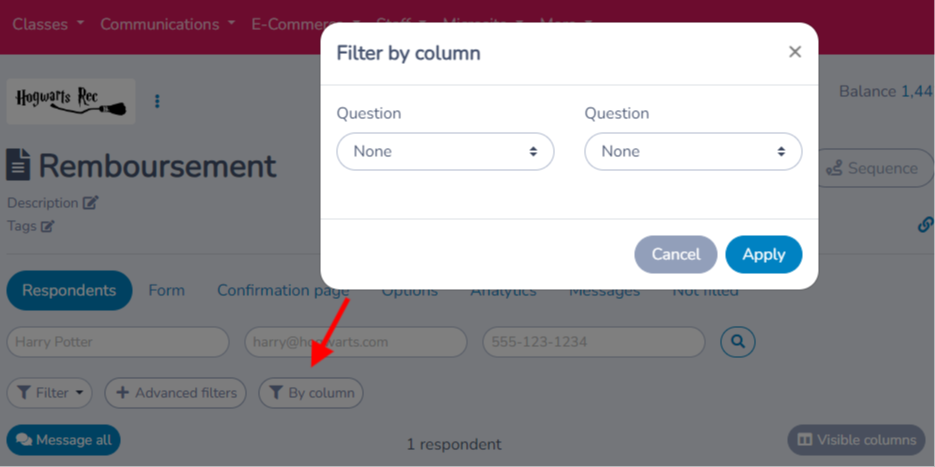
You can then filter by columns. For example, you can choose to only see customers who answered 'Small' to the sweater size question.
For a payment form that sells products, the Respondents tab can also show what each person bought. Open Visible columns and select a product under Products. Its column shows the purchased variant and quantity. To narrow the list, use Filter by column, choose Product — [product name], then select All variants or one variant. The quantity total above the table covers all matching respondents, not just the current page; it includes finalized unpaid orders and excludes cancelled purchases.
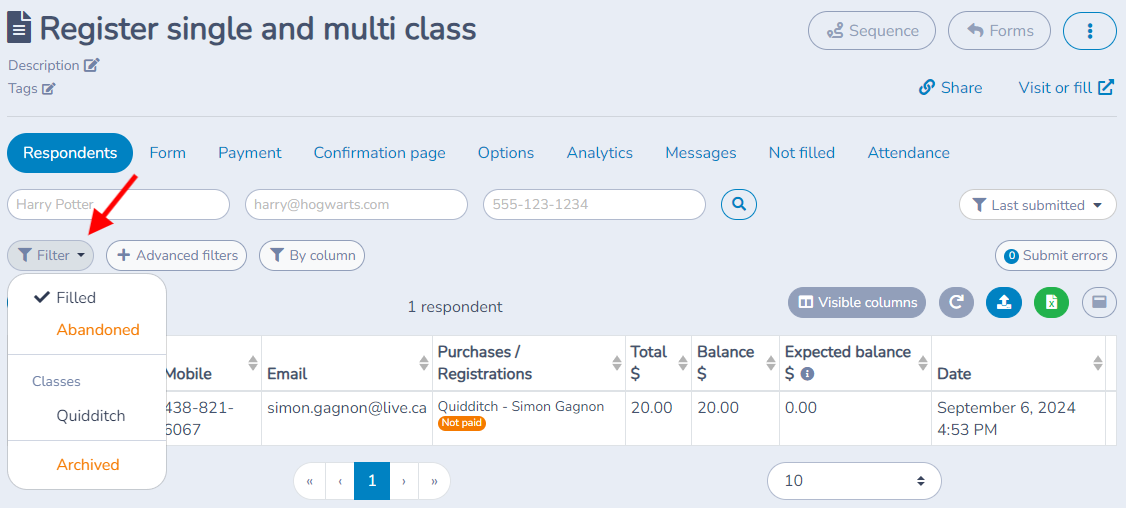
You can filter to see who started filling out the form but gave up.
You can see the respondents you have archived.
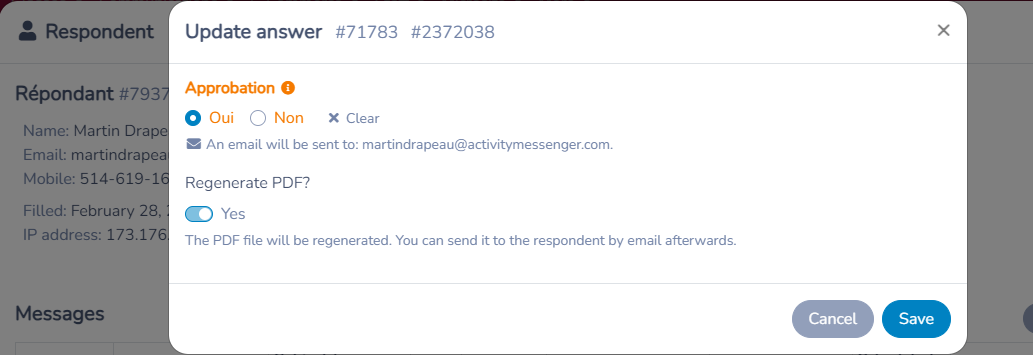
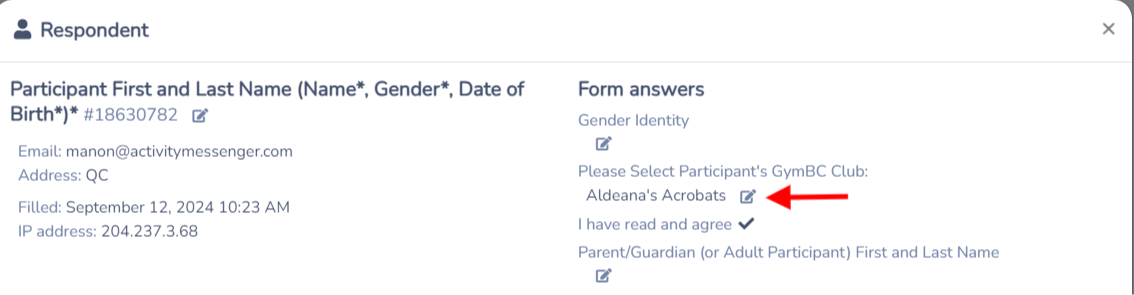
If a customer contacts you to report that they entered an incorrect response in the form, you can access their responses to edit them by clicking on their name.
Locate the answer you want to modify and click on the pencil icon.
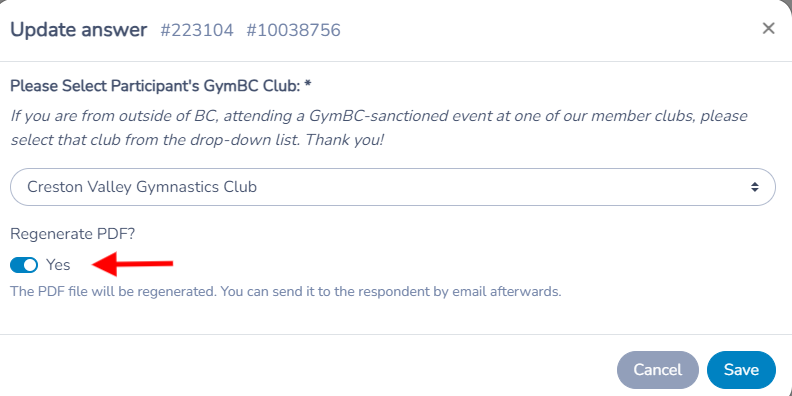
Then you have the option to choose whether you want to send them the PDF with the edited answers by email or not.
Completed forms
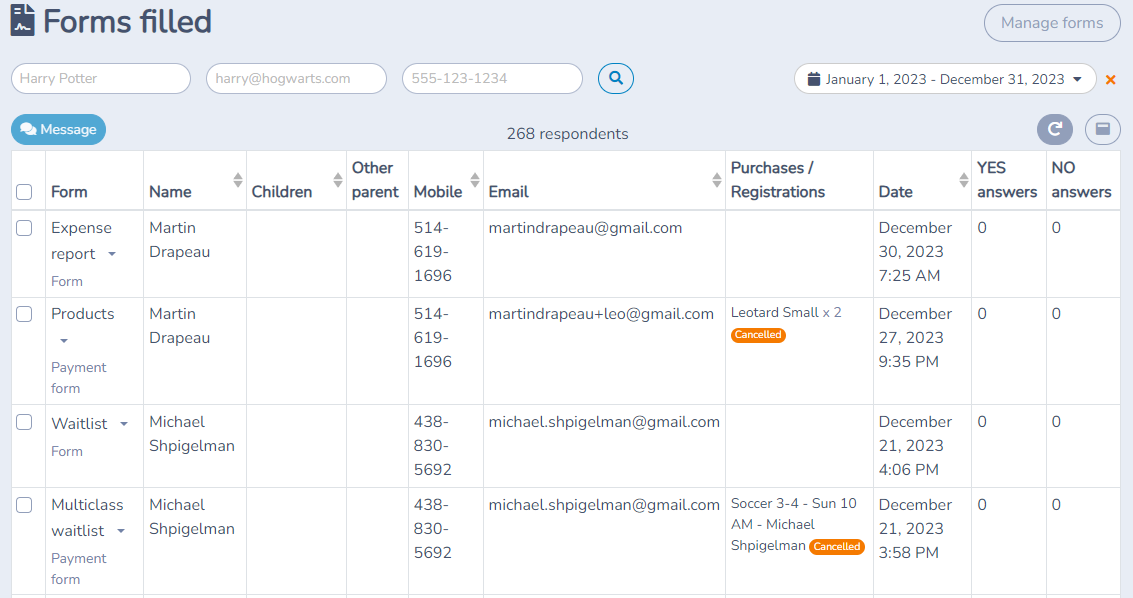
Click the Forms menu and choose Completed Forms.

You will be presented with a feed of all recently completed forms. You can search to find a respondent by name, email address or phone number. You can also search by the name of a child or parent.
The feed of completed forms can be filtered by dates. For example, find all forms filled out on a particular day.
This screen is adaptive and designed to work well on a smartphone. This allows your staff to quickly verify that all participants have completed a required form.
Link forms in a sequence
A sequence links two or more forms in a fixed order so that your staff can jump from one form to the next. It is a navigation shortcut for the people who manage the forms. It does not send any message, it does not schedule anything and it does not move respondents from one form to another, so it is not a drip campaign. Respondents see no difference on the public form.
A form can belong to only one sequence. If people must fill in another form after submitting this one, give them the instructions in the form's Confirmation tab and in its confirmation email.
To create a sequence:
- Open the form from Forms › Manage forms.
- Click Sequence at the top of the form page, then Create. The button is shown to users who can edit the form. It is not offered on checkout, contract, client account or waitlist forms.
- In the Sequence window, the current form is already listed. Click Choose a form, pick another form and click Add. Repeat for each form. The list only offers forms that are not already in another sequence.
- Drag the forms into the order you want.
- Click Create. The button stays unavailable until the sequence has at least two forms.
To move between the forms of a sequence, open any form in the sequence and click Sequence. The menu lists the forms in order with their number, and the form you are on is highlighted. Click a name to open that form. The button shows the number of forms in the sequence.
To change a sequence, click Sequence › Modify, then add forms, drag them to reorder them, or click the X at the end of a row to take a form out. Click Save. A sequence must keep at least two forms.
To remove a sequence entirely, click Sequence › Modify › Remove sequence and confirm. The forms are no longer linked together. The forms and their respondents are not changed.
Settings reference
| Setting | Where | Default | Effect |
|---|---|---|---|
| Form (search box) | Forms › Manage forms | Empty | Lists only the forms whose name contains the text you type. |
| Respondent search (name, email and mobile boxes) | Forms › Manage forms | Empty | Finds the forms a person submitted. Each matching form opens to show the matching respondents. |
| Filter | Forms › Manage forms | All | Shows one kind of form: Form, Evaluation form, Payment form, Registration form, Client waiver, Checkout form, Contract form, Waivers (forms created with the former waiver feature), Bookings waitlist, Pinned or Archived. Grant form is also listed when grants are enabled. Archived forms stay hidden until you choose Archived. |
| Tags (filter) | Forms › Manage forms | No tag selected, mode OR | Pick one or more tags, then choose AND (is tagged with all selected), OR (is tagged with any of the selected) or NOT (is not tagged with the selected). No tag lists forms that have no tag. |
| Staff (filter) | Forms › Manage forms | Everyone | Owners and administrators only. Lists the forms that the chosen user has access to. |
| Table columns | Forms › Manage forms | Always shown | Name, Type, Payment, Staff, Last updated, Respondents, Valid mobile and Valid email. Owners and administrators also see Locked. |
| Form designer / Respondents | Forms › Manage forms › three dots on a form | Not applicable | Opens the form to edit its questions or to review its respondents. |
| Rename | Forms › Manage forms › three dots on a form | Not applicable | Changes the form name. Not offered for forms created with the former waiver feature (Adult waiver, Youth waiver) or for archived forms. |
| Tags | Forms › Manage forms › three dots on a form | No tag | Assigns tags to the form. Not offered for archived forms. |
| Duplicate | Forms › Manage forms › three dots on a form | Name "Copy of" followed by the form name, in the current organization | Creates a new form with the same questions. Respondents are not copied. When the form contains classes or memberships, you must answer Duplicate classes? or Duplicate memberships? before you can save. |
| Duplicate Options tab settings? | Duplicate window | No | Yes also copies the Options tab settings and the access rules (who can fill the form, password, start and end dates, closed) from the original. This only applies when you duplicate into the same organization. |
| Share the form | Forms › Manage forms › three dots on a form | Not applicable | Opens the window with the shareable link, a tracked QR code and website embed code. See Track and manage QR codes. |
| Visit the form | Forms › Manage forms › three dots on a form | Not applicable | Opens the public form in a new tab. |
| Pin / Unpin | Forms › Manage forms › three dots on a form | Not pinned | Adds the form to your Pinned filter. Pinning applies to your own login. |
| Archive / Restore | Forms › Manage forms › three dots on a form | Not archived | Archive asks for confirmation and takes the form out of the list. To bring it back, choose Filter › Archived, then Restore. |
| Convert to client waiver | Forms › Manage forms › three dots on a form | Not applicable | Offered for forms of the type Form. It is disabled when the form is locked or contains questions a client waiver cannot hold. See Manage client waivers. |
| Locked | Forms › Manage forms › Locked column | Unlocked | Owners and administrators only. A locked form cannot be modified by any user, but clients can still fill it. Unlock it to edit again. |
| Staff column (pencil) | Forms › Manage forms › Staff column | Nobody listed | Choose the users who can view the form. Owners and administrators always have access. |
| Log | Forms › Manage forms › Log | Hidden | Owners and administrators only. Shows the changes made to forms and can be filtered by Form, Operation, Admin and date. See Review form audit logs. |
| Search and date range | Forms › Manage forms › form › Respondents tab | Empty | Searches respondents by name, email or mobile and limits them to a date range (Filter by date). |
| Filter (respondents) | Forms › Manage forms › form › Respondents tab | Filled | Switch between Filled, Abandoned, Duplicates, Suspected spam and Archived. Payment forms add Cancelled invoices and Exclude cancelled invoices. Forms with classes add Pending approval and one entry per class. |
| By column | Forms › Manage forms › form › Respondents tab | No column filter | Keeps only the respondents whose answer to a question matches the value you pick. |
| Visible columns | Forms › Manage forms › form › Respondents tab | Standard columns | Choose which columns the table shows. The button appears when the form has more columns than those displayed. |
| Download PDF / ZIP | Forms › Manage forms › form › Respondents tab | Not applicable | Appears once you select respondents. Select at most 100 respondents per download. Not available on the Starter plan. Choose Full PDF, Partial PDF with only specific questions, Compact PDF with only answered questions, Uploaded documents only (when the form has uploads) or Invoice (payment forms). |
| Download to Excel | Forms › Manage forms › form › Respondents tab | Not applicable | Opens a window to pick the columns to export. Only users allowed to access client contact information see the button. |
| Archived selected / Archive all | Forms › Manage forms › form › Respondents tab › trash menu | Not applicable | Archives respondents of a form. Not offered on payment forms. Restore all archived brings them back. |
| Update answer | Forms › Manage forms › form › Respondents tab › respondent › pencil | Regenerate PDF?: No; Send notification email: No | Changes one answer. Regenerate PDF? appears when the form creates a PDF. Send notification email lets you pick a template to notify the respondent. |
| Message all / Message (n) | Forms › Manage forms › form › Respondents tab | Not applicable | Starts a message to every respondent, to the filtered ones, or to the n respondents you selected. Requires messaging access. |
| Forms filled | Forms › Forms filled | Latest submissions first | Lists recent completed forms across all your forms. Search by name, email or mobile and limit with Last submitted. Select rows to Message them. |
| Sequence | Forms › Manage forms › form › Sequence › Create or Modify | No sequence | Links two or more forms so staff can open one from another. Needs at least two forms, and a form can be in only one sequence. Sends nothing to respondents. Drag to reorder and click the X to take a form out. |
| Remove sequence | Forms › Manage forms › form › Sequence › Modify | Not applicable | After you confirm, the forms are no longer linked together. The forms and their respondents are kept. |
Common questions
How do I find everything a client submitted? Go to Forms › Manage forms and type the person's name, email or mobile number in the respondent search boxes. Every form with a match opens to show the matching respondents. Forms › Forms filled lists the latest submissions across all forms and can be searched the same way. See Search and permissions and Completed forms.
Why does a staff member see only some of my forms? Users who do not have access to all forms only see the forms where they are listed. Open Forms › Manage forms, click the pencil in the Staff column and add the user. Owners and administrators always have access. See Search and permissions.
How many respondent PDFs can I download at once? At most 100. Select the respondents, then click Download ZIP and choose Full PDF, Partial PDF or Compact PDF. If you select more than 100 the download is blocked, so split the selection. The ZIP download is not available on the Starter plan. See Respondents.
How do I correct a wrong answer? Open the form's Respondents tab, click the respondent, find the answer and click the pencil to open Update answer. Turn on Regenerate PDF? if the form creates a PDF, and turn on Send notification email to notify the respondent with a template. Some answers, such as calculated values, unique IDs and quiz scores, cannot be edited. Changing an invoice item answer does not change the invoice. See Respondents.
Can I get a form back after archiving it? Yes. Archiving only hides the form. Choose Filter › Archived on Forms › Manage forms, open the three dots on the form and click Restore.
What does duplicating a form copy? It copies the questions into a new form named "Copy of" plus the original name. It does not copy respondents. Options tab settings and access rules are copied only if you answer Yes to Duplicate Options tab settings? and duplicate within the same organization. See Tags.
How do I see people who started a form but did not submit it? In the Respondents tab, open the filter and choose Abandoned. These are forms that were started but not submitted. To remind those people, see Abandoned forms.
Who can export the respondents to Excel? Users with access to client contact information. They see the green Excel button on the Respondents tab and choose the columns to export. Other users do not see the button. See Analytics and Exports to Excel and CSV.
Does a sequence send the next form to my respondents? No. A sequence only lets your staff move between linked forms. To tell respondents to fill in another form, write the instructions in the form's Confirmation tab and in its confirmation email. See Link forms in a sequence.