Set up payments and financial tracking
Before selling a class, booking, membership or product, decide how clients will pay and how your team will recognize the sale in its reports. Forms, the online store, bookings and staff-created invoices share the same invoicing workflows. Configuring the financial foundations first makes later sales easier to reconcile.
Before you begin
You need access to your organization's payment settings. Have your payment-provider account, required tax rates and accounting codes ready. If you only offer free registrations or record payments collected outside Activity Messenger, you can start without connecting Stripe.
This guide concerns money collected from your clients. Your organization's Activity Messenger subscription is managed separately under Billing.
1. Choose how you will sell
| Your goal | Start here |
|---|---|
| Collect registrations or a custom payment | Payment forms |
| Sell merchandise in a shopping cart | Online store |
| Reserve a resource for a time period | Booking packages |
| Sell a pass or membership | Memberships |
| Take staff-assisted payments at a counter | Point of sale |
Choose one workflow for your first offer. You do not need to configure every sales channel before launching it.
2. Connect payment services
Open your organization's Stripe settings to connect an account and follow the provider's onboarding instructions. Availability depends on your account and region; connecting an account is not a guarantee that all payment methods are immediately enabled.
Review test mode before experimenting with payment forms, and confirm that the account is in live mode before collecting real payments. A successful card payment and a payout into your bank account are separate events.
For Canadian Interac e-Transfers, configure the receiving address and settlement workflow using the Interac guide. Auto-deposit at the bank and invoice reconciliation in Activity Messenger are separate parts of that workflow. For Canadian PAD or US ACH debits, use the bank debit guide.
Then select the methods offered on each form, package or store. See Payment methods for deposits, instructions and invoice-balance options. Terminal readers are only needed for in-person card payments; they can wait until you prepare your front desk.
3. Configure taxes
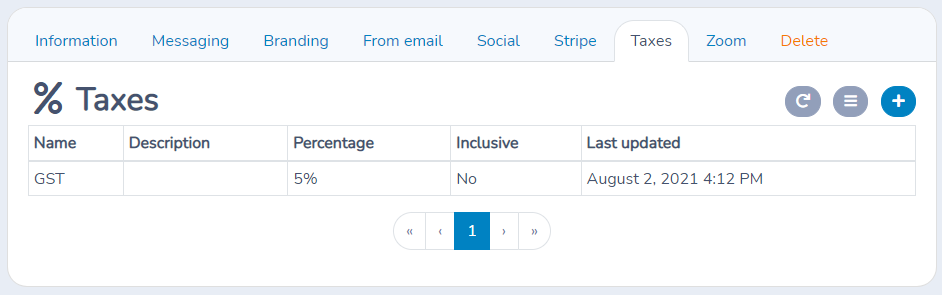
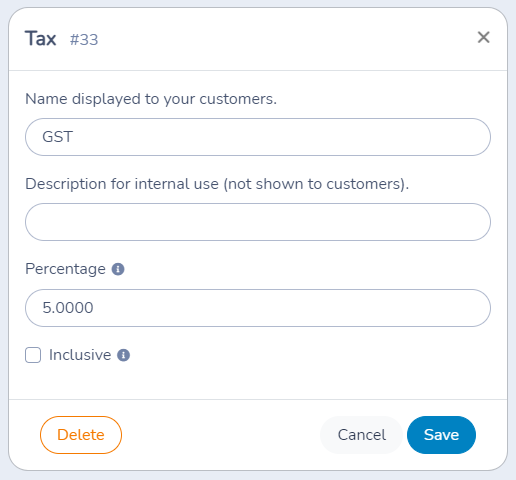
In Taxes, add a tax and enter its name, description and percentage. Choose whether the tax is inclusive or exclusive:
- Inclusive: the displayed price already contains the tax portion.
- Exclusive: the tax is added to the price.
Apply the appropriate configured taxes to the items you sell. Creating a tax does not replace checking each class, product, package or form item. Review a sample invoice to confirm the price and tax breakdown. Use the rates and treatment appropriate to your organization.
4. Assign ledger codes
Ledger codes identify what was sold, such as a program, department or activity. Create the codes before setting up your offers, then assign them to the relevant sellable items. This keeps sales and payment reporting useful from the first transaction.
Use Accounting and ledger codes for setup, bulk assignment and historical corrections. Optional ledger-code categories group existing codes for reporting; they do not replace them.
5. Review checkout and follow-up
Before sharing an offer, review its price, taxes, accepted methods, deposit or payment schedule, checkout form and confirmation message. Check what clients see when an invoice has an unpaid balance. Configure reminder, failed-payment and cancellation behavior deliberately rather than assuming that an unpaid invoice automatically cancels a registration.
For in-person sales, finish POS setup and, if needed, Stripe Terminal setup. Keep provider processing costs, Activity Messenger service fees and any client-facing convenience fee distinct; consult your configured rates instead of assuming a universal percentage.
Next steps
After your first sale, open the client invoice, confirm its payment state and use Financial reports to choose the right view. Sales, collected payments and bank payouts answer different questions.