Activity Messenger Help Center
Understand classes, events and attendance
A class or event defines an activity: its name, schedule, location and capacity. A registration form defines how clients sign up. An attendance list helps your team manage the registered participants on each date. Start by separating these three jobs before choosing your settings.
Choose how people register
| Activity | Typical registration approach |
|---|---|
| One event | Register for a single scheduled date |
| A session or season | Register for all dates in the session |
| Drop-in classes | Choose one or several individual dates |
| Recurring classes | Choose one or several weekdays in a recurring schedule |
Create the schedule on the class, then select the registration rule on the form’s Class or Multiple Classes block. The same class can be offered through more than one form, for example a session form and a drop-in form. Each form can have its own allowed selections and price overrides; check both the class settings and the form settings when diagnosing availability.
Create and organize activities
Open Classes > All classes and events to find or create an activity. Use tags and ordering to organize a larger catalogue. You can also create an activity while configuring a form, or import activities with attendance lists from a supported source.
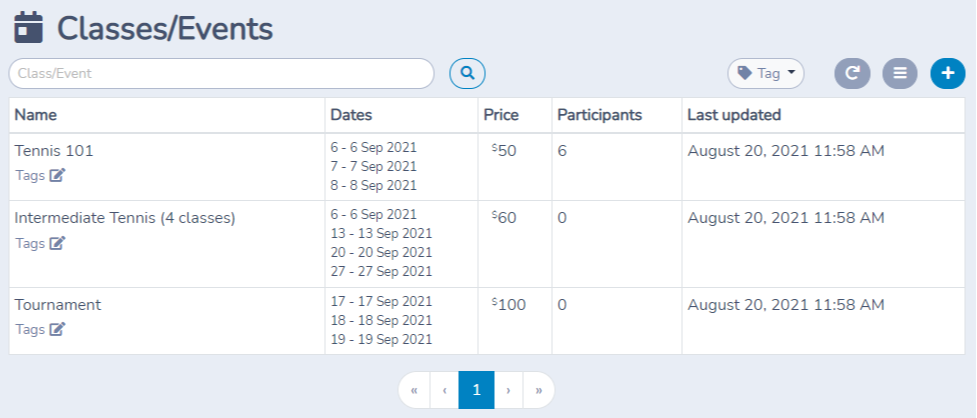
Changing an existing class can affect the forms that use it. Review those forms after changing the schedule, capacity or price. Follow Create a class or event for setup and Sell classes and events for registration rules, payment and launch checks.
Choose the client experience
Use a regular form when no payment is needed, or a payment form for invoicing and checkout. To let clients choose one or more activities, add the Multiple Classes block to the form. Select the classes to offer in the block and configure its registration rules, including whether at least one class is required; the available schedule and selections also depend on each class and the form’s rules. Do not confuse this selection block with the Multiple classes or events question: that question collects participant information once when someone is registering a participant other than the account owner. It does not provide the class-selection control.
For a child or other participant who differs from the account owner, add the participant question separately as needed. Configure confirmations and access rules to match the workflow; whether a client must sign in depends on the form’s restrictions.
For admission by ticket, follow Sell tickets online. For online sessions, use Zoom classes to connect Zoom, enable meetings for the classes and set up messages that include the meeting details. Registration on the form, Zoom meeting creation and reminder delivery are separate configuration steps; do not assume that setting up one automatically completes the others.
Prepare the team for each date
Each attendance list has a sheet for its scheduled occurrences. Assign the appropriate staff, review the participant information they need, and choose the correct date before recording arrivals or departures. Use the attendance list’s message action to reach participants or connected contacts.
Next, follow Attendance tracking. For repeated communications, configure the appropriate class reminder or activity-start/end automation rather than manually recreating the same message for every date.