Activity Messenger Help Center
Invoices and client billing
There are several ways to bill customers, but generally, invoices are generated when someone registers through a registration form.
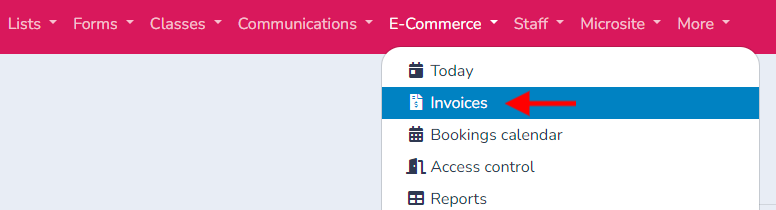
Go to the E-commerce tab and select Invoices. Here, you will see all the invoices on the platform.
You can also view invoices from a payment form through the Responses tab of the form. The invoices displayed will be limited to purchases made with that specific form.
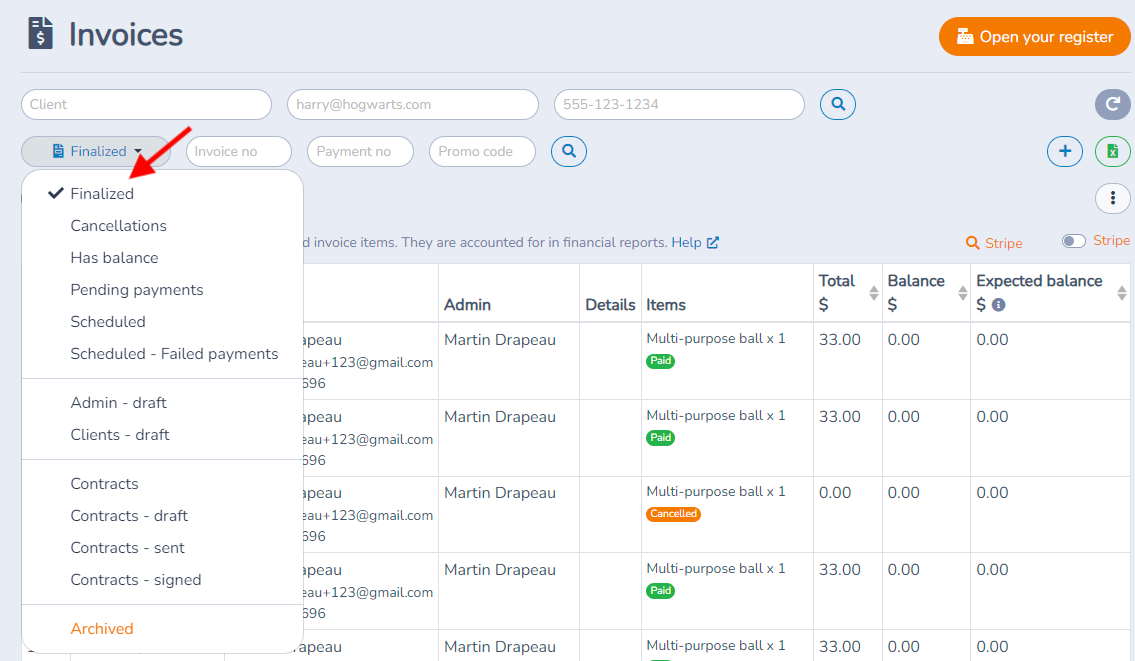
Filter the invoices
- Finalized: Indicates completed invoices.
- Cancellation: Lists invoices that have been created and then canceled.
- Balances Due: Shows which invoices are unpaid.
- Pending Payments: Reflects transactions awaiting payment confirmation, typically Interac transfers.
- Scheduled: For multiple payment plans where payments are spaced over time.
- Scheduled - Failed Payments: Tracks failed payments and allows follow-up with customers.
- Clients - Drafts: Invoices that are not yet finalized, often from abandoned payment forms.
- Administrators - Drafts: Invoices that are partially completed by an administrator and awaiting customer payment.
- Contracts: Manage contracts, including drafts and sent contracts.
- Archived: Invoices that have been archived by an administrator.
Invoice
Click on a row to open the Client billing dialog. You are present with the client, form answers, purchased items, the invoice, payment(s) and messages relating to this purchase.
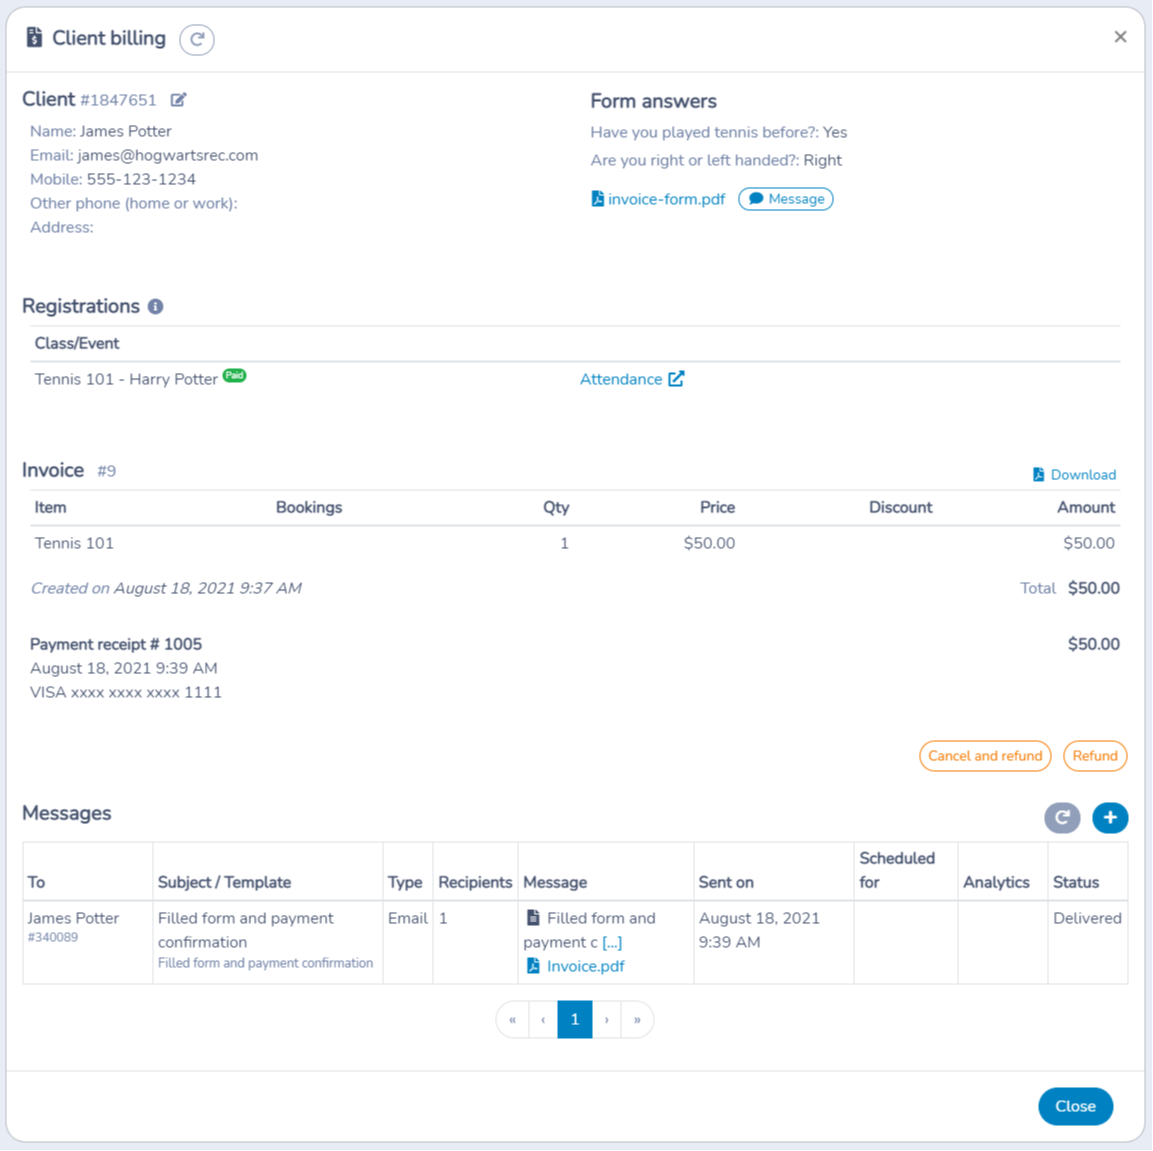
The customer billing window allows for the following actions:
- Edit the customer's name, email address, or mobile phone number.
- View and modify responses to form questions.
- Download the invoice in PDF format.
- Cancel purchases and specify the credit to apply.
- Credit items without cancelling their purchase.
- Refund a payment separately from its payment receipt.
- Enter a payment if there is a balance on the account.
- Resend the invoice to the customer via email.
- Send an email or text message to the customer.
- Add invoice items (custom items or course registrations).
Manage a client's credit card on file
An administrator can remove a client's saved Stripe card from the client account by opening any invoice that belongs to the client. This prevents Activity Messenger from using that card for future payments.
Before you begin
You need:
- Access to E-Commerce → Invoices.
- Permission to view client invoice details.
- A client with a Stripe credit card on file.
This guide is about a client's payment method. It does not change the credit card used to pay your organization's Activity Messenger subscription.
Remove the card
- Go to E-Commerce → Invoices.
- Open any invoice that belongs to the client.
- In the client section, find the saved card and click the edit icon beside it.
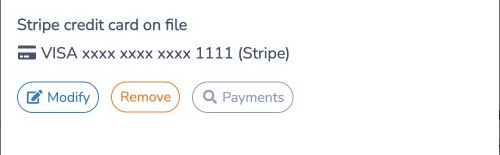
- In Payment methods on file, find Stripe credit card on file.
- Click Remove.
- Review the scheduled-payment warning, then click Remove to confirm.
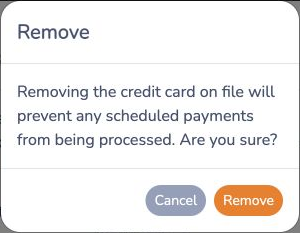
The card is removed from the client's account across your organization. The change is not limited to the invoice you opened.
Before removing a card with scheduled payments
Removing the card prevents scheduled payments from being processed with that card. It does not cancel scheduled-payment definitions, registrations, memberships, or other obligations.
Before confirming:
- Review the client's upcoming scheduled payments.
- Ask the client to replace the card when future payments should continue.
- Make any separate cancellation or payment-plan changes required by your agreement with the client.
What removal does not delete
Removing a card on file does not delete or change:
- Existing invoices.
- Completed payment and receipt records.
- Previous refunds.
- Registrations or memberships.
- Scheduled-payment definitions.
The Payments action beside the card remains useful before removal when you need to review payments associated with its brand and last four digits.
Can the client remove the card?
Clients can go to Invoices → Credit card on file in their client account to add or replace their card. They cannot remove it themselves. An administrator must use the invoice workflow described above.
Example
A family asks you to stop using its saved card after the current season. Open any invoice for that client, edit Payment methods on file, and remove the Stripe card. Existing invoices and receipts remain available, but future scheduled payments cannot use the removed card.
Related guide
Create a new invoice
Generally, invoices are created when a payment form has been filled out. It will remain in draft mode until the customer (or administrator) makes a payment, after which it will be finalized.
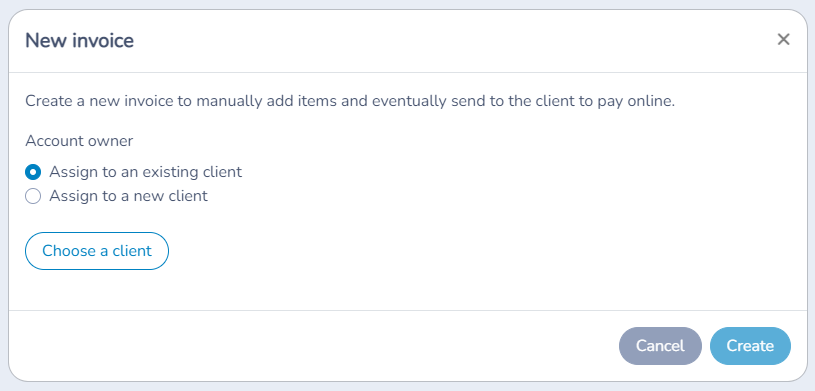
As an administrator, you can also create an invoice from scratch by clicking the (+) button. Choose an existing customer or add a new one. The newly finalized invoice will be added, and you can then add invoice items. Once it’s complete, you can send it to the customer for online payment.
Adding new invoice items
Invoices can be added to even if they were paid. This will increase the total amount due and create a balance outstanding. The client can pay the balance online or you can take a payment offline.
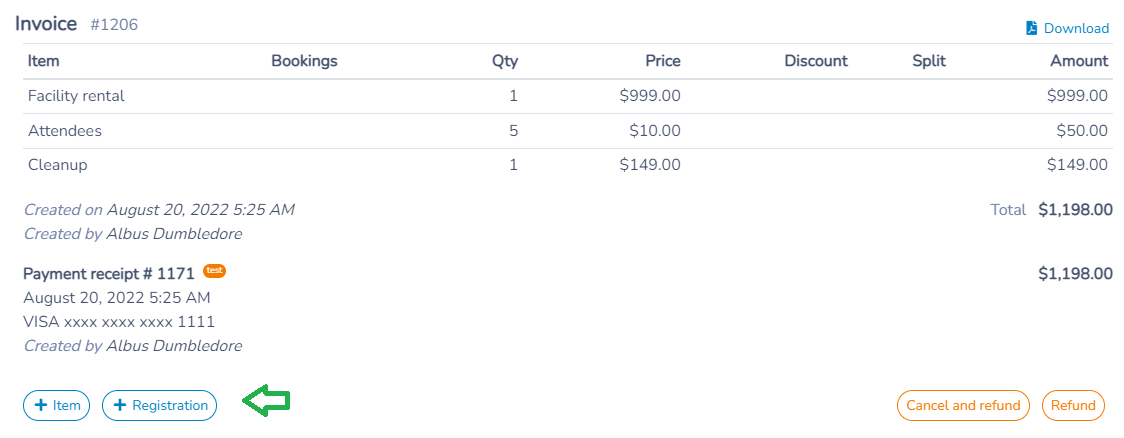
You can add a custom invoice item by entering the amount, quantity, sales taxes, and accounting code. This allows you to add fees or extras to an invoice. Unpaid custom invoice items can be modified or deleted.
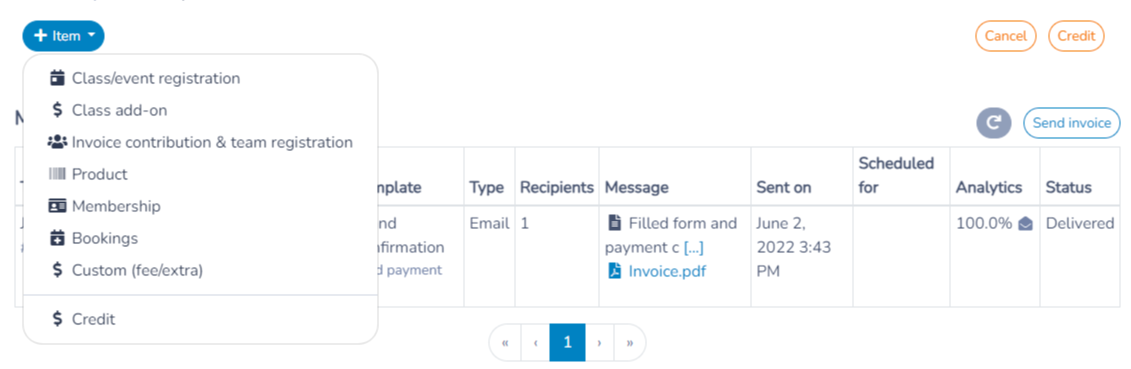
To add an item, scroll to the bottom of the invoice and click on + Item, then select the type of item you want.
Types of Items
Course or Event Registration: Register the participant for an additional event.
Add Courses: Useful for adding services, such as childcare, if the client initially forgot to include it.
Invoice Contribution & Team Registration: Allow someone to reduce the balance of an invoice or register a player on a team, enabling them to pay part of the invoice.
Item: Add items like sports equipment.
Subscription: Add or modify subscriptions.
Reservations: Add reservations for sports facilities.
Custom (Fees/Extras): Add specific fees as needed, such as a late fee.
Credit: Add a credit to the invoice.
You can register someone to a class directly from the invoice. No need to pass through a payment form. Useful to manage private lessons and drop-ins.
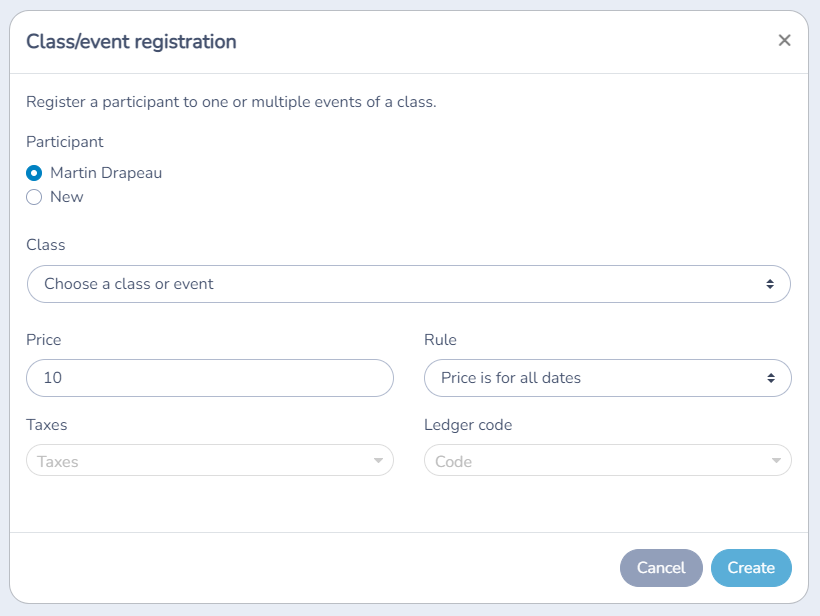
See Create bulk invoices to bill several clients from one draft, register each included participant in a class or event, schedule installments, and exclude individual people.
Admin payment (offline)
The administrator can always take a payment offline. For example by cheque, by cash or a balance transfer from another platform. The administrator can also take a credit card payment by phone.
Click on the "Make a payment" button, and choose a payment method. You can also add a comment and send the receipt to the client by email.

Client payment (online)
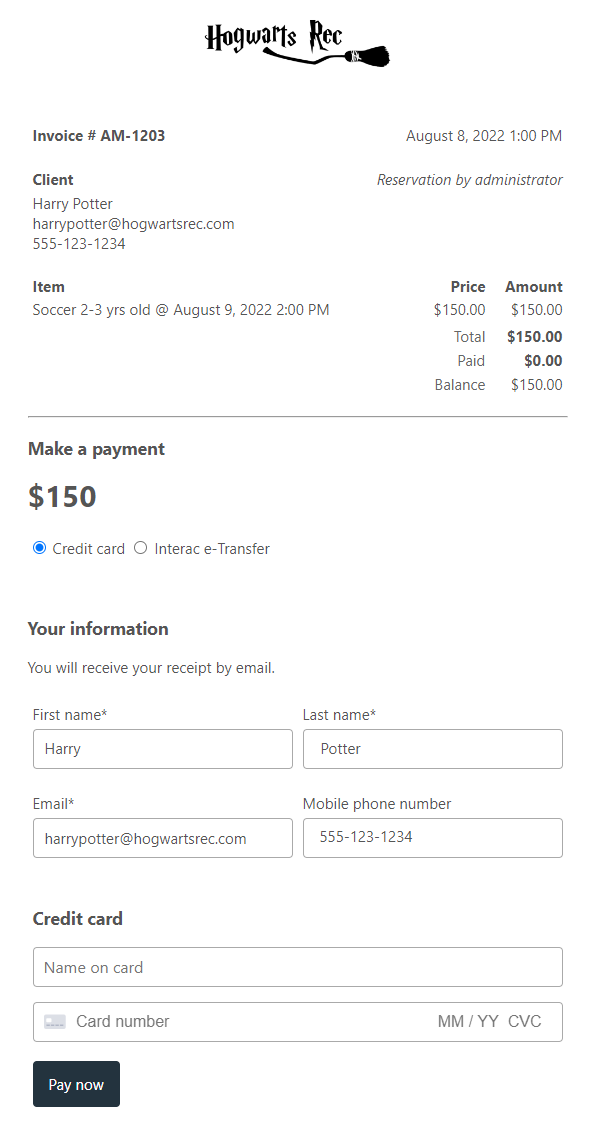
Any invoice with an outstanding balance can be sent to the client by email or by SMS for them to pay online with a credit card. In Canada, you can also allow the client to pay via an Interac e-Transfer payment.
Click on "Send a link to pay online" to open a New message window. The invoice PDF will be added as an attachment to the email. The client will receive a link that leads to a page to pay online.

The new message sending window will open. The invoice in PDF format will be attached to the email. The customer will also receive a link to pay the balance of their invoice online.
Request one payment for several invoices
Use an account statement when a client has several outstanding invoices and should pay the amount due with one card payment. Open the client account, select Billing → Invoices → Actions → Issue account statement, issue the statement, then send its link and optional email PDF.
After payment, each invoice has its own allocated payment receipt and a Paid from account statement ST-… link. The statement does not create another invoice. See the account-statement guide for payment breakdowns, historical PDFs, fees, refunds and reconciliation.
Cancellation, credit, and refund: choose the right operation
Cancelling an item, applying a credit, and returning money are related but distinct parts of invoice adjustments. The Cancel dialog can cancel selected purchases, apply the refund/credit amount, and—when a refund is due—include a cancellation fee. A standalone Credit keeps the purchase active. Create a refund, beside a payment receipt, is a separate workflow for cases where you need to refund a payment without using the cancellation dialog.
Before you begin
Go to E-Commerce → Invoices and open the client's invoice. Check the items, balance, payment receipts, and any previous credits or refunds. Your user permissions must allow the operation you want to perform; access to invoices alone does not grant permission to cancel, credit, or refund.
Cancel a purchase and retain a cancellation fee
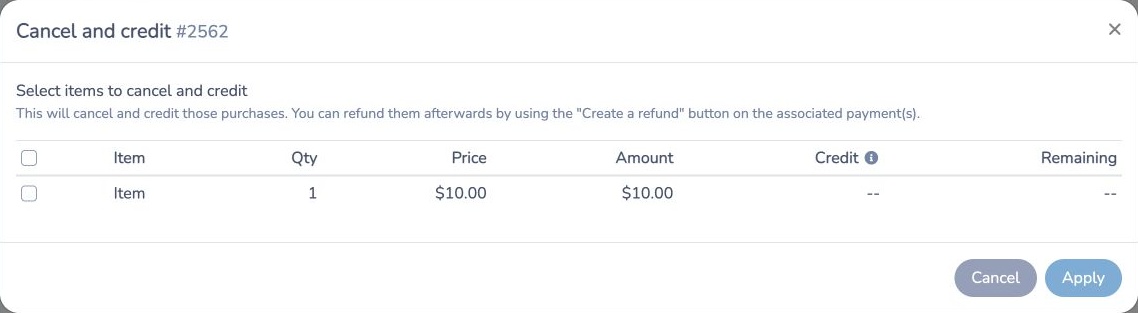
- Click Cancel below the invoice. The Cancel and credit window opens.
- Select the items to cancel. When the window offers quantities or individual events, select only the quantities or events concerned.
- Review the Credit or refund amount for each selected item. Check the resulting amount and taxes before applying.
- When a refund is due and you need to retain an administrative/cancellation fee, use the Cancellation fee? selector in this dialog. Choose the fee payment type, enter the fee amount, and review any taxes and the displayed total. The fee is added as a cancellation-fee invoice item and deducted from the refund amount. The available payment types depend on your organization's configuration.
- If a recurring-cancellation option appears, review whether future occurrences should also be cancelled.
- Add an administrator note if needed and choose whether to send the receipt by email.
- Check the dialog's refund summary, then click Apply. Review the resulting invoice balance and refund receipt.
The cancellation fee is not a setting to enter as a reduced item credit as well. For a fully paid $100 purchase with no taxes and a $15 fee, select the full $100 cancellation refund and set the fee to $15. The fee is charged on the invoice and deducted from the refund, so $85 is returned and $15 is retained. Confirm the invoice balance and displayed refund amount before applying. If taxes apply to the fee, the fee total—including its taxes—affects the net refund; review the amount displayed in the dialog.
For cases without a cancellation-fee selection or where you are issuing a refund separately, credit/cancel the applicable invoice items as needed, then use Create a refund beside the appropriate payment receipt. Do not use both approaches to deduct the same fee.
Refund a payment separately
- In the invoice, locate the original Payment receipt. Click Create a refund beside that receipt.
- Select the payment items and enter the amount to refund for each. Use the remaining refundable amount shown; account for previous refunds.
- Review the refund method. For a Stripe card refund, use the original card payment. This refunds that transaction, not an arbitrary card currently saved on the client's account.
- If you choose an offline method such as cash, cheque, or Interac e-Transfer, arrange the actual repayment separately. Recording that refund does not send cash, issue a cheque, or initiate an Interac e-Transfer. Other choices depend on your organization's configuration and the original payment.
- Add notes if needed, choose whether to email the receipt, then confirm the refund.
- Check the refund receipt and the invoice's updated balance. If the purchase was paid through several receipts, handle the relevant receipts separately.
A standalone payment refund does not by itself cancel a registration or credit the invoice items. If you refund a payment without cancelling or crediting the charge, the invoice can become payable again. Use the cancellation dialog when the purchase is ending, or Credit when reducing its price while keeping it active.
Credit an item while keeping the purchase active
To credit an invoice, your user needs the Can credit invoices permission. Account Owners always have it; Admins and Attendants have it only if an Account Owner has allowed it. Access to invoices alone is not enough, so if Credit does not work for you, ask an Account Owner to enable this permission for your user.
- Click Credit below the invoice.
- Select the items and enter the credit as a negative amount before taxes. Check the remaining amount, taxes, and balance shown.
- Choose whether to email the receipt, then click Apply.
The credit reduces the amount charged without cancelling the purchase or registration. It can reduce an unpaid balance or create a credit balance on a paid invoice. If you also need to return money, use Create a refund on the payment receipt as a separate step.
Examples
For simplicity, these examples have no sales taxes or other invoice items.
- Cancel a fully paid $100 registration: cancel it and refund $100. The registration ends and the final balance is zero.
- Cancel but retain $20 using the cancellation-fee field: select the full $100 cancellation refund and enter a $20 fee. The dialog charges the fee and deducts it from the refund; $80 is returned and $20 is retained. Check that the resulting invoice balance is zero.
- Cancel but retain $20 using a separate adjustment: when not using the cancellation-fee field, cancel/credit the $100 registration by $80, then refund $80. The $20 retained remains charged.
- Give a $20 discount without cancelling: credit the paid $100 item by $20, then refund $20 if the client should receive the money back. The registration stays active.
- Cancel an unpaid $100 registration: cancel it with a $100 credit. There is no money to refund.
After an adjustment, review any remaining scheduled or pending payments and the expected balance. Cancellation can change these payments depending on the invoice; a refund is not a substitute for reviewing a payment plan.
Related help
Archiving invoices
Activity Messenger does not allow you to archive invoices. The exception is for invoices that have no impact on your finances. Specifically, you can archive cancelled invoices and those without outstanding or paid invoice items. You can always archive draft invoices too.
To archive an invoice, open it and click on the Archive button located at the bottom left of the popup. Once archived it will be removed from the list of invoices.
If you need to, you can click on the filter and show archived invoices.
Invoice summaries for one client
To provide a combined record of selected invoices and their taxes, including invoices already paid, create an Invoice summary. Filter the Invoices page, select invoices billed to one client, then choose Actions → Create invoice summary. Review the selection and tax totals, choose the language, and create the document.
You can also use Billing → Invoices from the client account. The Documents tab keeps invoice summaries and account statements together, with PDF, Send and Logs actions. A summary is a saved record; it does not request payment or create another charge.